Case door with optical drive passthrough? Sign me up!
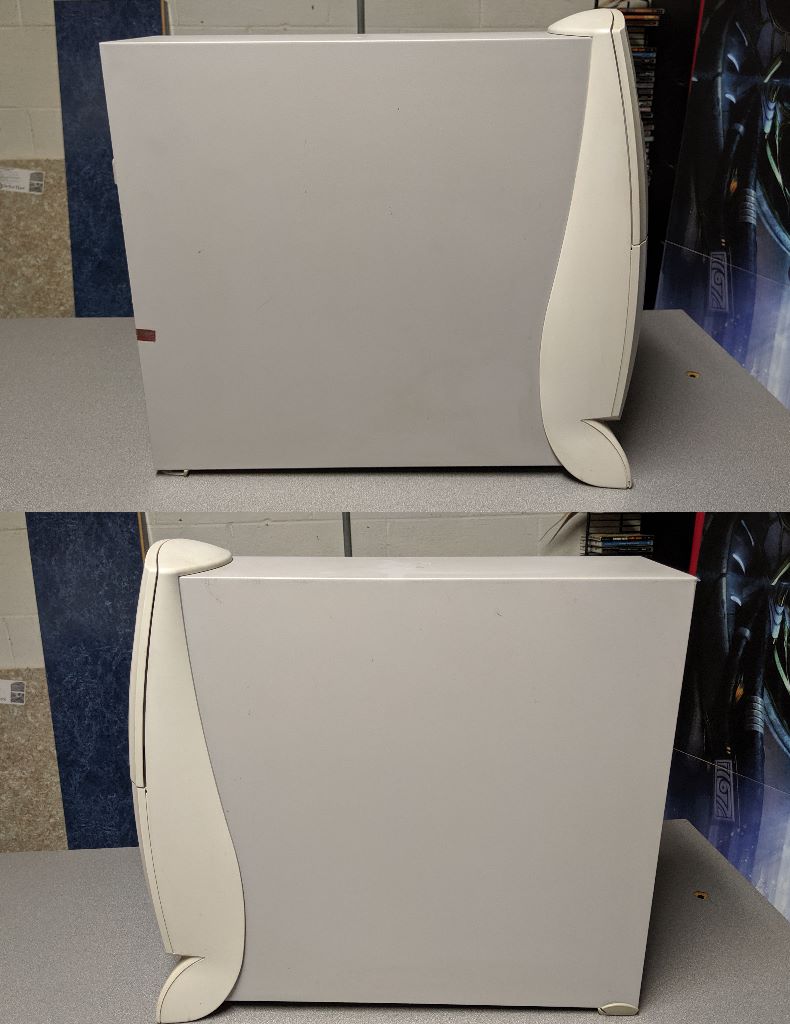
Big, beautiful beige tower
A simple heatsink on this 1st generation Intel Celeron with one rear 92mm case fan driving case cooling.
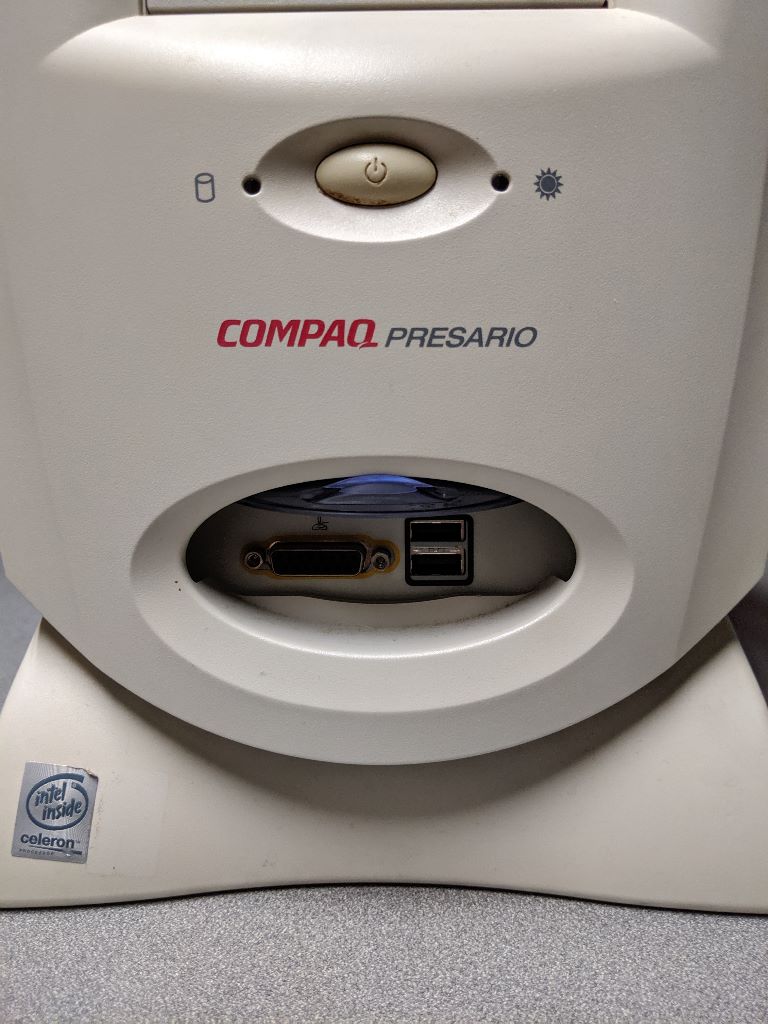
My first personal computer was a Compaq Presario 7470. Windows 98 SE, 533 MHz AMD K6-II CPU, 64 MB RAM, 20 GB HDD, and integrated graphics. I made the purchase from Circuit City in January of 2000, saving up money from my high school job in Chicago at a local pharmacy. I knew so little about computers that when I upgraded it to 512 MB RAM, I paid Best Buy to install it. Wow. By the end of its life, it saw an Iomega CD-RW 8x4x24x IDE drive, Iomega Zip 100 EDI drive, and an ATI All-In-Wonder 16 MB graphics/tv tuner card.
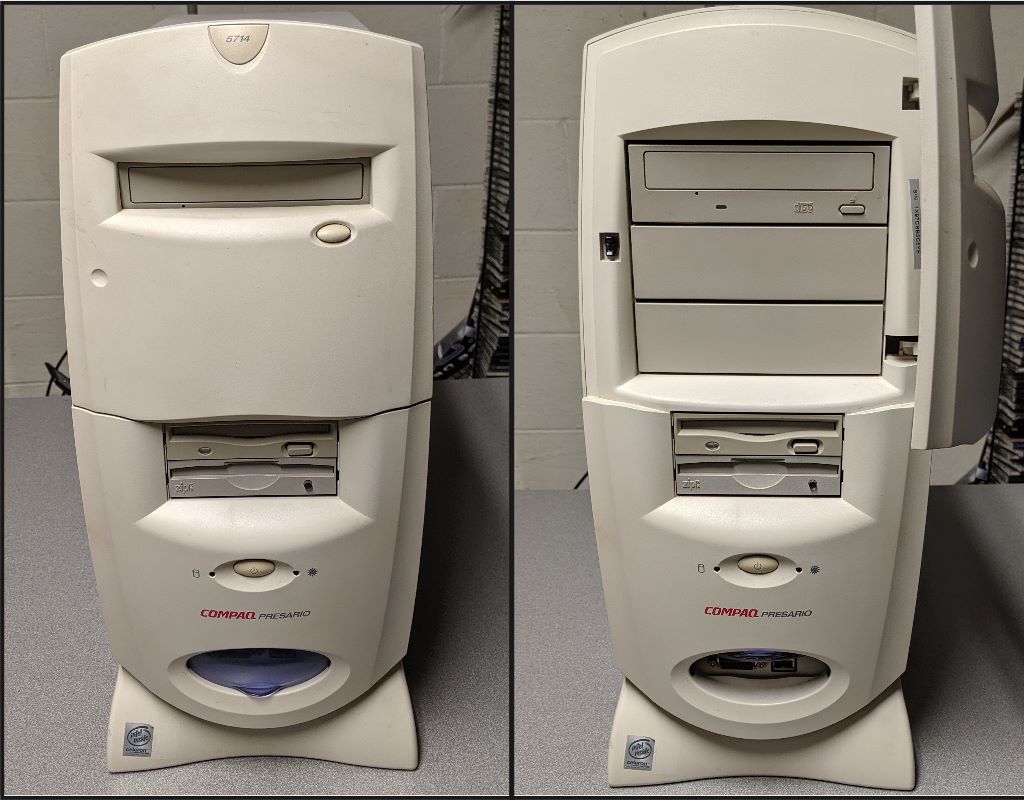
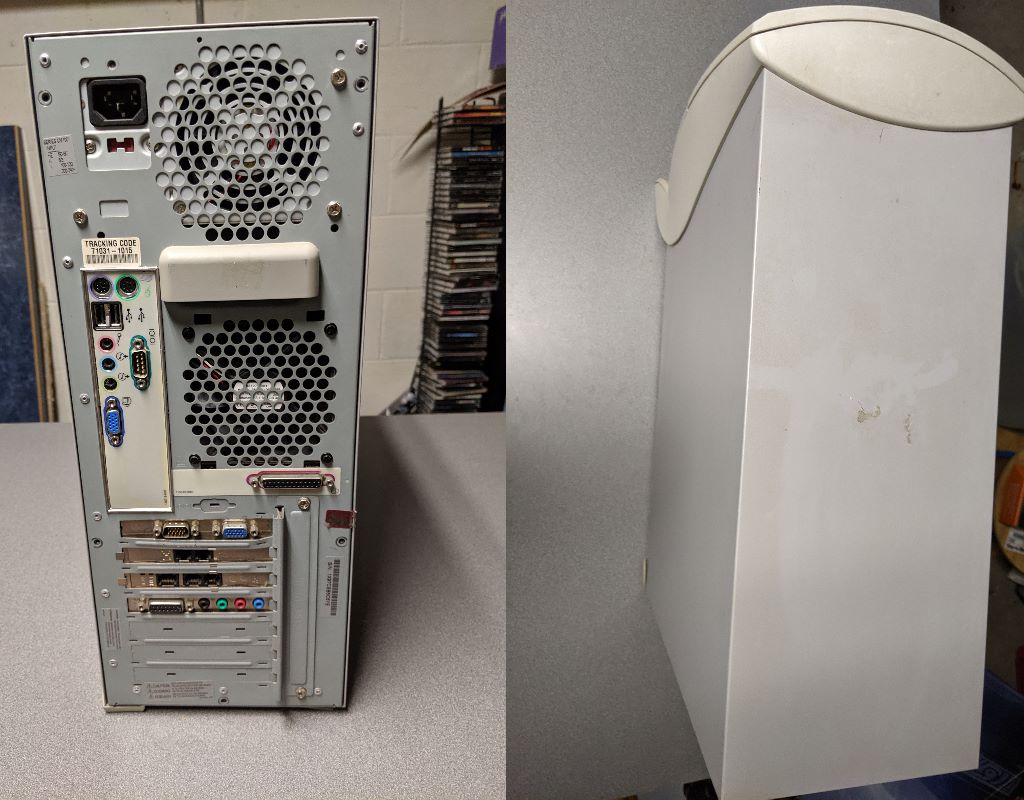
I've built over a dozen computers since that Compaq graced my home network. My last machine was an exercise in building a silent gaming tower. For my next one it was going to be finding an old Compaq case from the late 90s era to stuff modern components into. My main requirement was that the I/O shield could be knocked out in favor of whatever new motherboard I bought had. I was fine drilling new motherboard standoffs and making minor modifications for the PSU but I didn't want to have to grind a bunch of the rear case off to accomodate an I/O shield. I was fortunate to source a Compaq Presario 5714. This case was almost identical to my 7470. The 5714 sports 3 5.25" drive bays whereas my 7470 had 2 5.25" drive bays. The PSU also mounted conventionally in the 5714.
Case door with optical drive passthrough? Sign me up! |
|
Big, beautiful beige tower |
|
|
A simple heatsink on this 1st generation Intel Celeron with one rear 92mm case fan driving case cooling. |
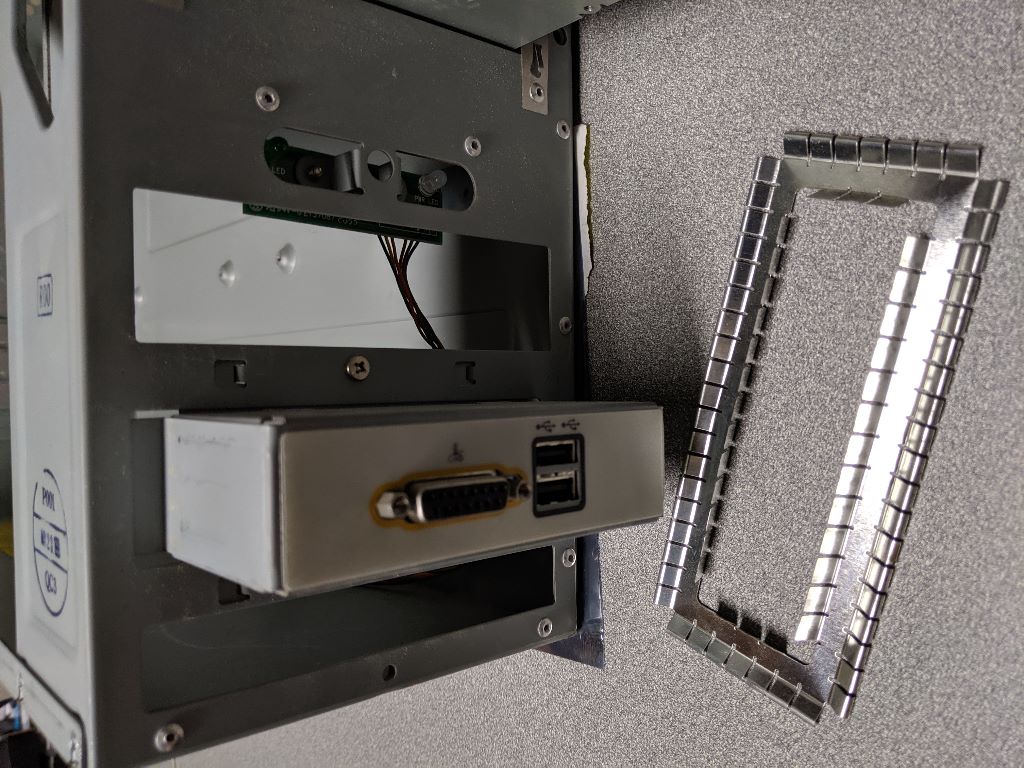
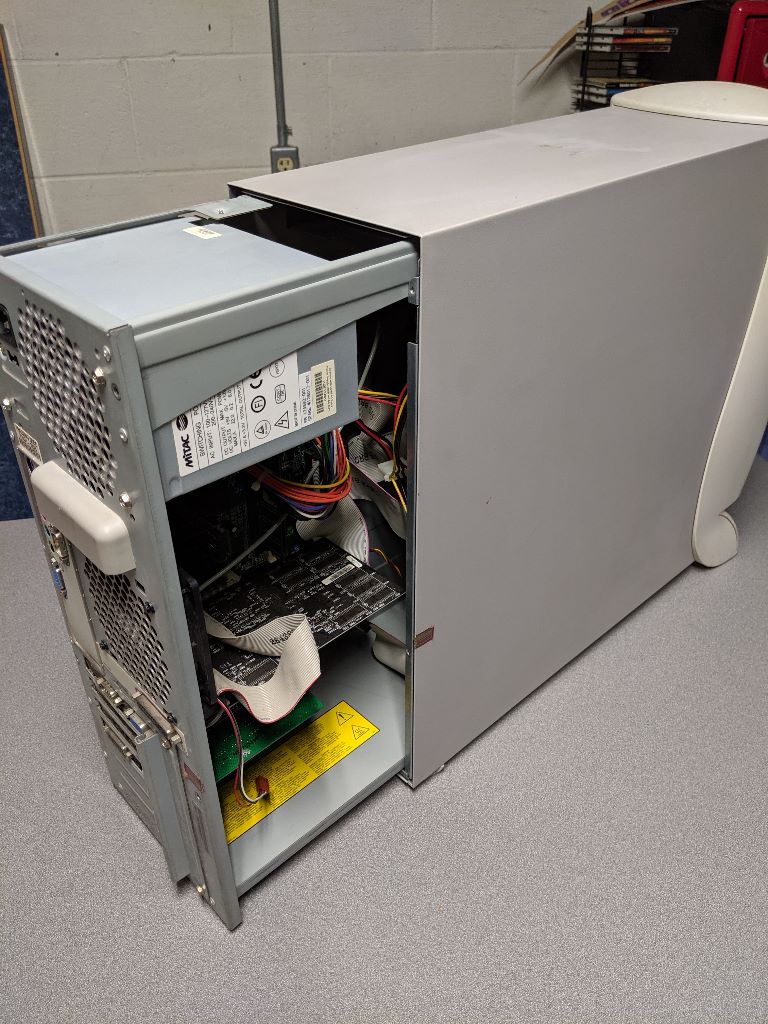
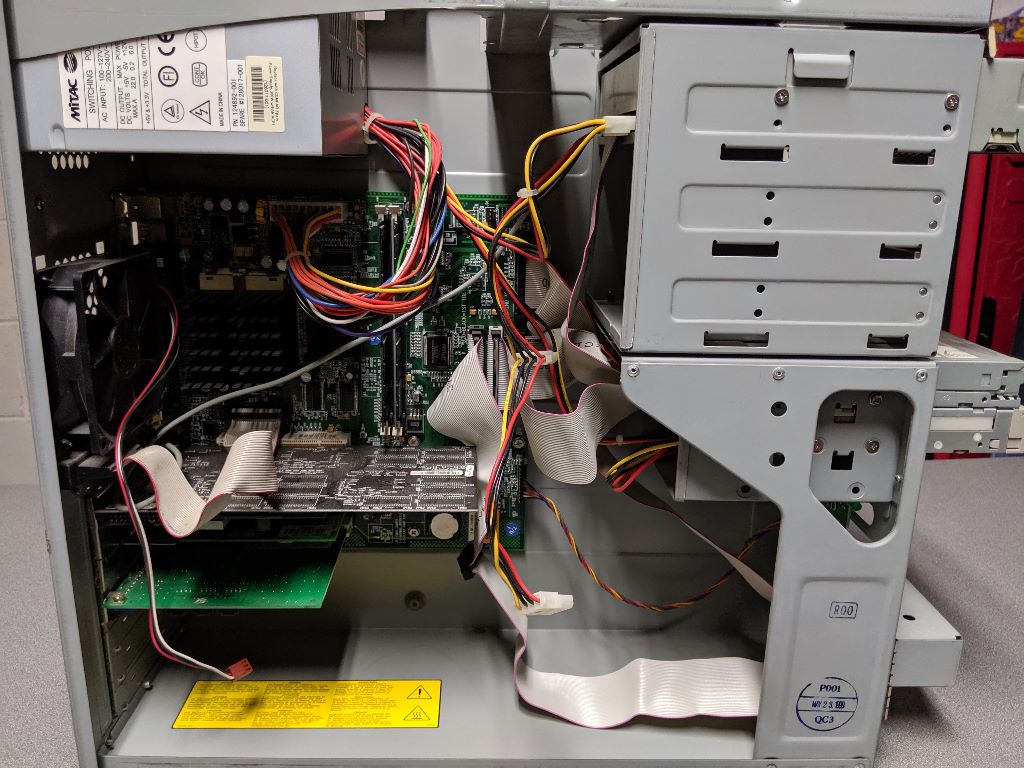
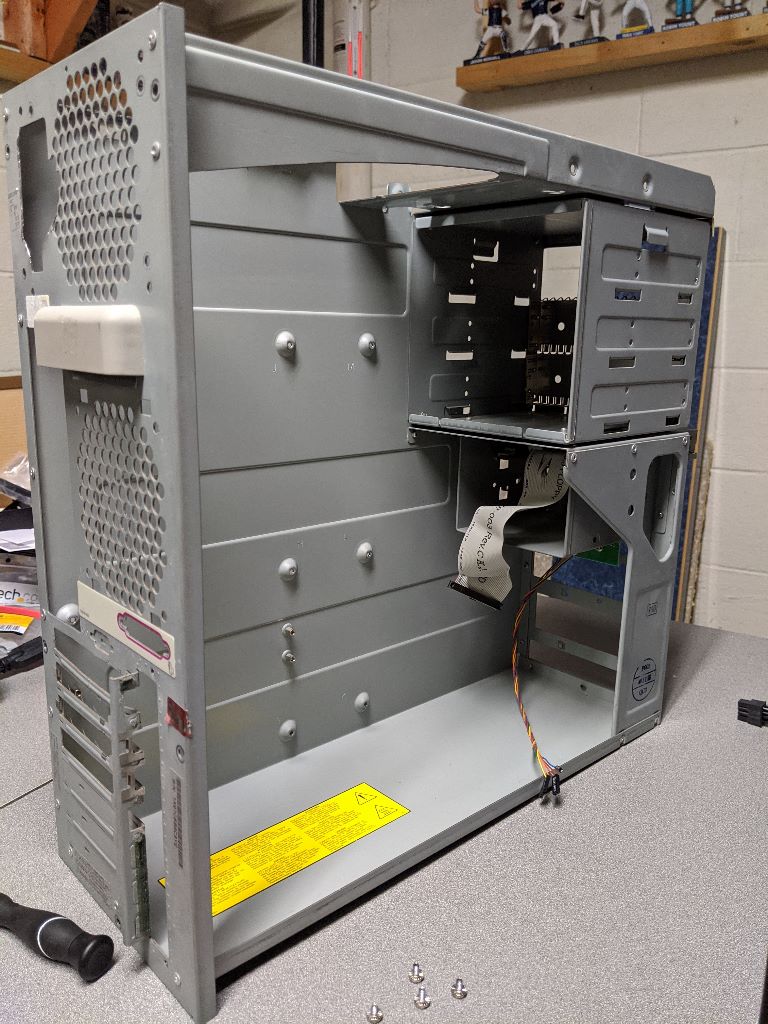
My goal on this build was to make as much of the original gear like the floppy drives work. Unfortunately as I'll note below, I couldn't get the floppy or Zip drive working. The CD-ROM would be swapped in favor of a DVD-RW with a SATA interface and a beige front. Power switch and LEDs I needed to address and the media bay with a Gameport, two USB 1.1s, and a proprietary connector back to the motherboard.
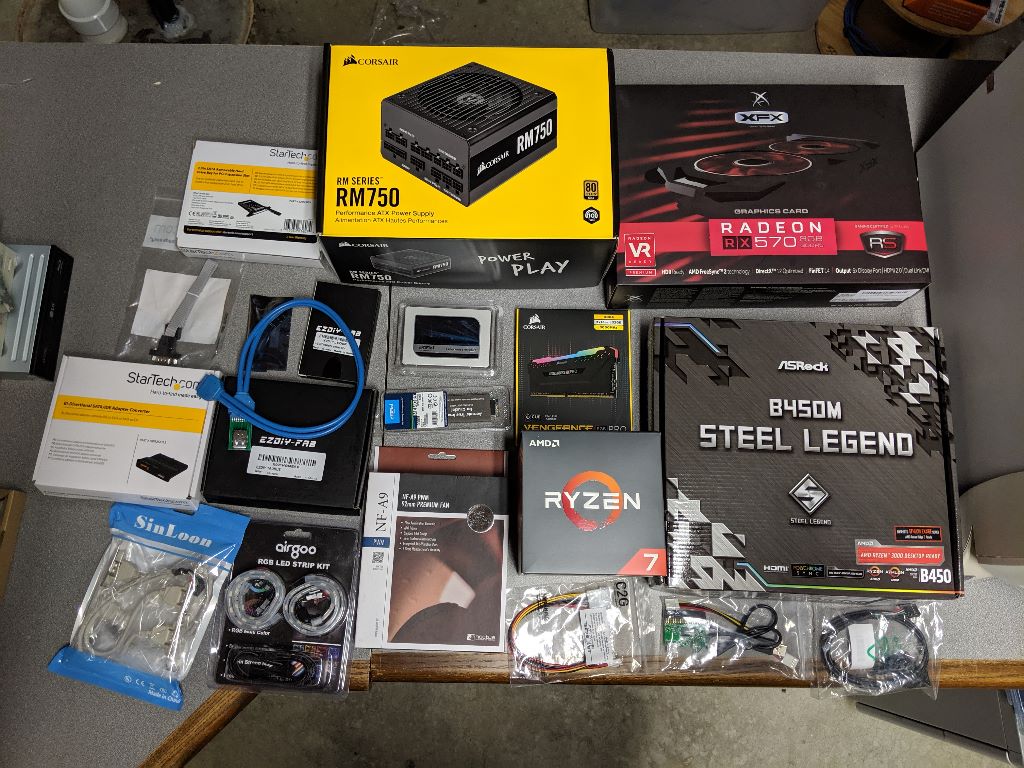
Alright, let's take the above case and shove all these goodies in!
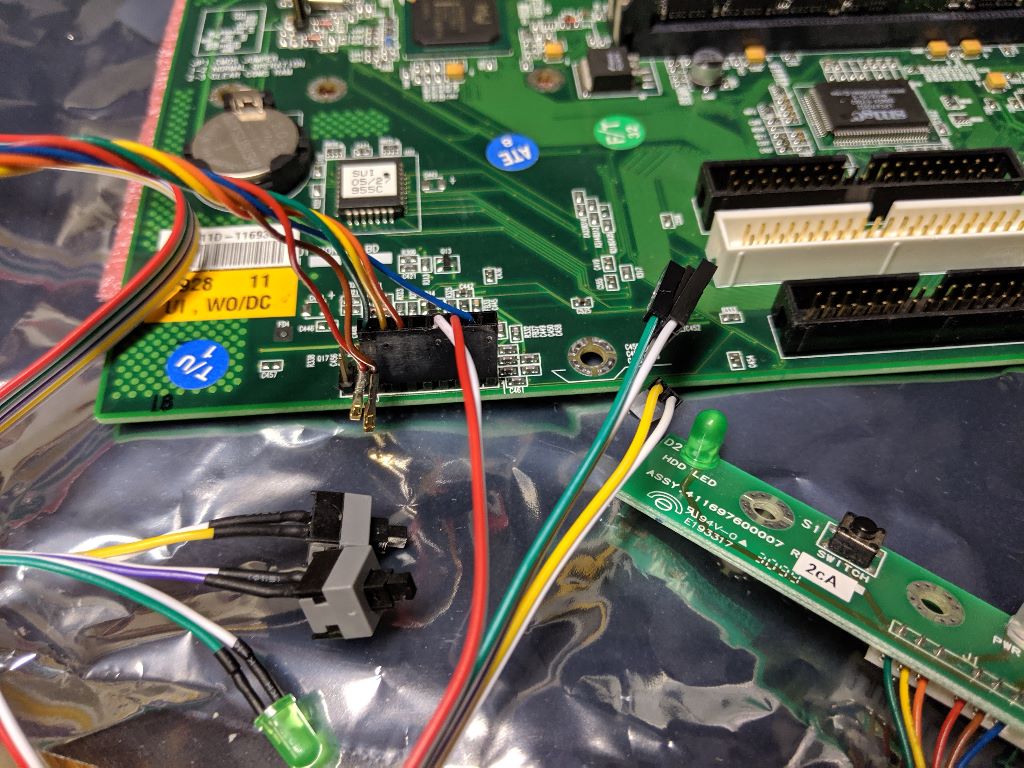
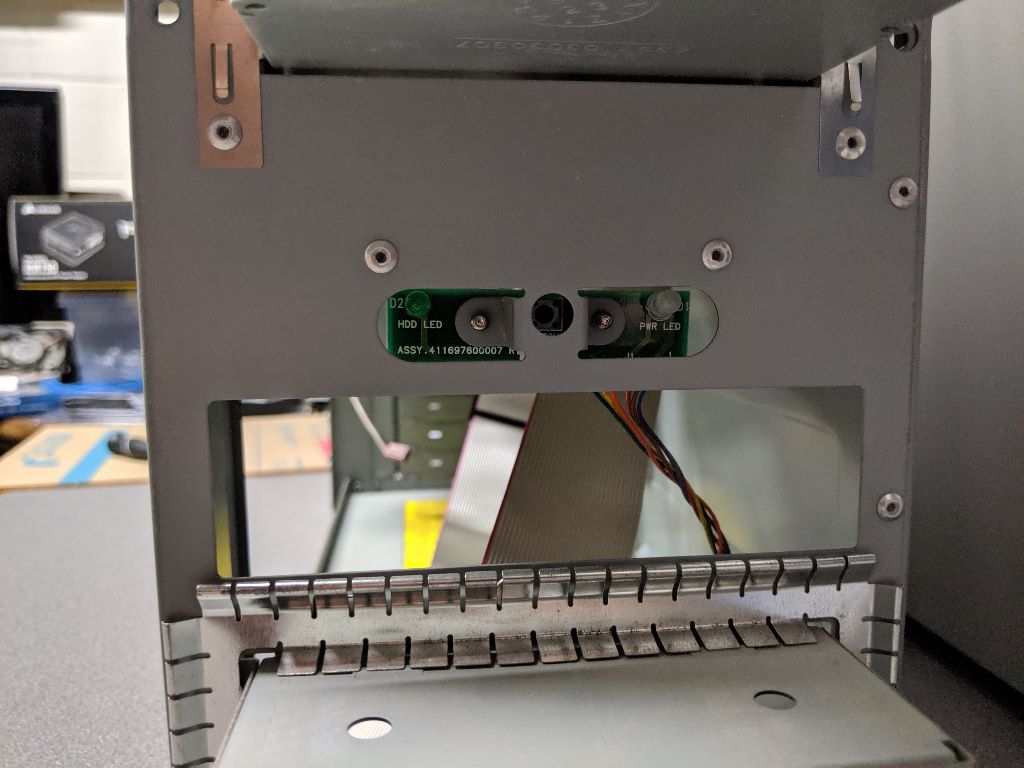
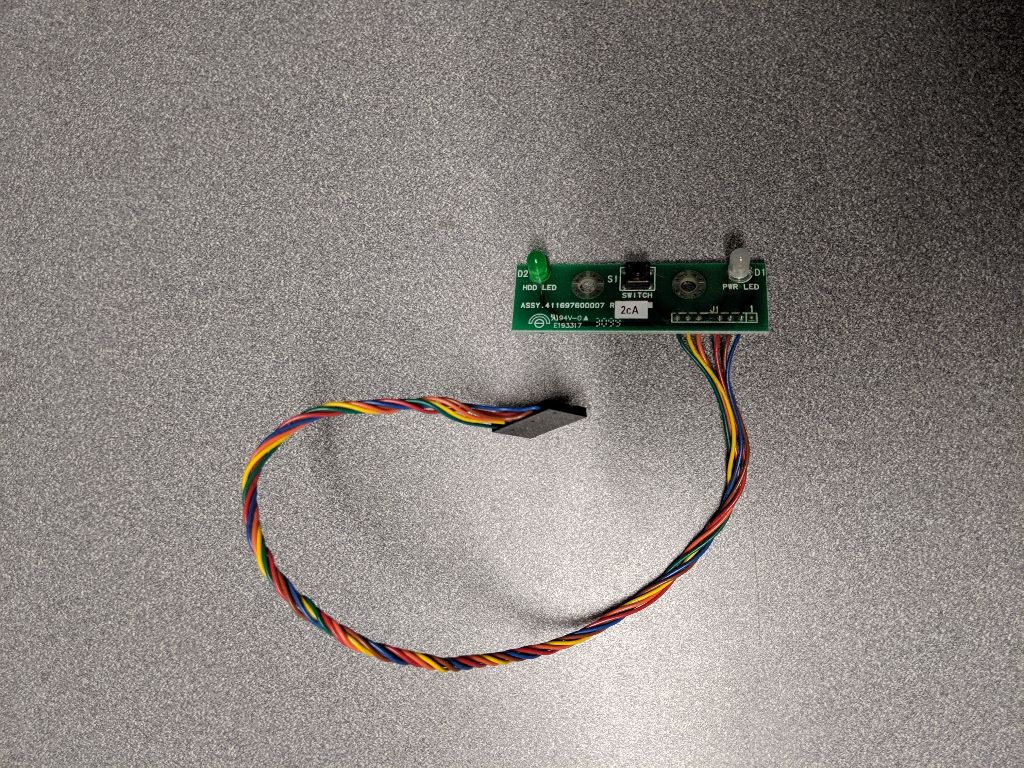
First thing I wanted to figure out was whether I could make the original switch and LED assembly work on a modern motherboard.
 |
 |
 |
 |
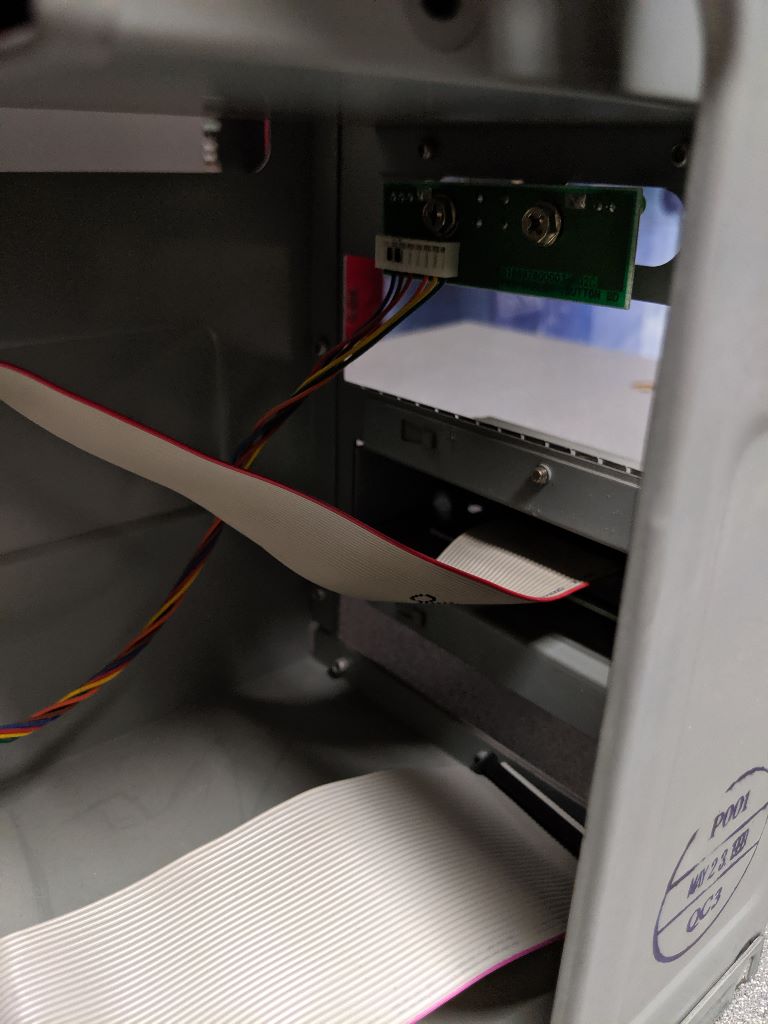
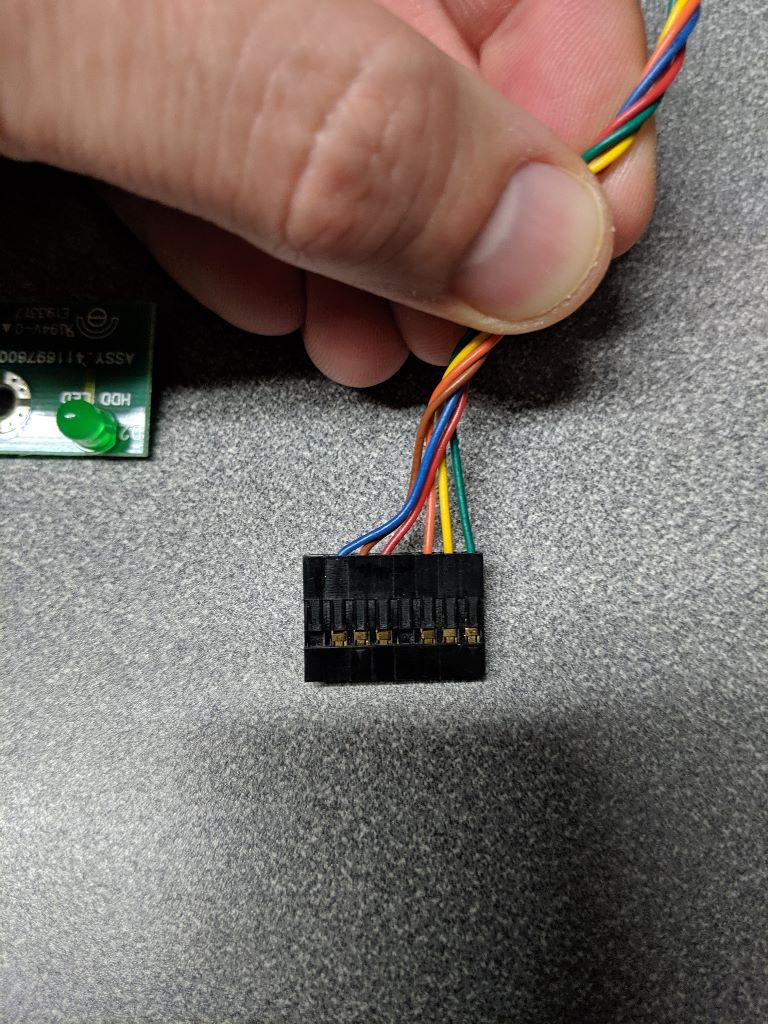
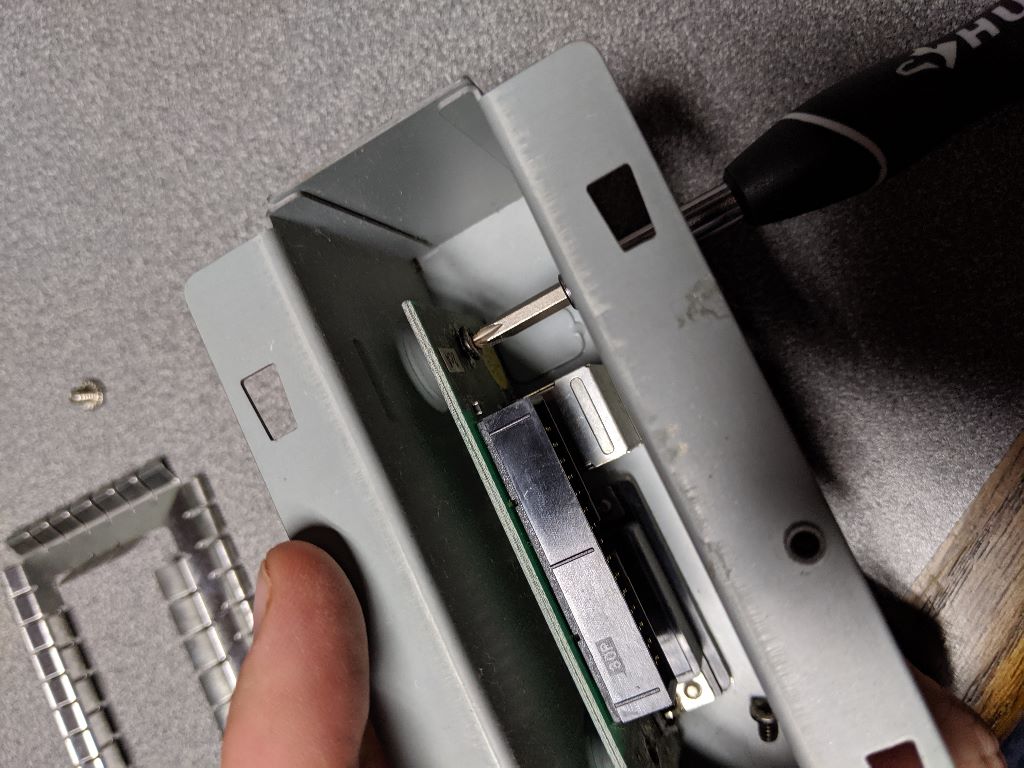
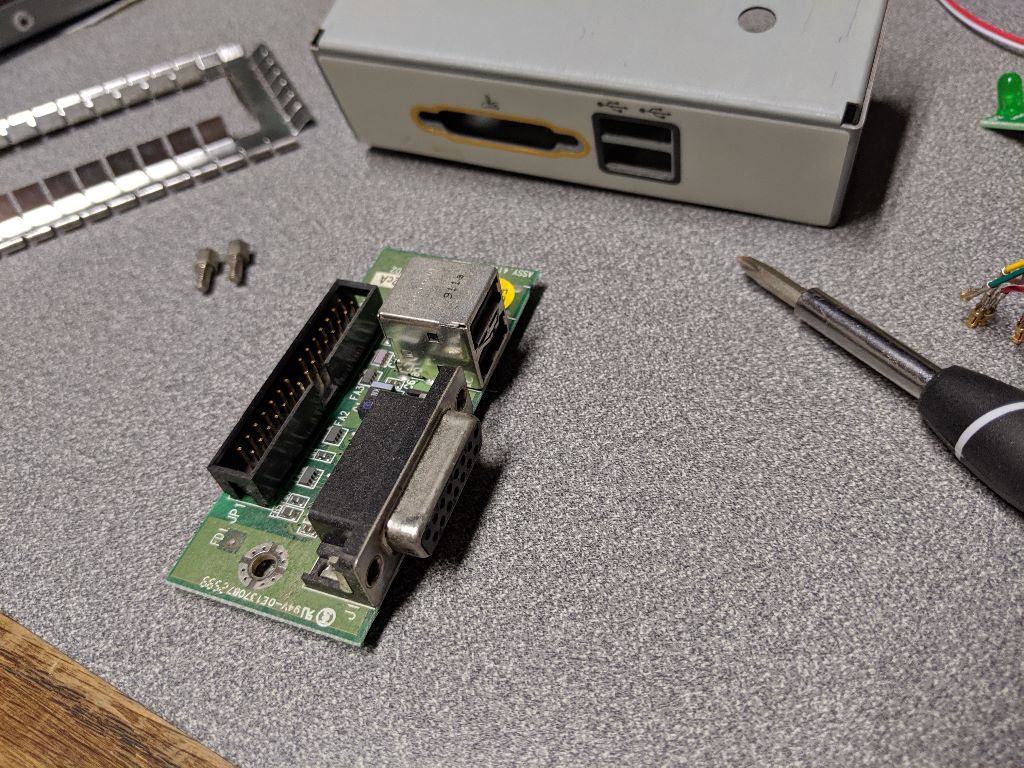
The trick here is the cabling terminates to a single motherboard specific block. Taking a close look at the circuit board, I can see that the power switch uses green and likely yellow, power LED uses orange and blue, which leaves hdd LED with brown and likely red. I figured that each gold/brown trace on the circuit board was the live one with the ground the wire not traced, for example hdd LED traces to brown, making red the ground. I verified the cable pairs for each by pulling them out of the OEM block and plugging them a pair at a time.
 |
Testing old and new |
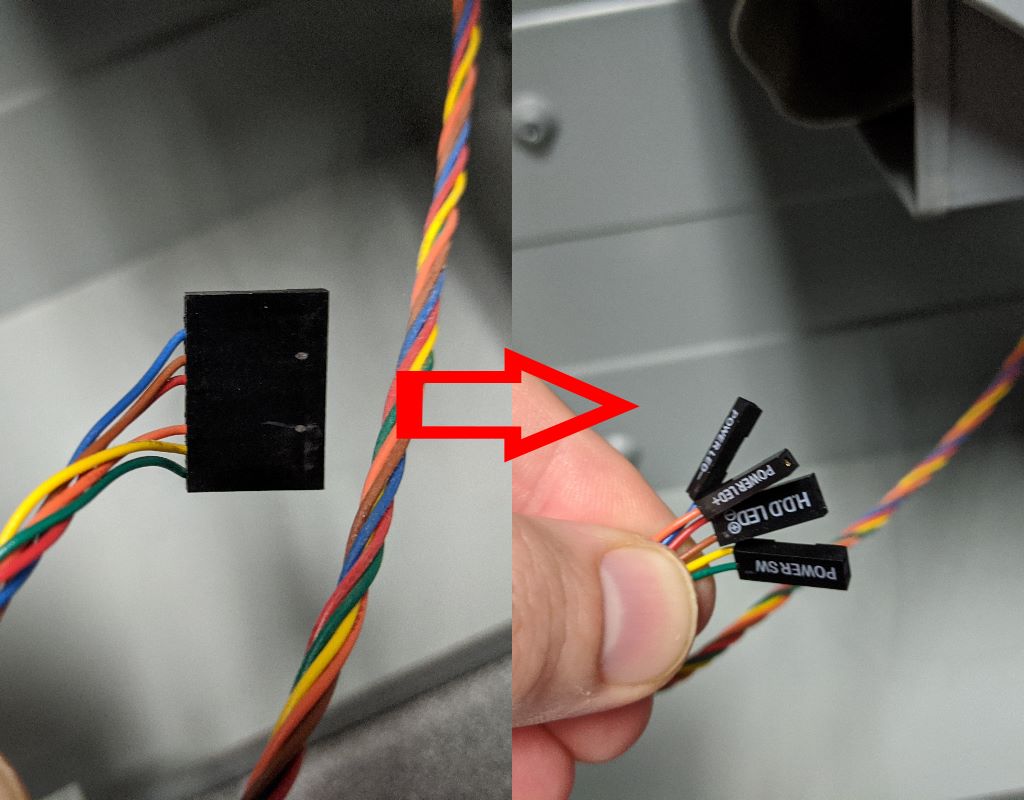
Easy to use a flat head to pull the individual wires out of the OEM block |
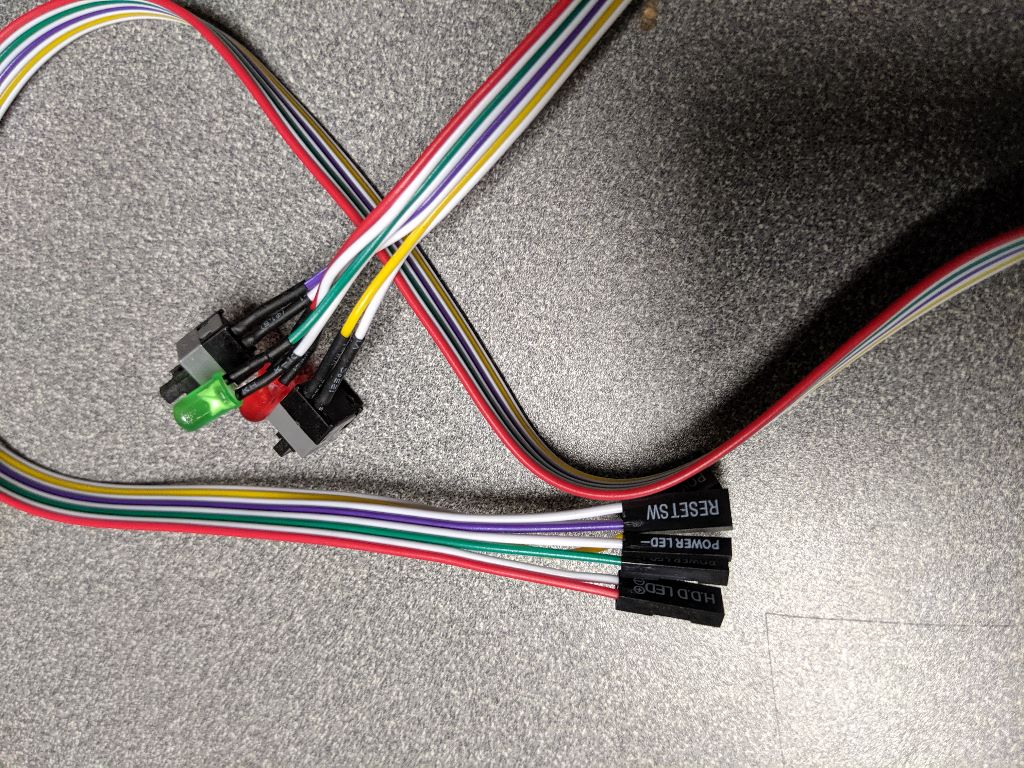 |
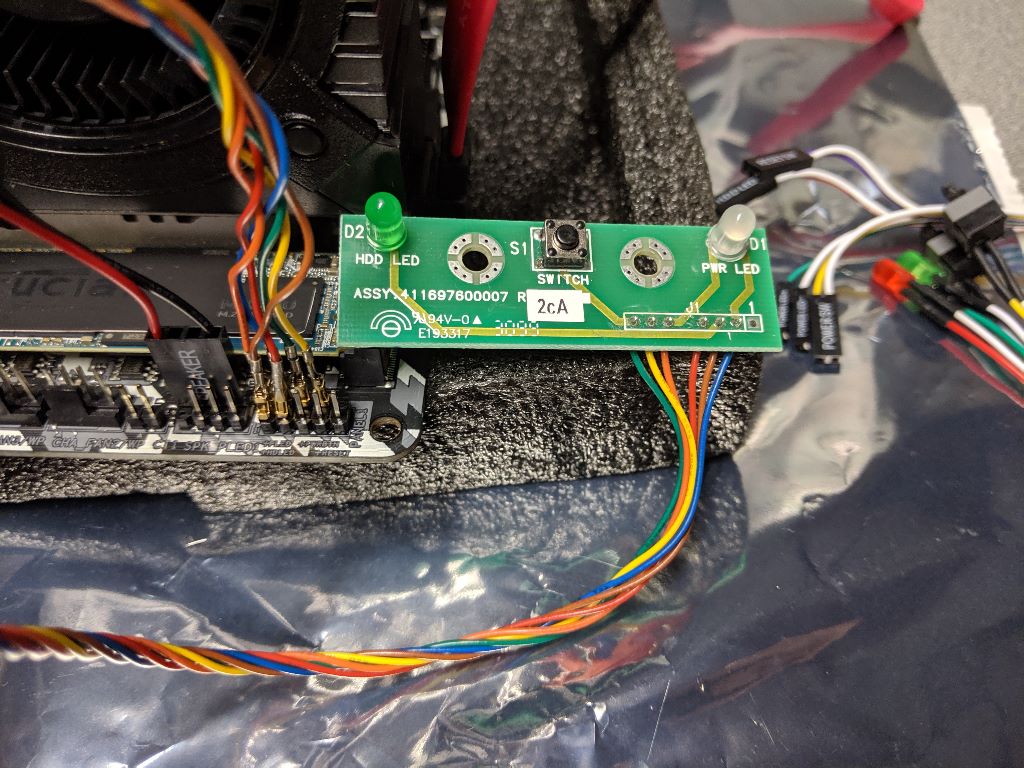
Old switch, new motherboard |
Turning OEM into universal |
I was able to successfully reuse the switch assembly from the Compaq, pulling out the original OEM block and then using 1 and 2 pin blocks from a universal kit. One of the byproducts I noted is that the PWR LED is always lit on my case now unless I physically switch off the PSU. I've read motherboard manufacturers have different implementations for power and it's likely that because USBs can still be used to charge connected devices that there is always some level of power trickling in now. The HDD LED is always lit when the system is on and never blinks, perhaps an artifact of SSDs. Finally, the motherboard also had a header for a reset switch which the Compaq does not have, so I'll be routing a simple reset switch from the universal kit to a front panel
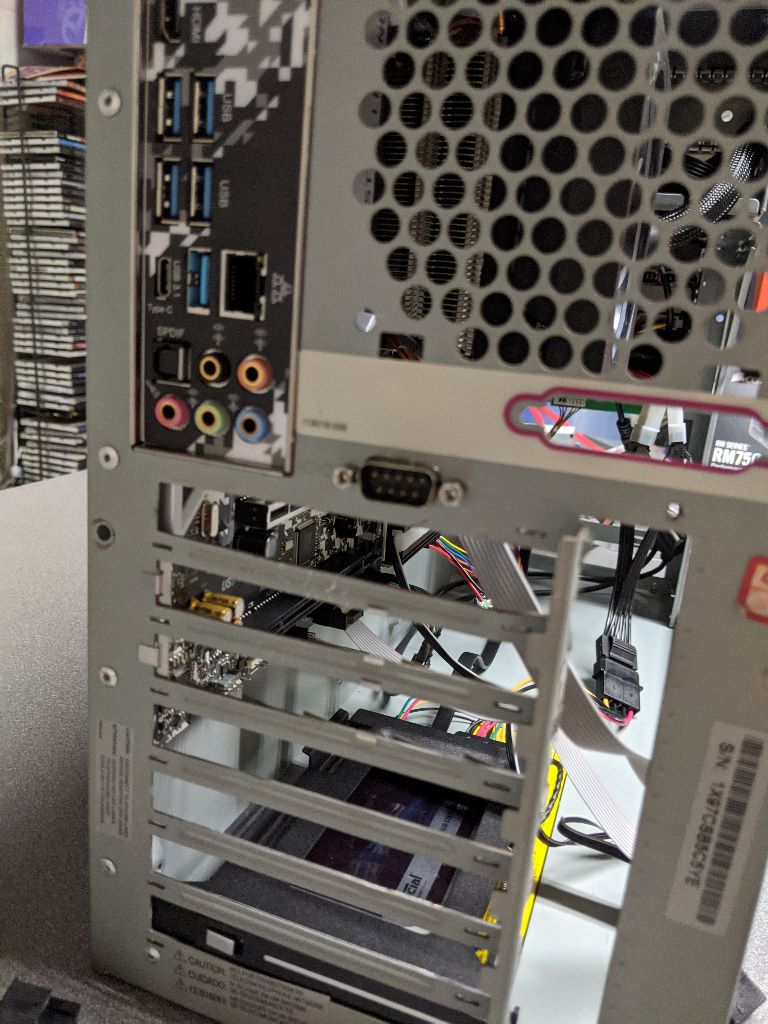
Next up is fitting the motherboard into the case. I was gambling since the case used a normal looking removable I/O shield that maybe the motherboard designed for it was likewise following the ATX standard. If not I could always template out my motherboard then drill new holes with standoffs. Turns out I got lucky!
 |
 |
Not pictured is the 3 extra motherboard standoffs I installed to support the bottom of the motherboard. You can see those down in the build section. The old Compaq motherboard didn't use those on the full ATX board for whatever reason but standoffs in the case all follow ATX spec. Thank goodness for engineers enforcing standards over proprietary nonsense.
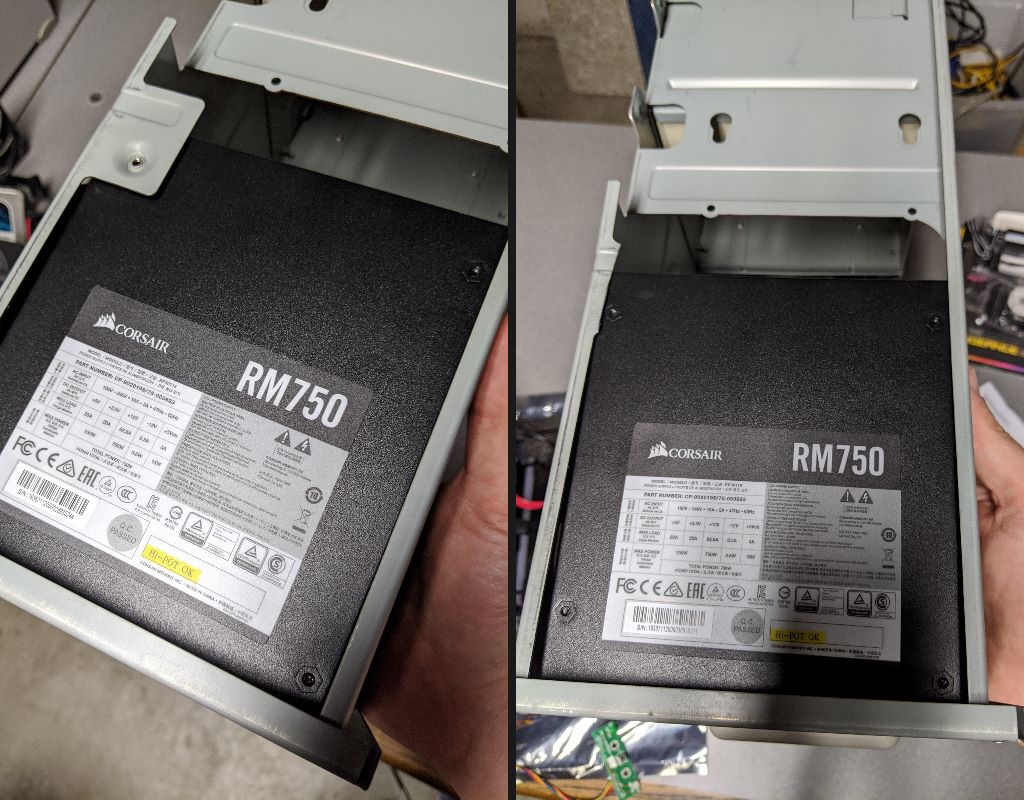
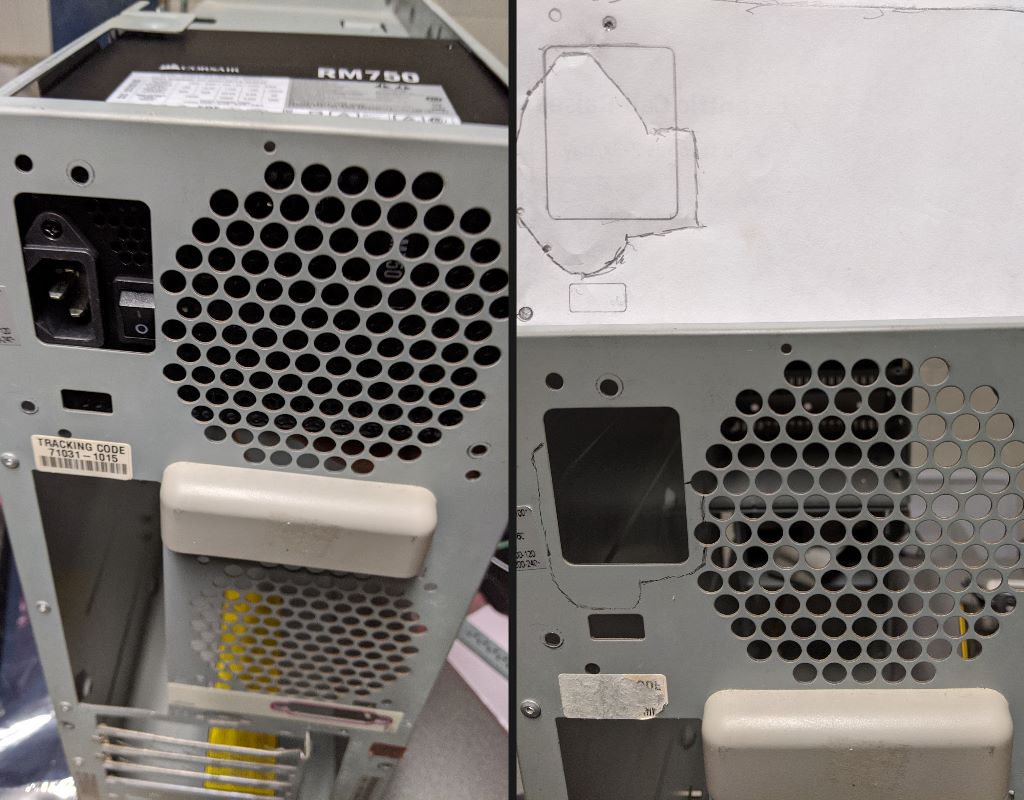
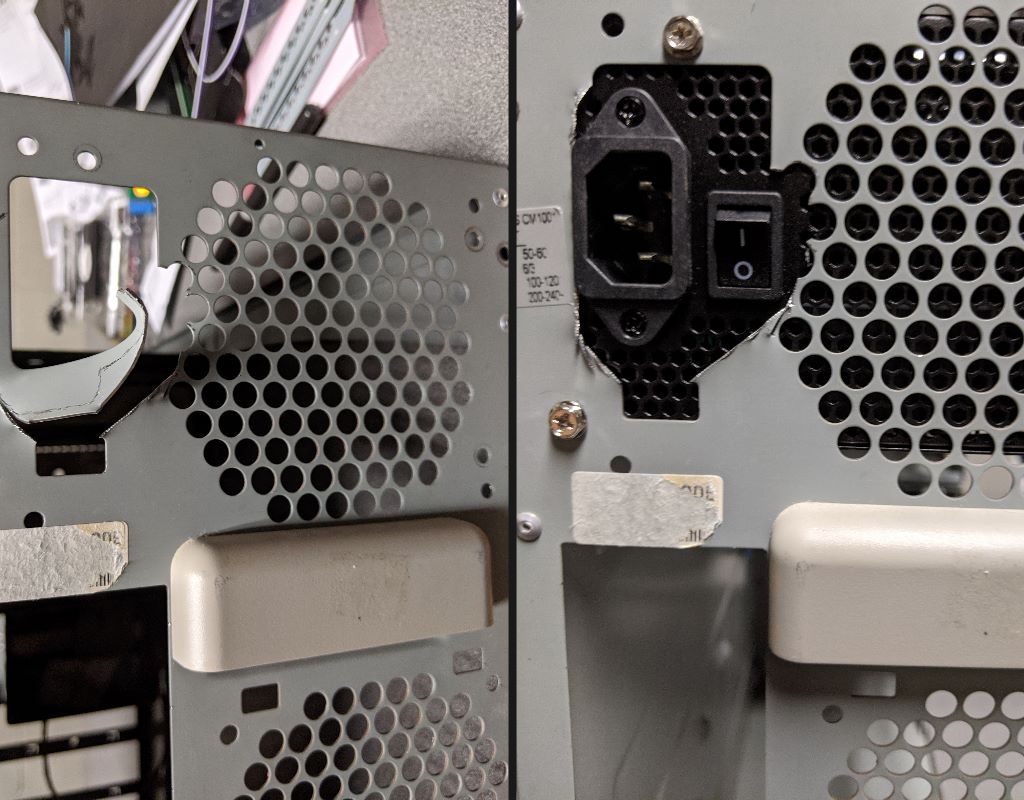
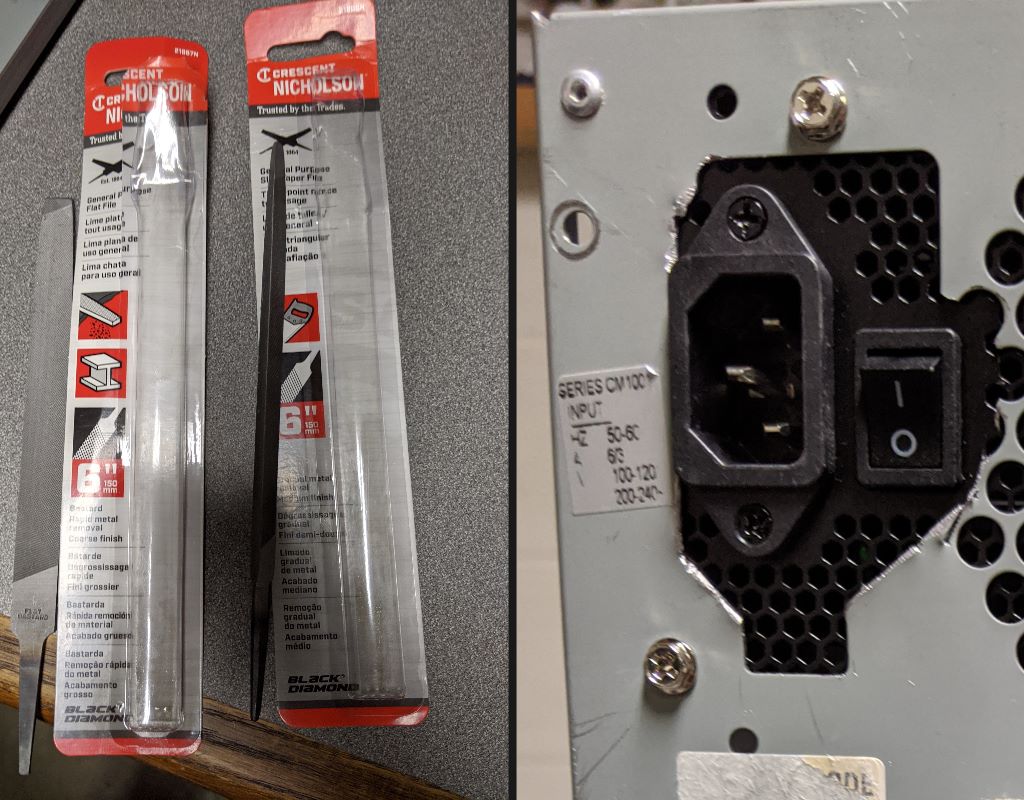
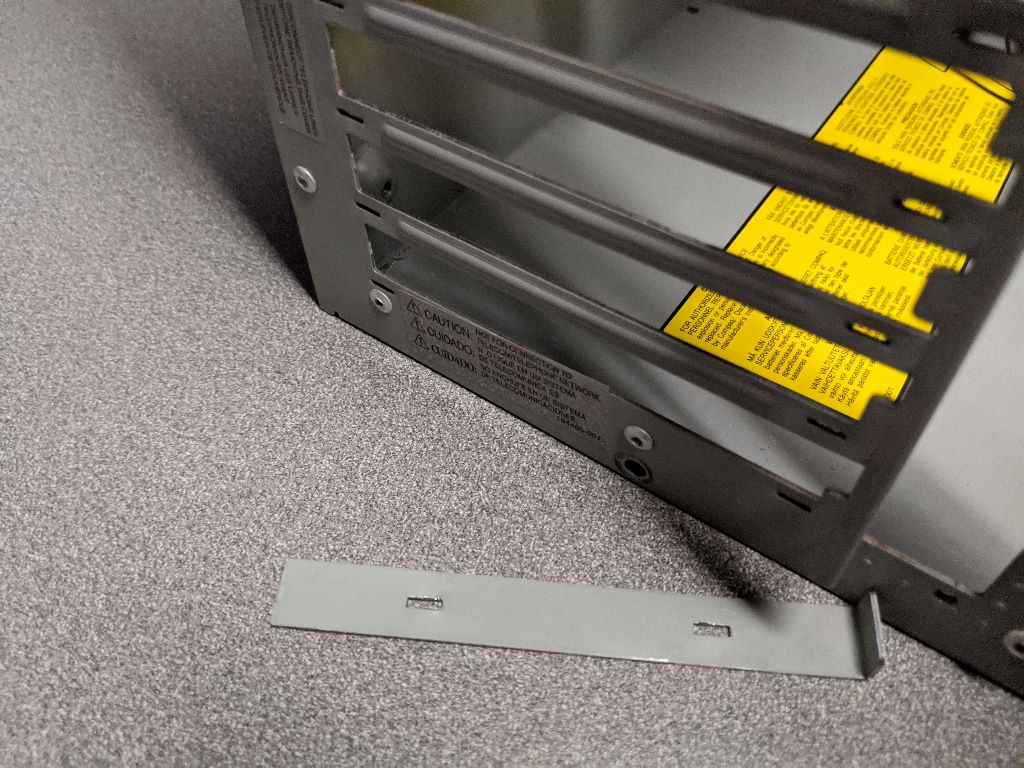
Finally was testing the placement and fit for my PSU. Two barriers prevented a simple swap, a flange inside the case to help hold the OEM PSU and the metal stamping of the case itself on the back of the case. Both were remedied using tin snips and a metal file. I took a piece of paper and traced a template over the new PSU with holes for mounting and the outlet/switch moulding to figure out how much cutting was needed. Then I traced it over the metal to figure out how much I needed to cut. It wound up looking not clean but the edges are smooth to the touch and gets the job done.
 |
 |
 |
 |
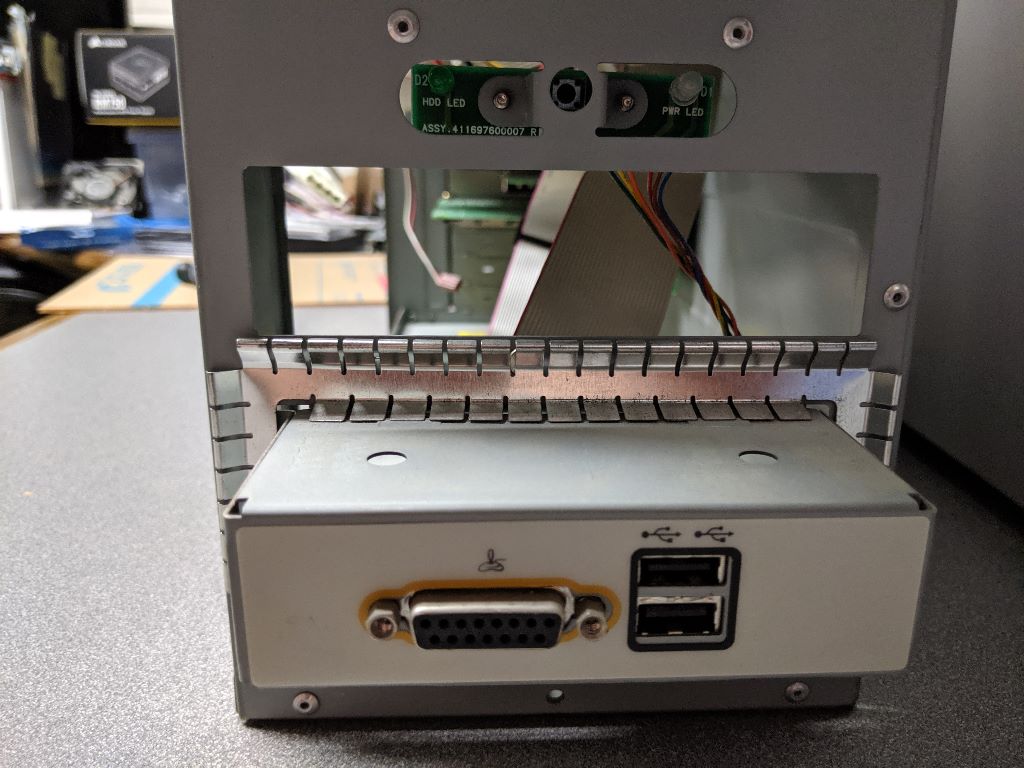
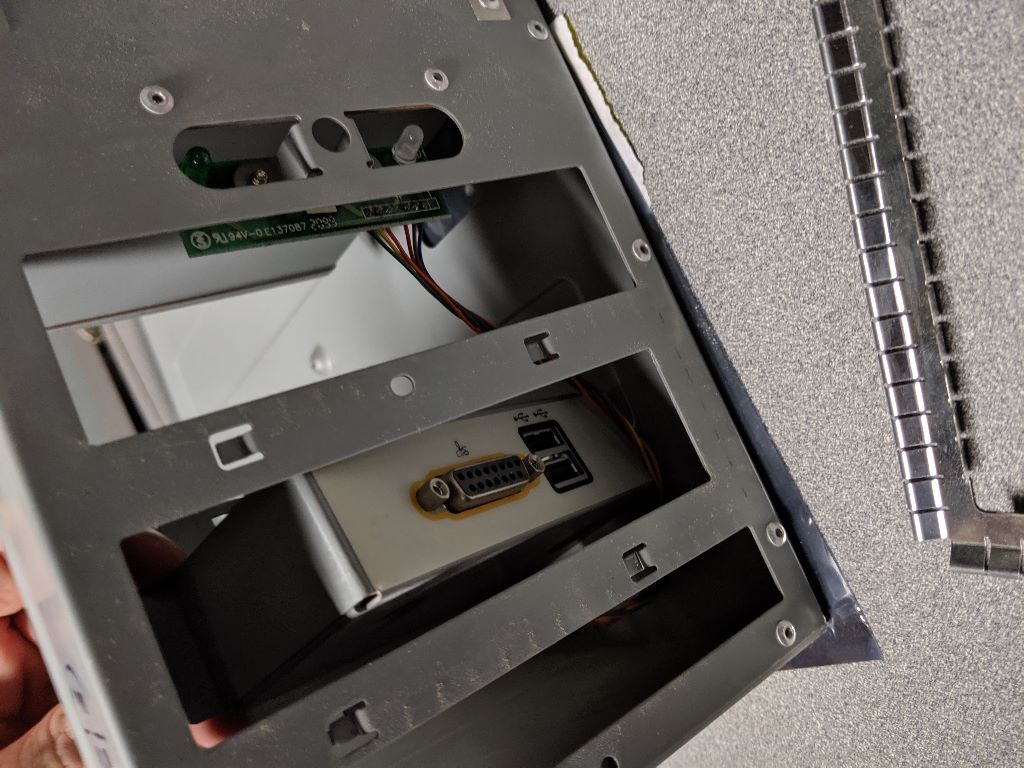
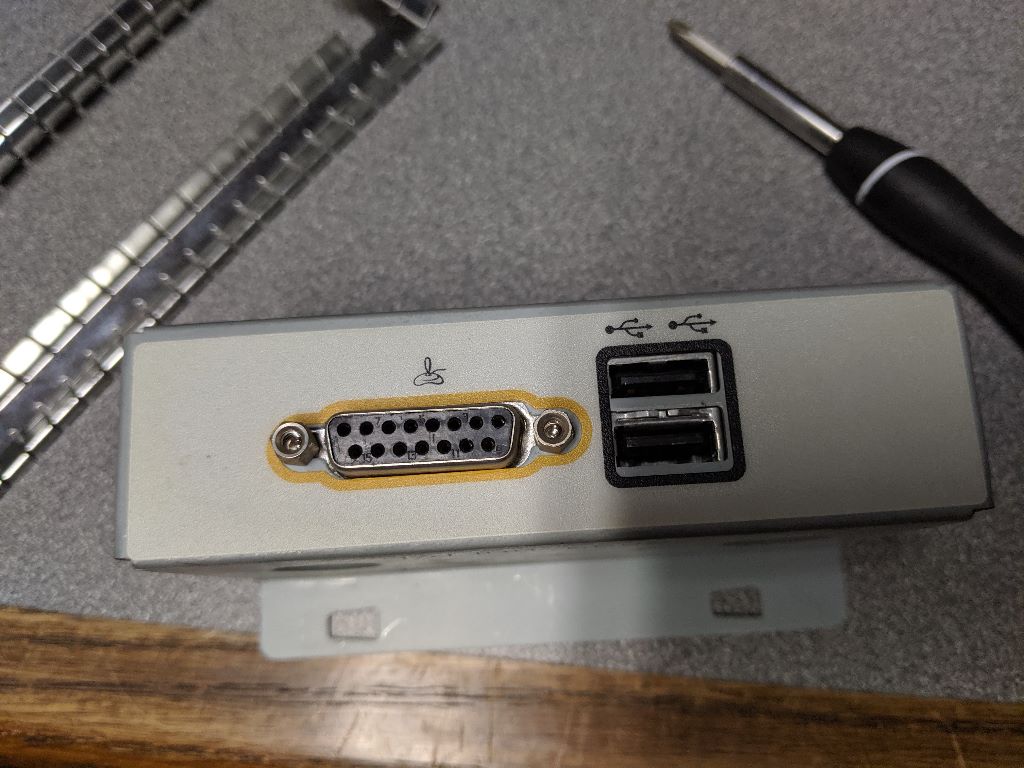
The only other case modification I need to make is the front media panel located behind the spaceship like bubble. It's the most visually distinctive part of this era of Compaq Presarios and handy for easily plugging in Gameport joysticks, Sidewinder USB controllers, and other fun gamepads. Gameport and USB 1.1 ports have no place in my build anymore.
 |
Looks very close to a 3.5" drive bay, just a bit wider |
Removing the seemingly optional flange |
|
|
A knockout for a Firewire port on the left |
 |
 |
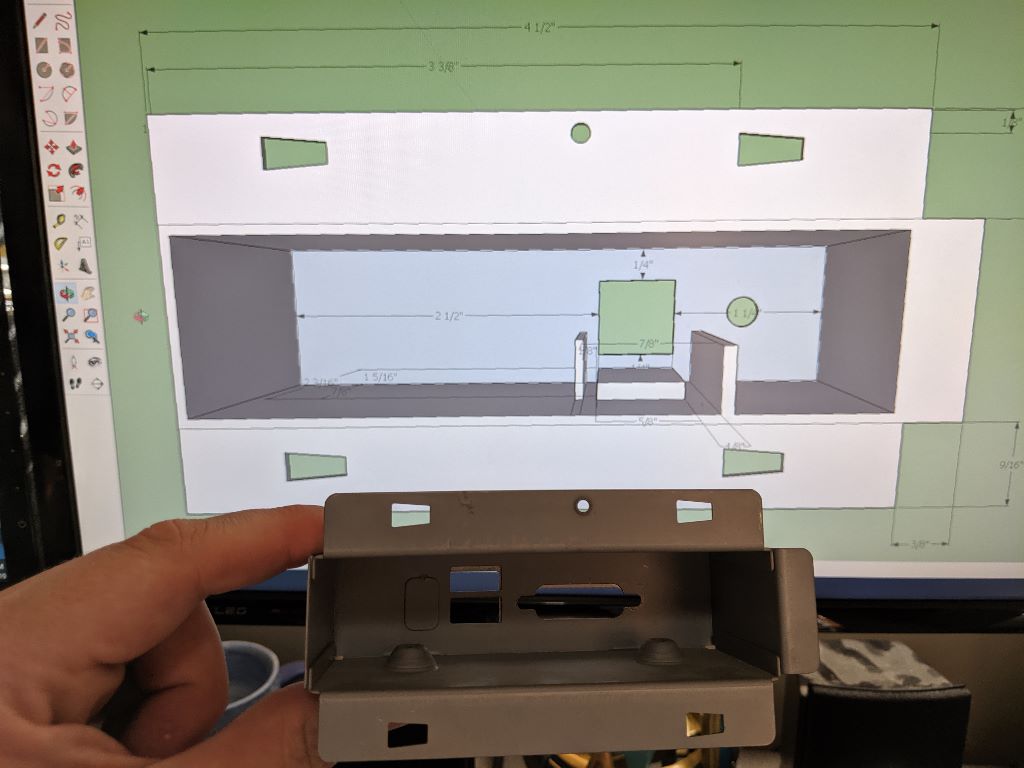 |
The last picture shows a CAD design of this fornt medial panel chassis which can house a new USB 3.0 port plus a hole for a reset switch. I could have done some rigging to use the original metal chassis to get the USB 3.0 ports in there but I'd have a gap for the Gameport and figured I could 3d print something closer to what I want. I made some revisions to this drawing to include some other fun stuff, as soon as the 3d printing is done I'll post updates.
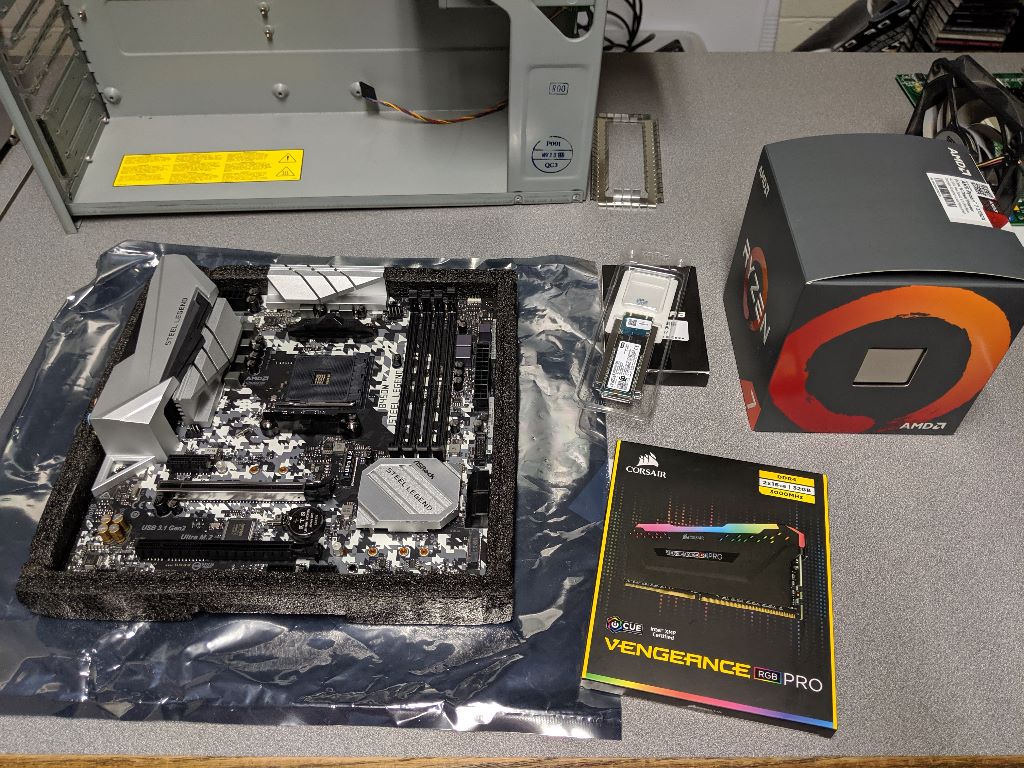
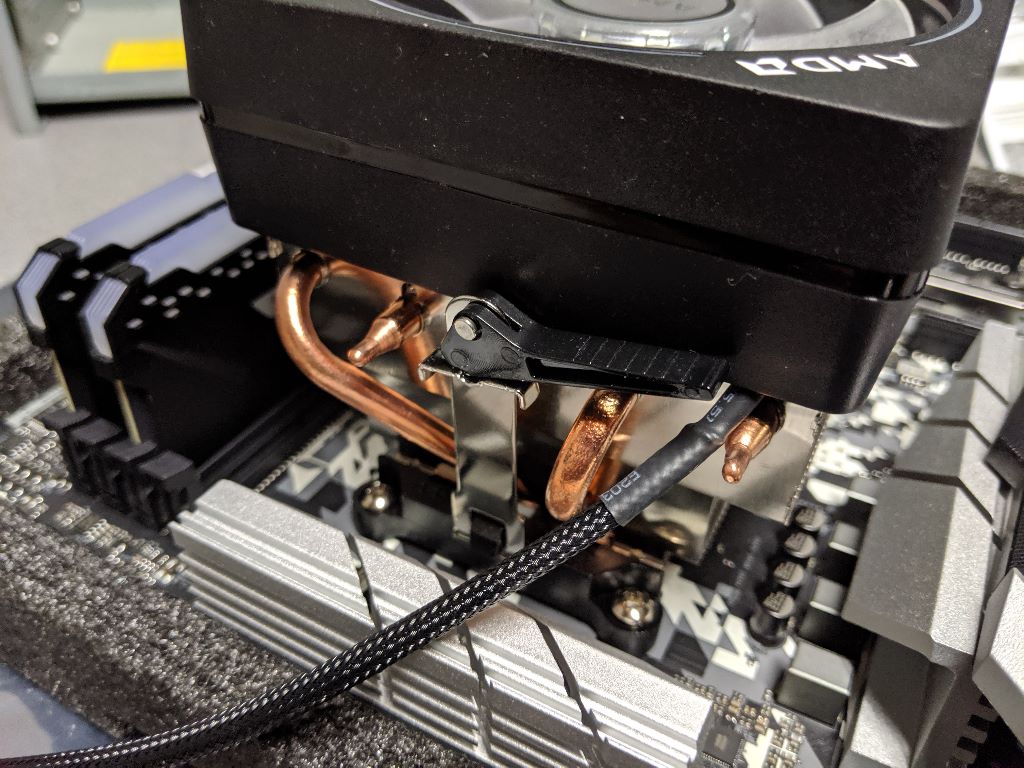
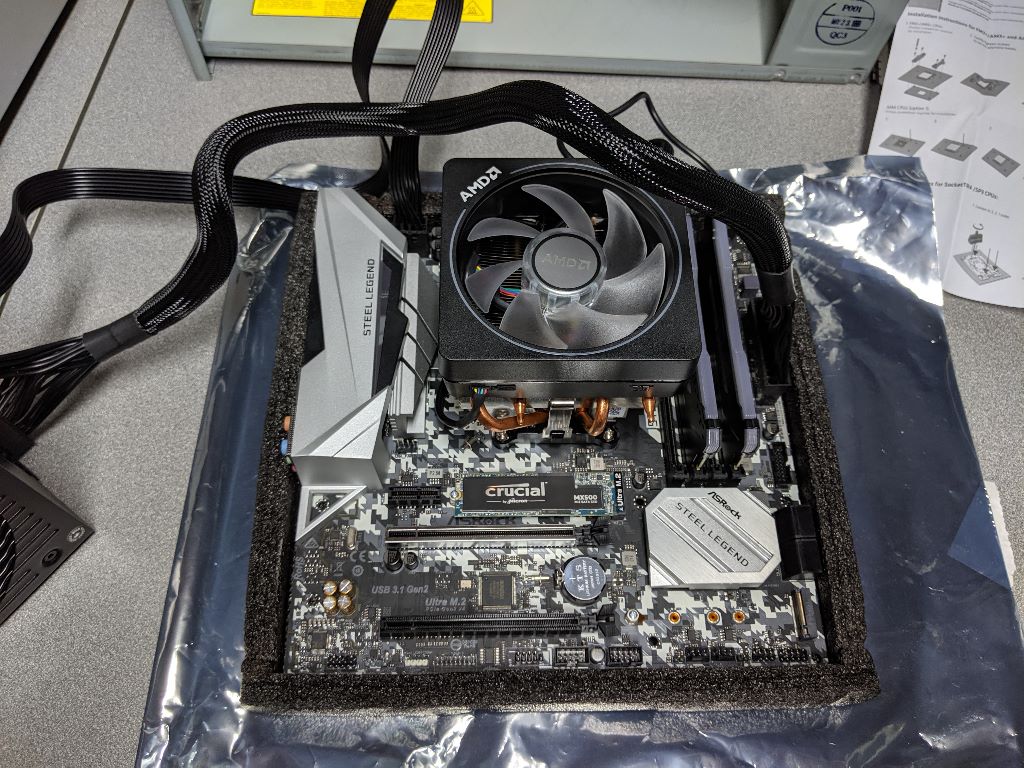
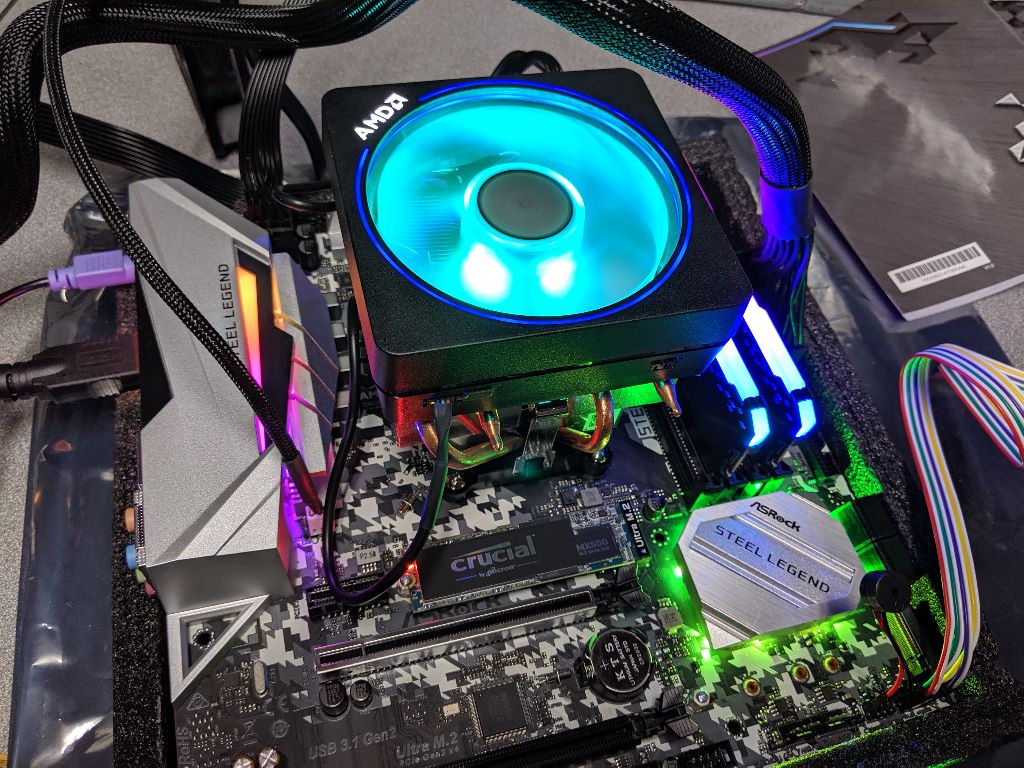
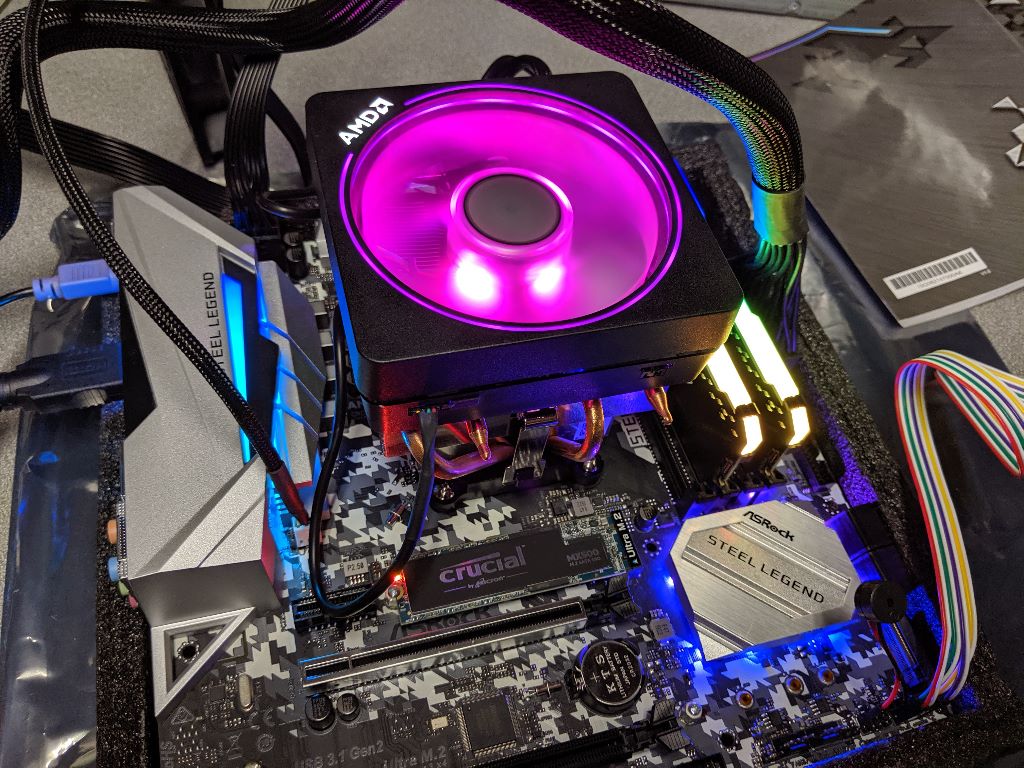
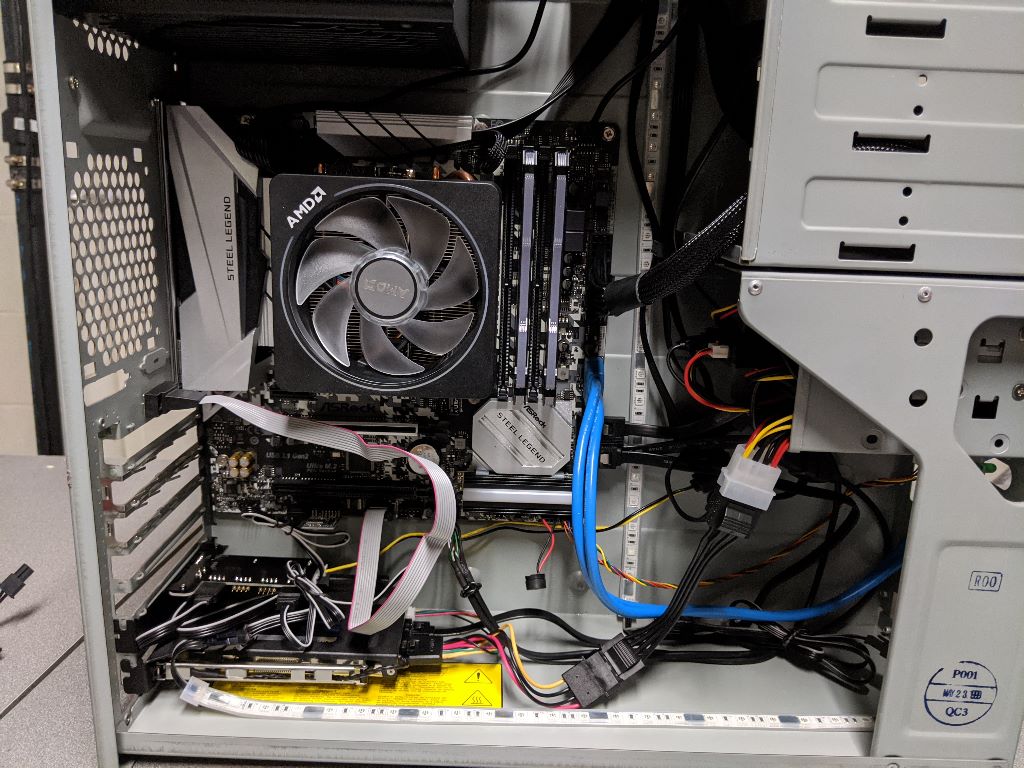
At this point in my build I figure it's time to make sure all those parts I bought are in working order before I start installing them in the case. This is a bit of trial an error for me. It's been 6 years since I last built a computer (Intel Core i5 4570S) and almost 12 years since my last AMD build (AMD Phenom X4 9600 later upgraded to an AMD Phenom II X4 945). This is the first time I dealt with M.2 ports, RGB lighting, and a CPU without built-in graphics capabilities. Installing the OEM heatsink was old hat for me, having built numerous AMD Athlon XP machines back in the early 2000s. The level/latch system was easy.
|
|
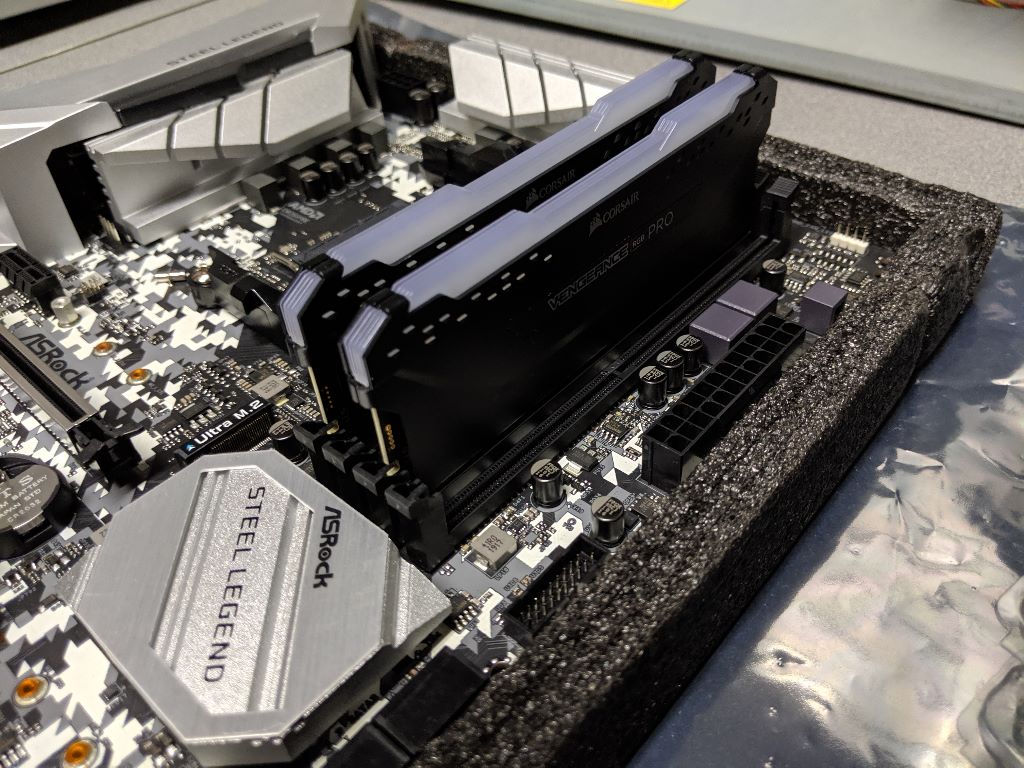
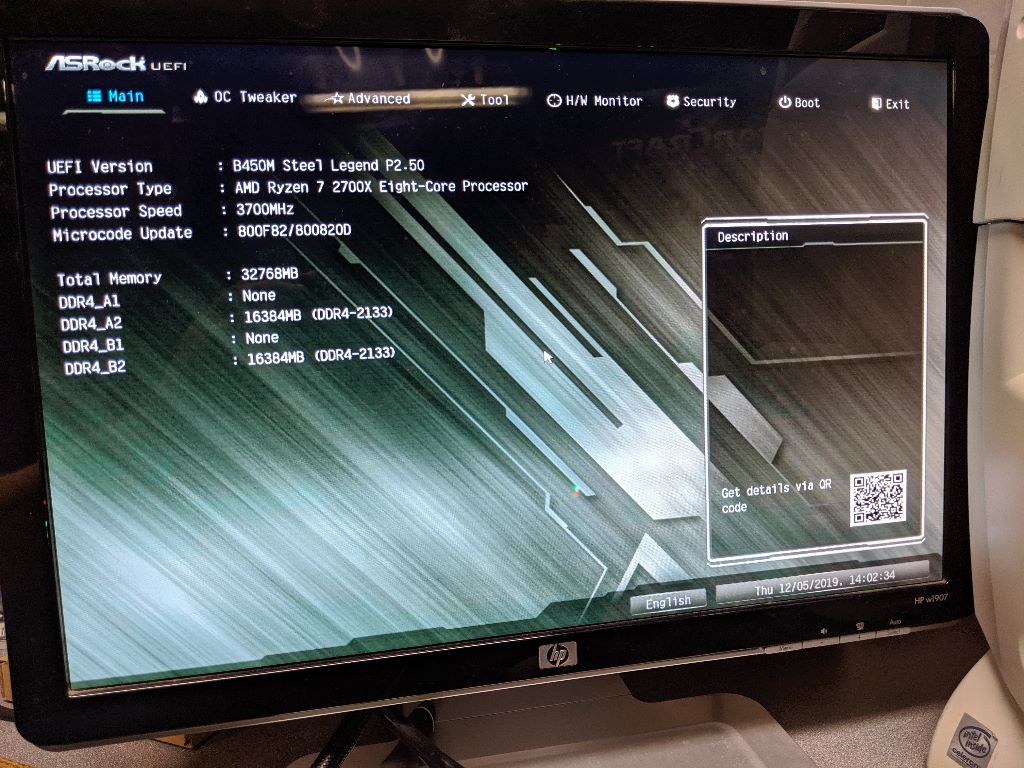
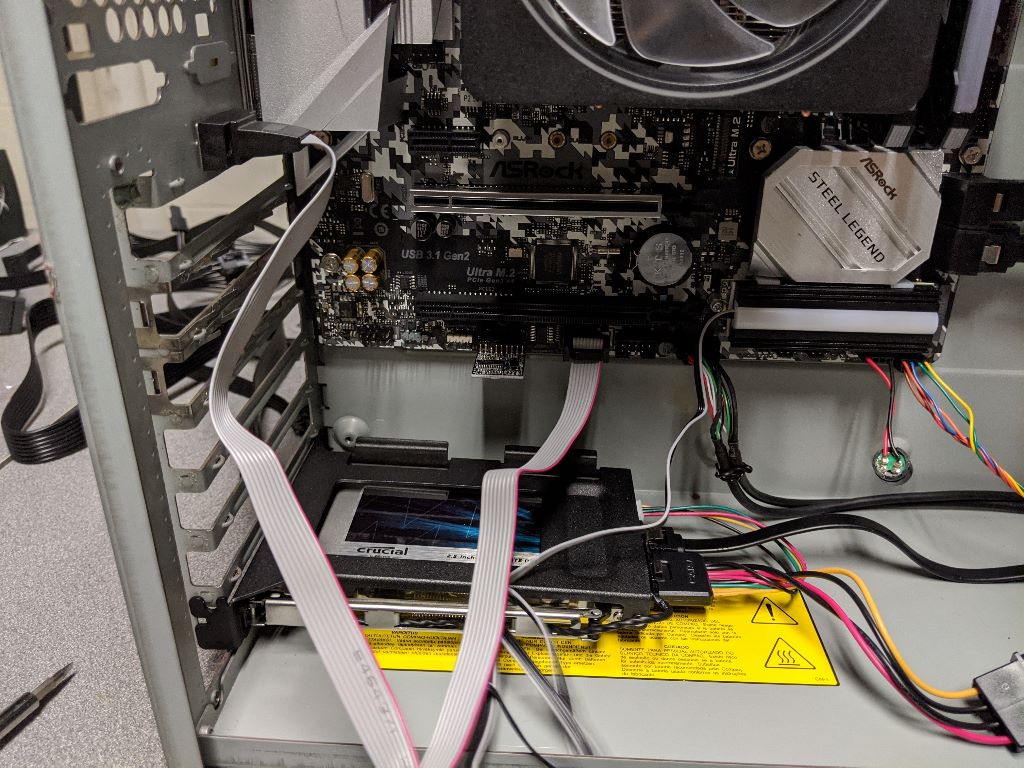
Per Asrock, when running a pair in dual channel, RAM is installed in 1b and 2b |
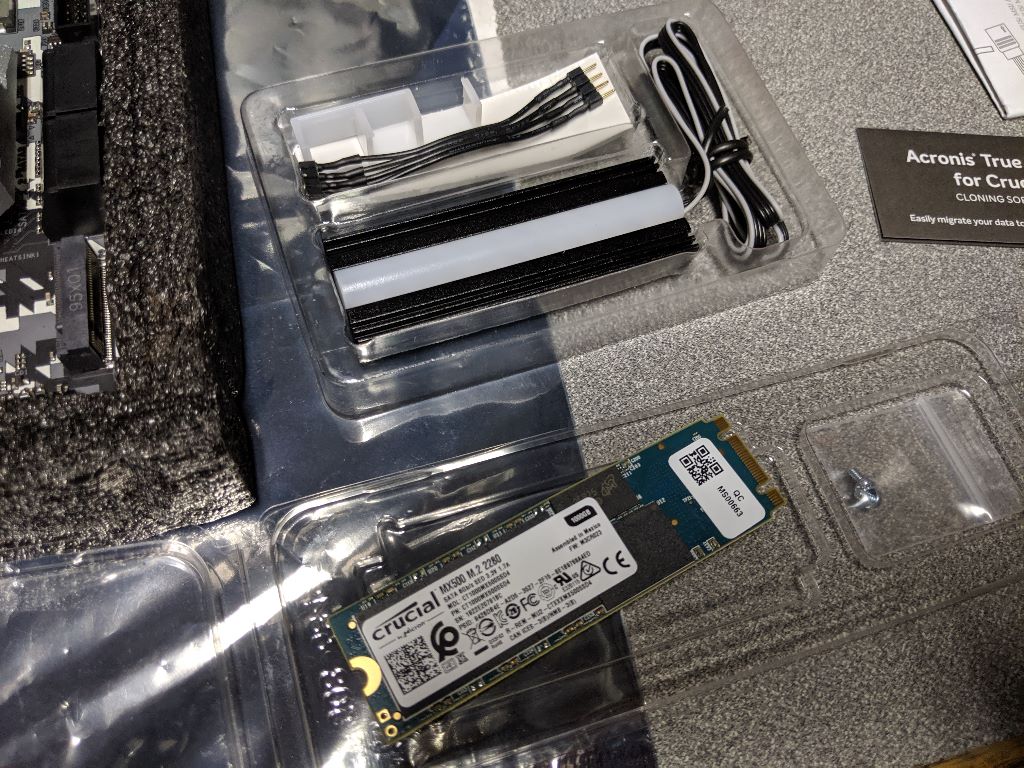
What is this black magic that stuffs 1 TB onto this? |
|
The arm comes down |
heatsink secured with an M.2 to boot |
latch secured and arm flipped |
CPU fan header |
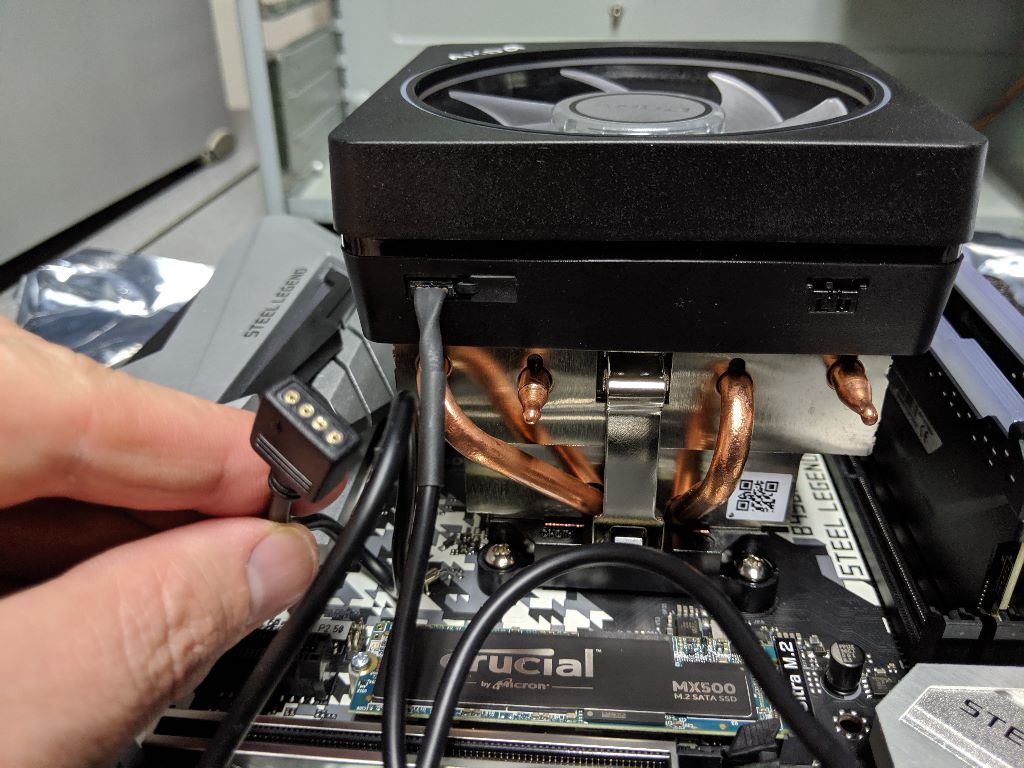
Heatsink supports 3 or 4 pin RGB/LED |
|
Why did they create a cable that can be installed backwards and damage the pc? |
 |
 |
 |
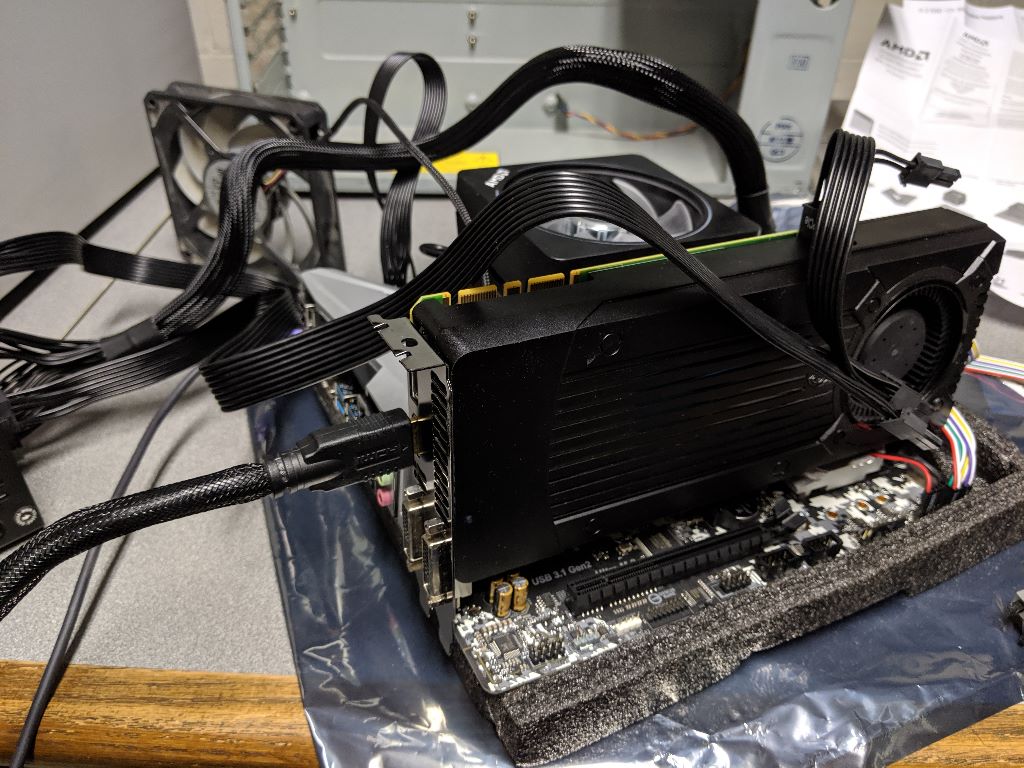
spare Dell OEM GeForce GTX 660 |
|
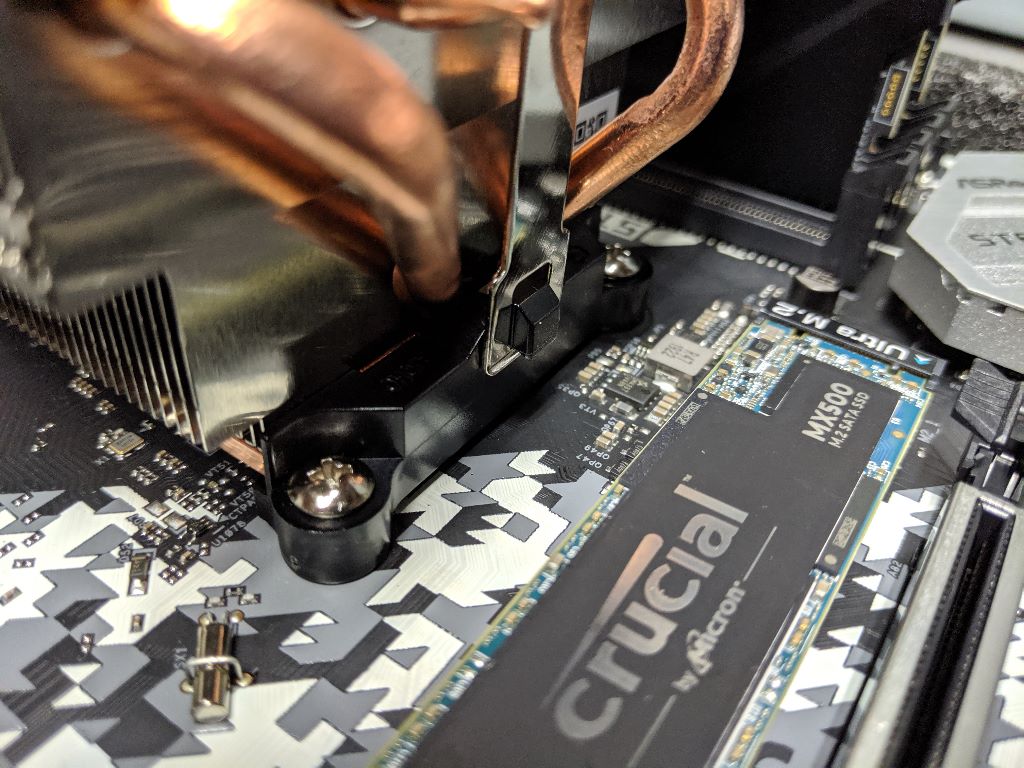
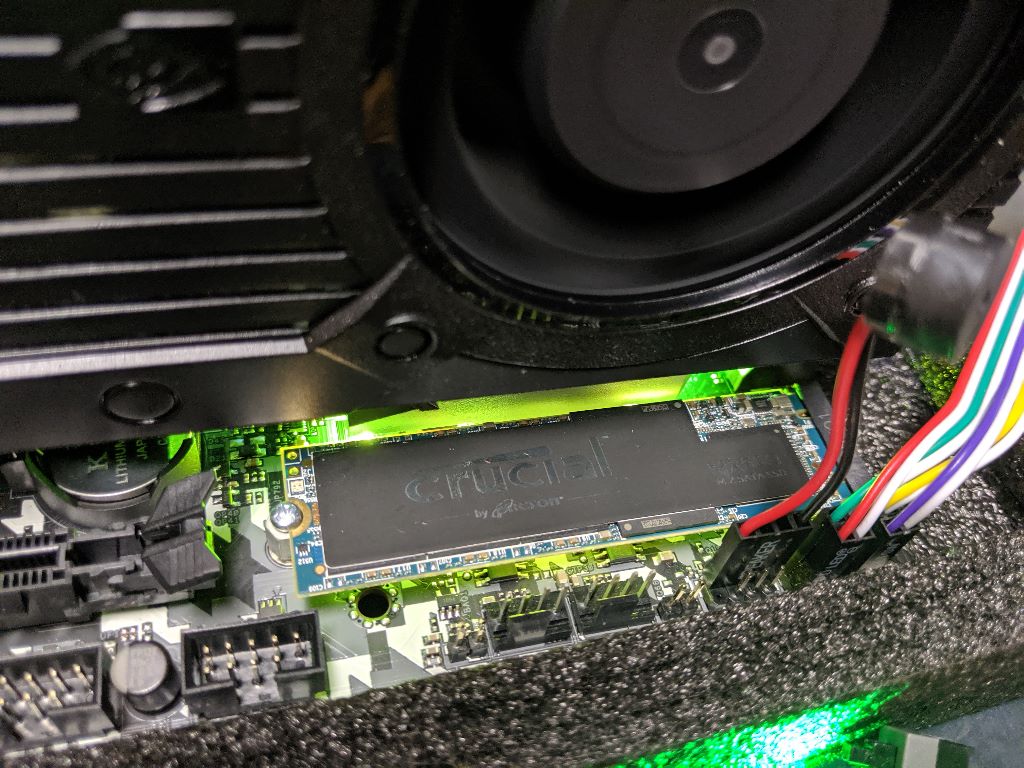
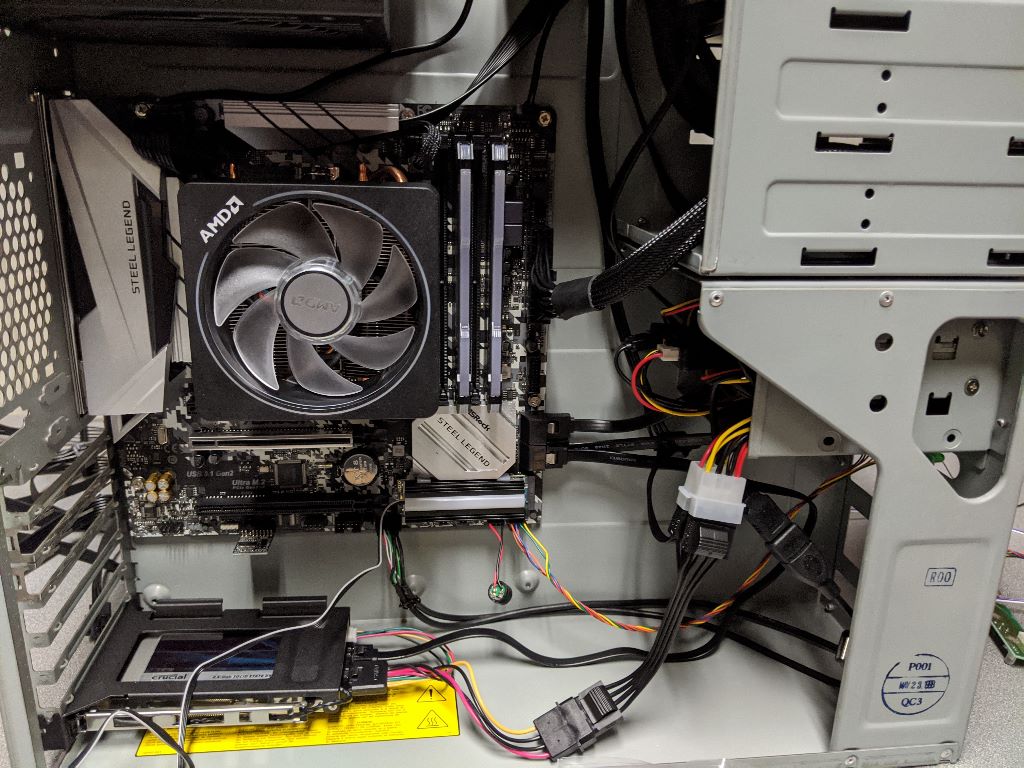
Final home for the M.2 SSD |
I learned a valuable lesson on the difference between SATA M.2 and PCIe M.2 (aka Ultra M.2). The annoying thing I later found out was my RGB heatsink is too tall when the AMD R570 is installed. If I had purchased the Ultra M.2 I would have been fine, or if I had gotten a graphics card that wasn't so chunky. All well, I think I can reuse that RGB M.2 heatsink elsewhere.
At this point all of my components work. It's time to party like it's:
Let's get to the build!
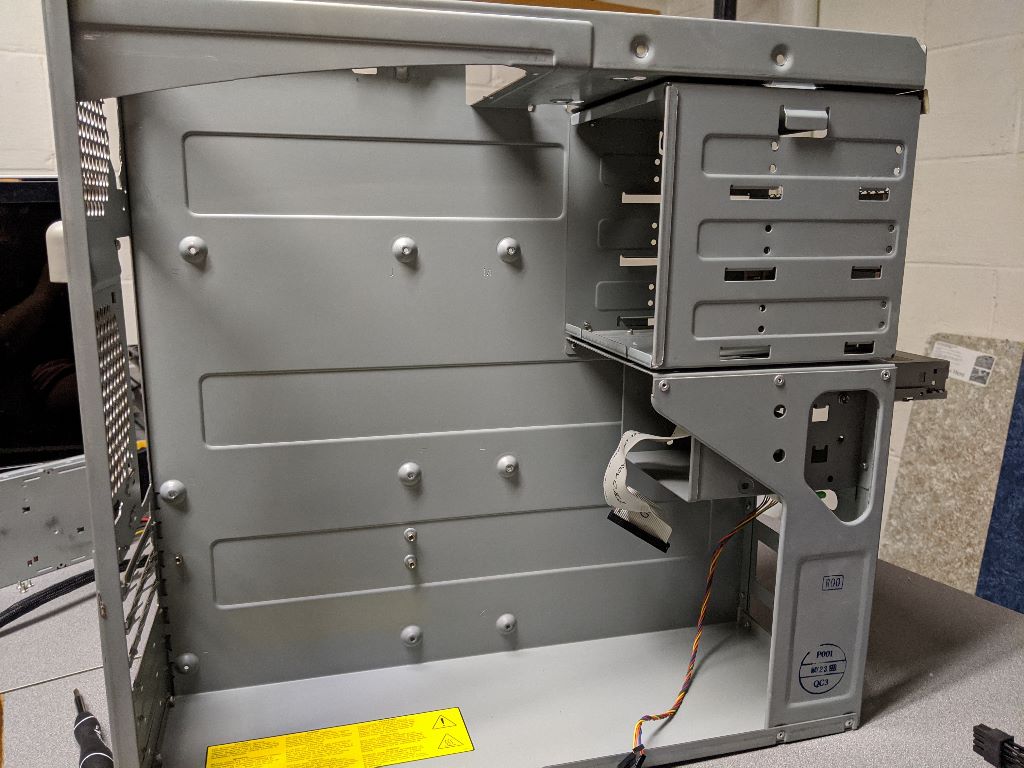
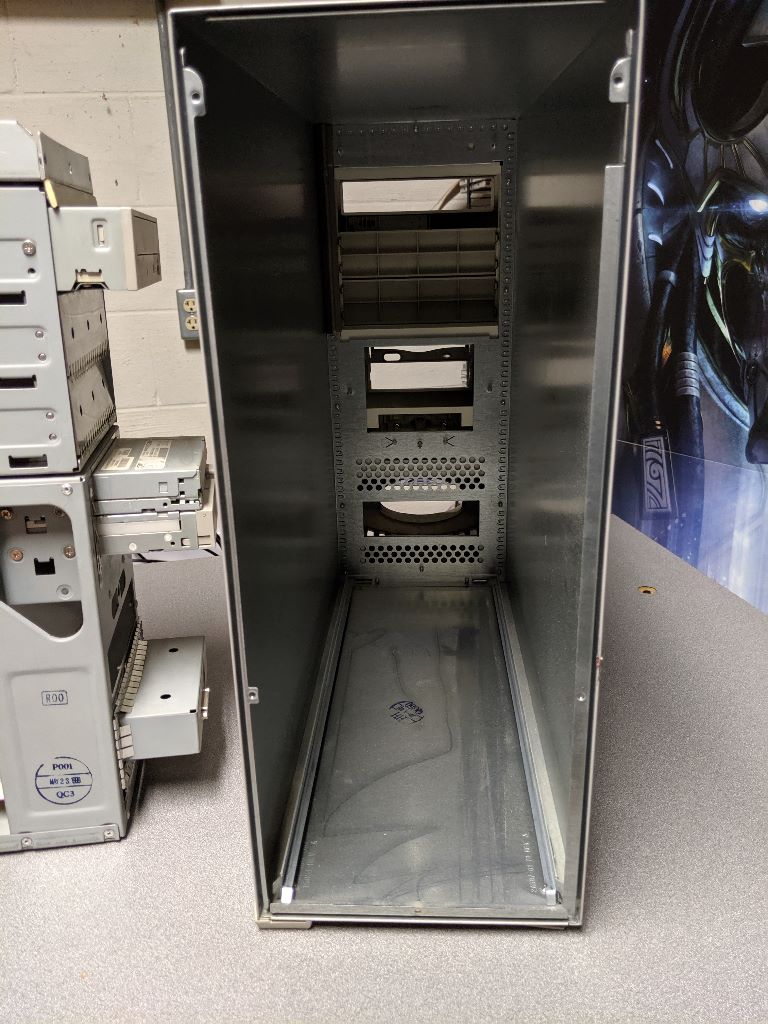
| Empty interior chassis ready to be brought to the 21st century. | 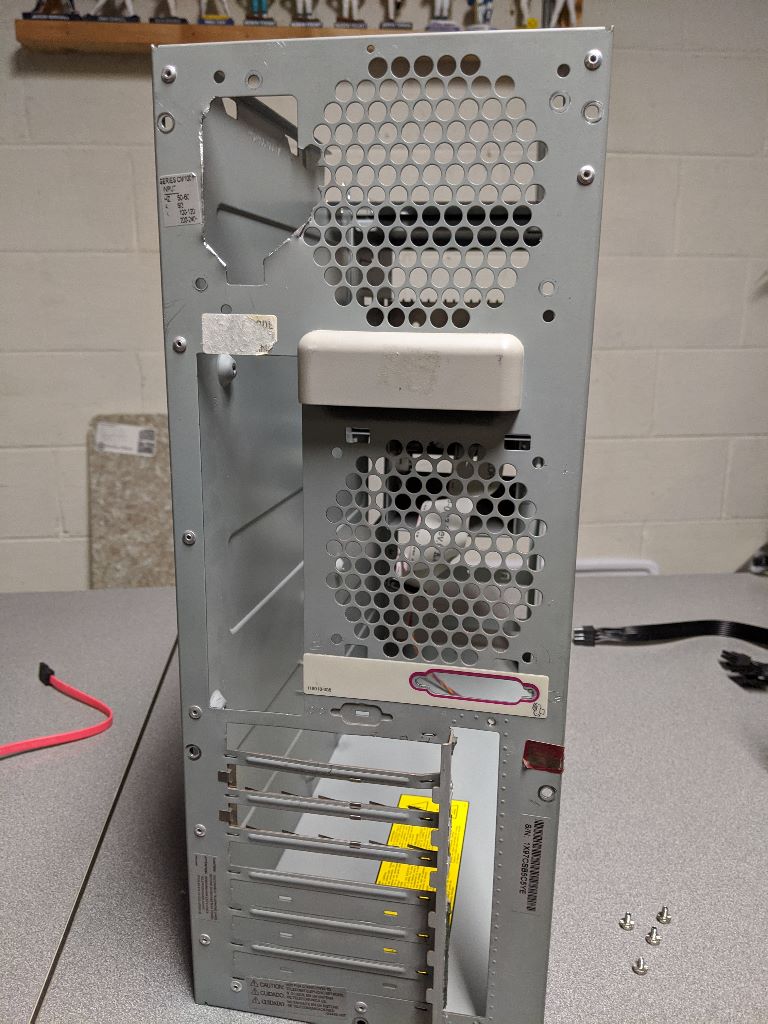 |
 |
|
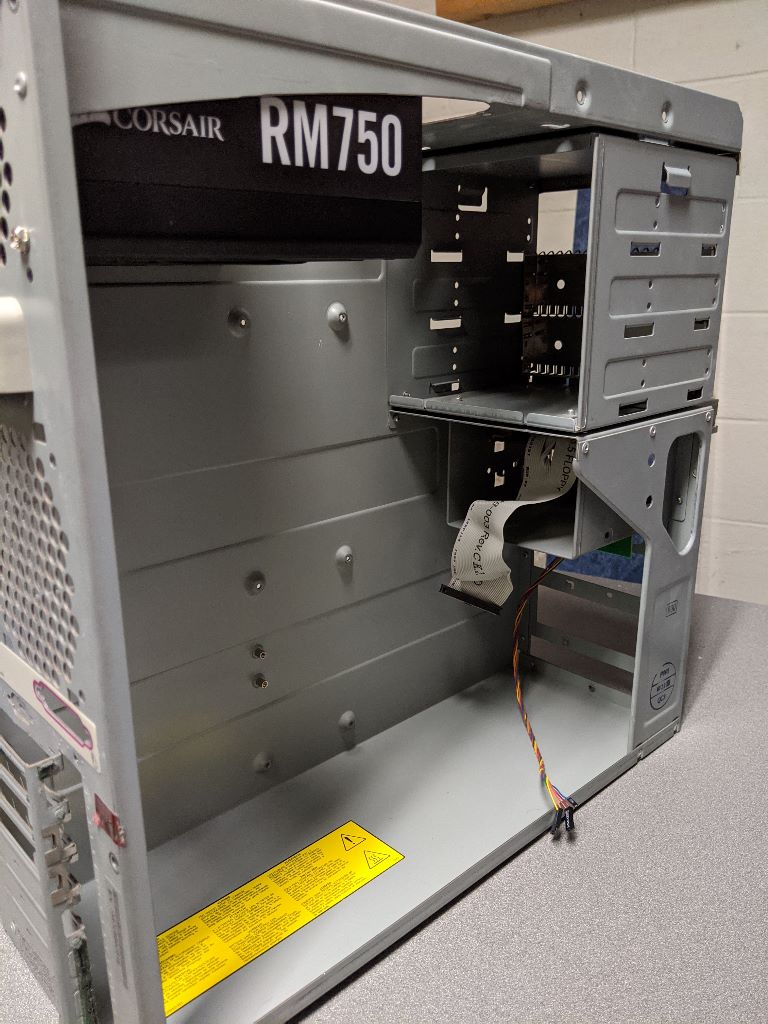
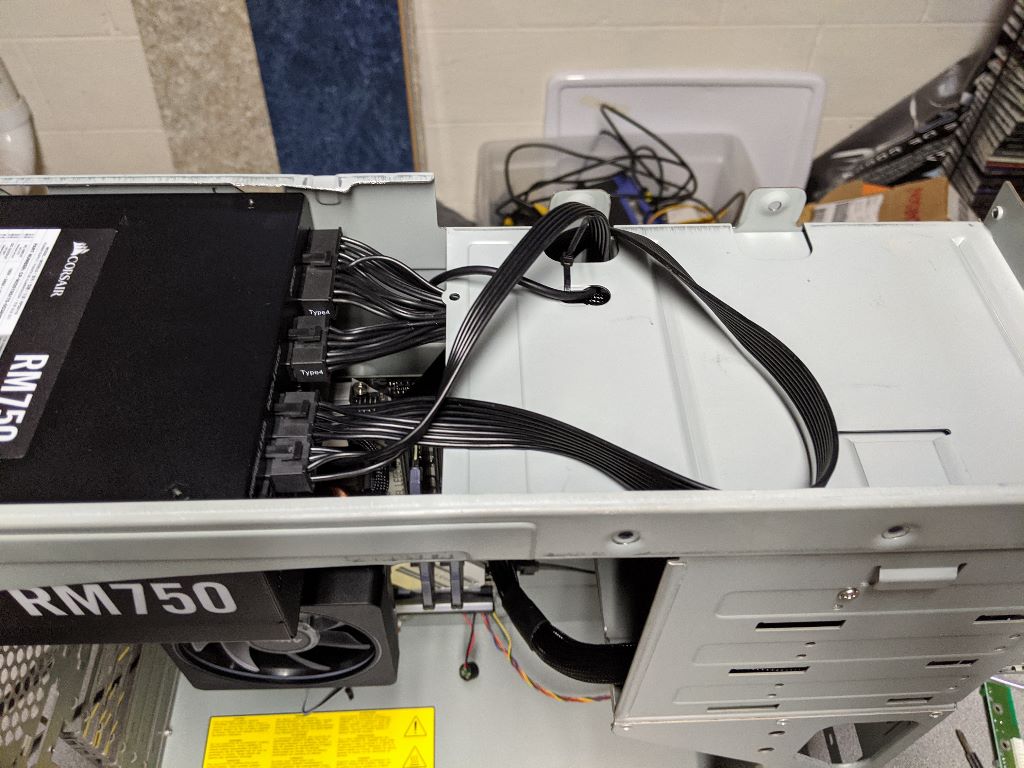
| Power supply installed. | 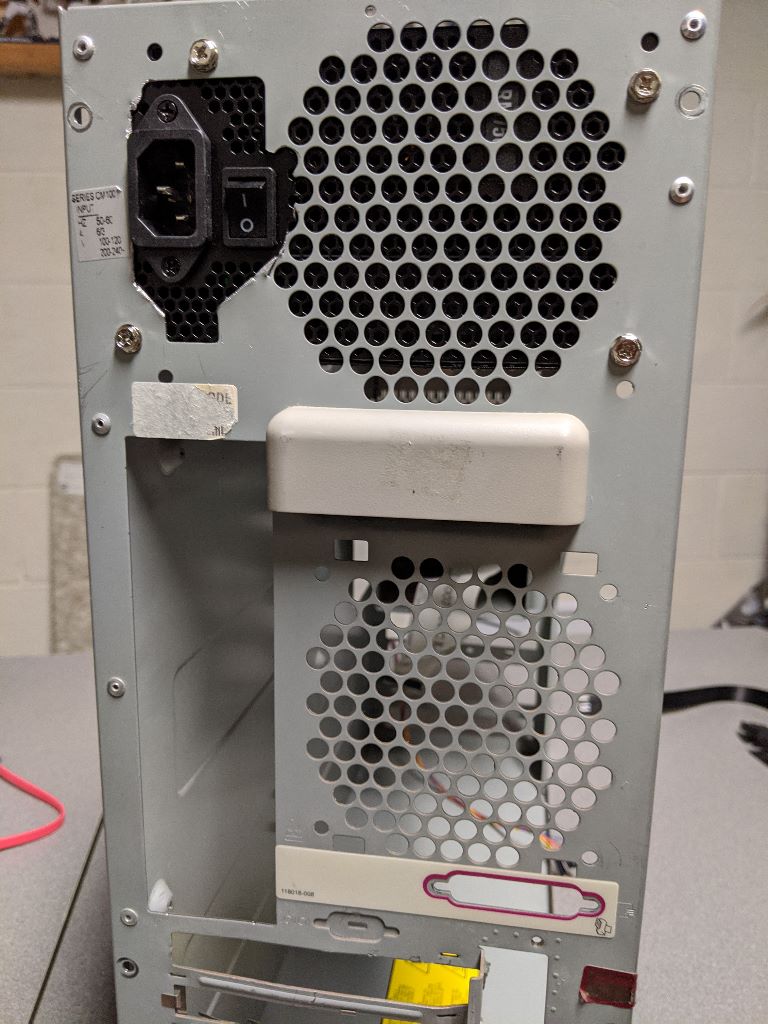 |
 |
|
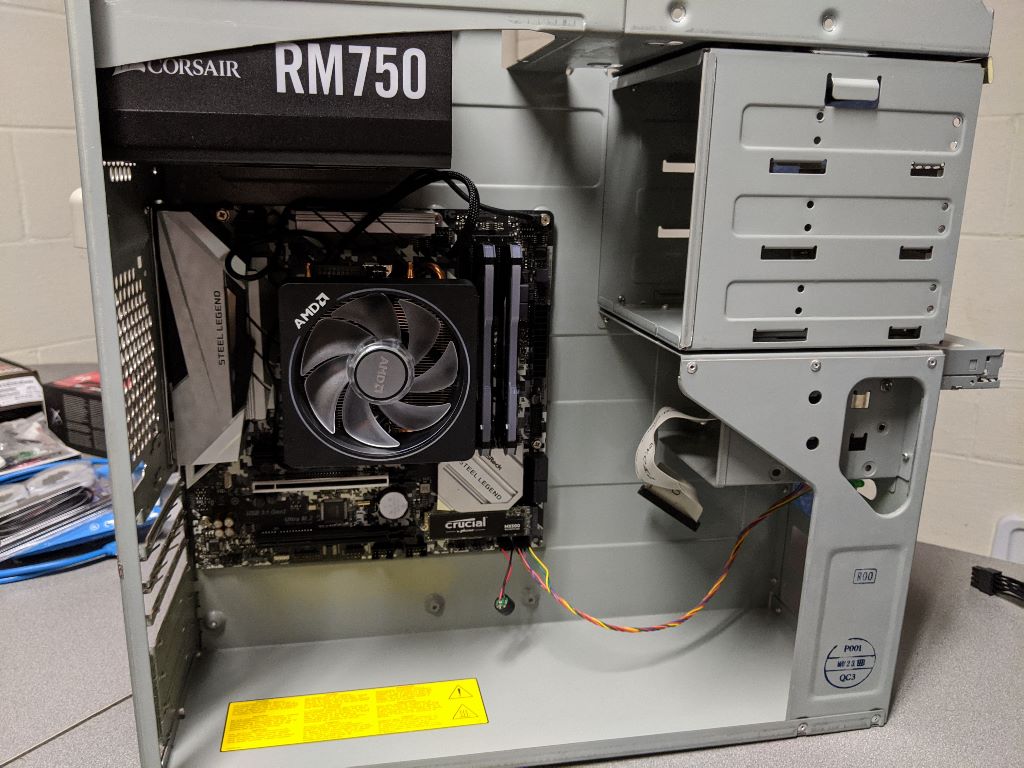
| Motherboard installed along with the M.2 drive. Unfortunately the RGB heatsink would not stay as the graphics card shroud was too bulky. | 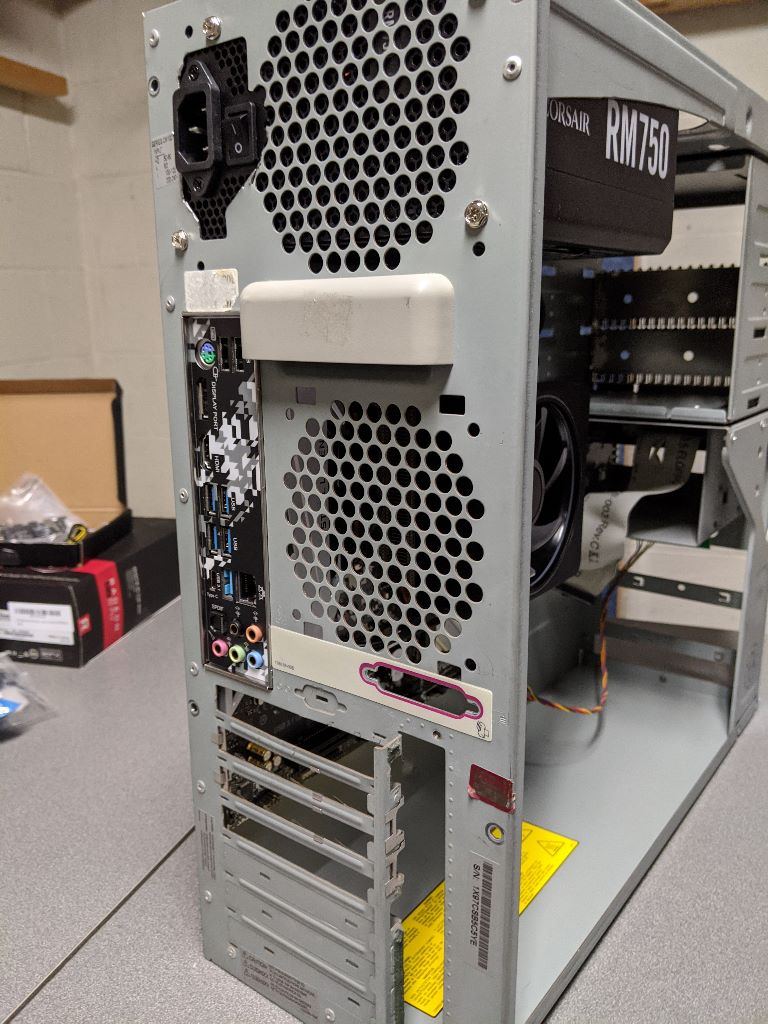 |
 |
 |
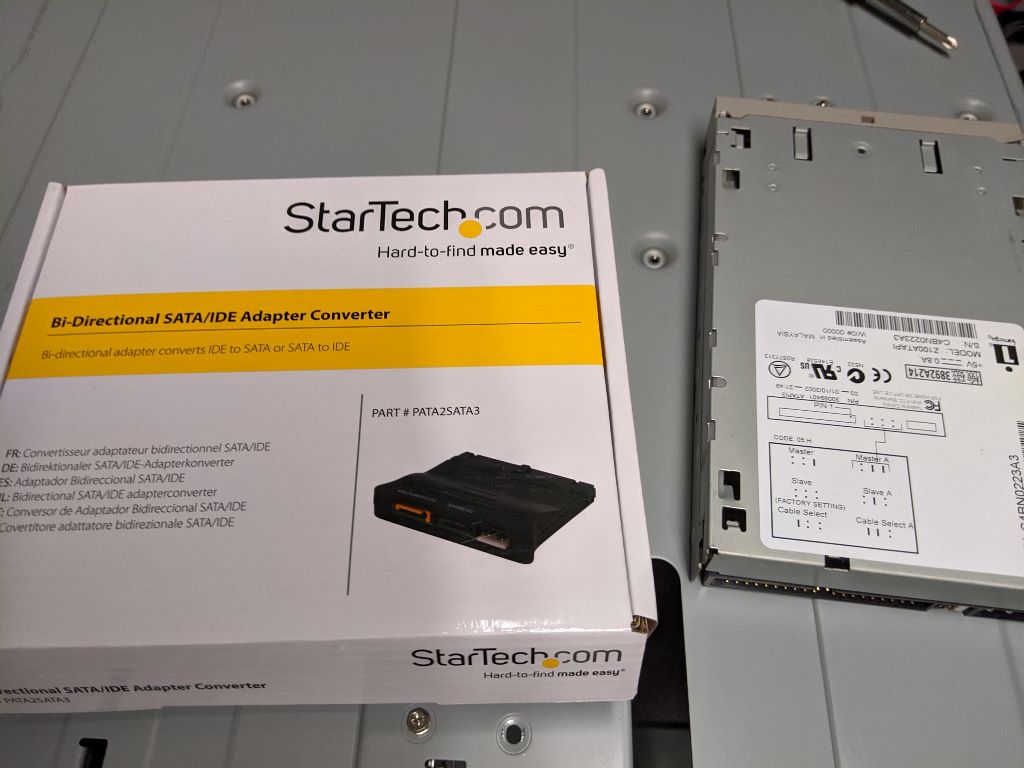
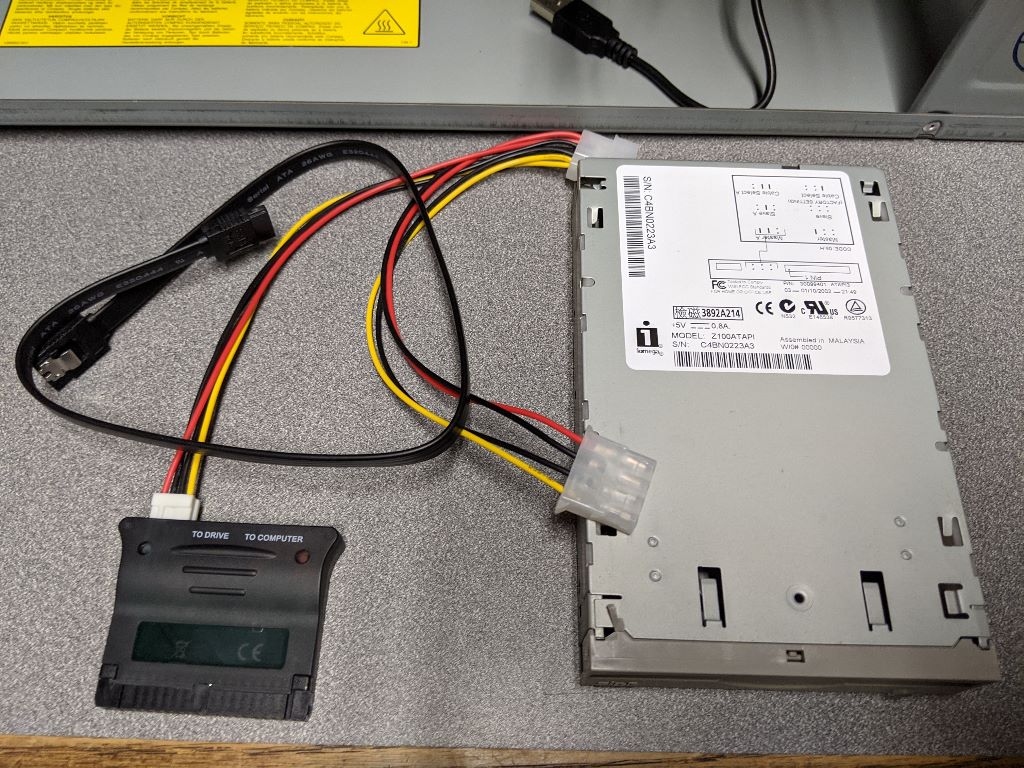
| PATA to SATA |  |
 |
|
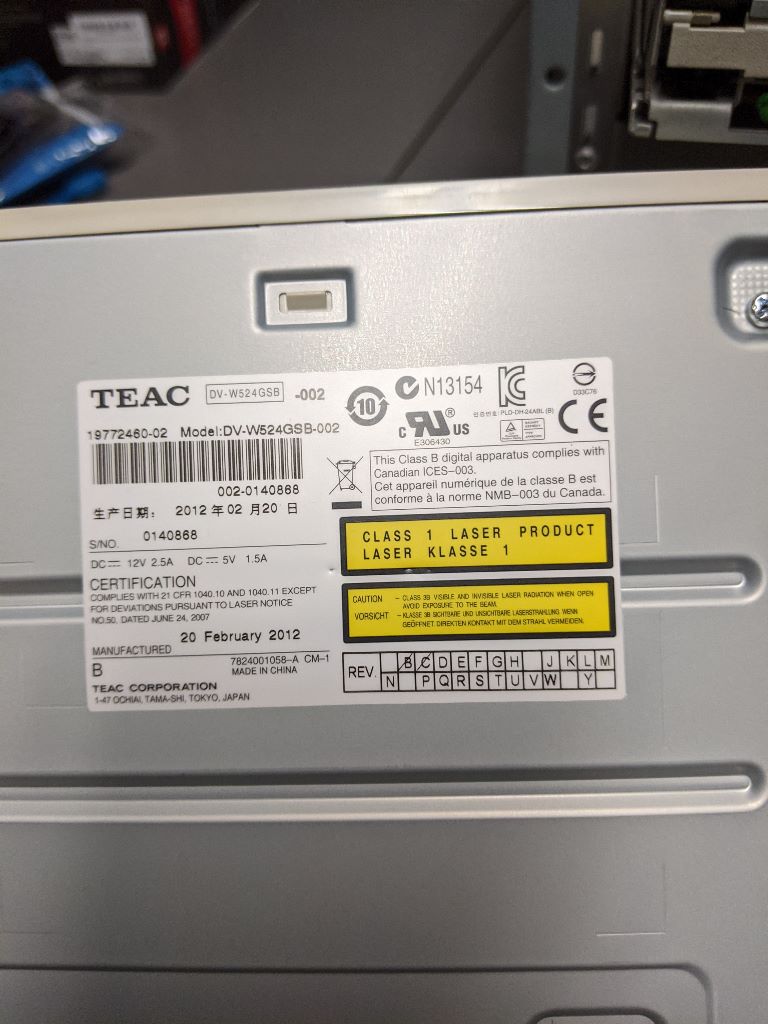
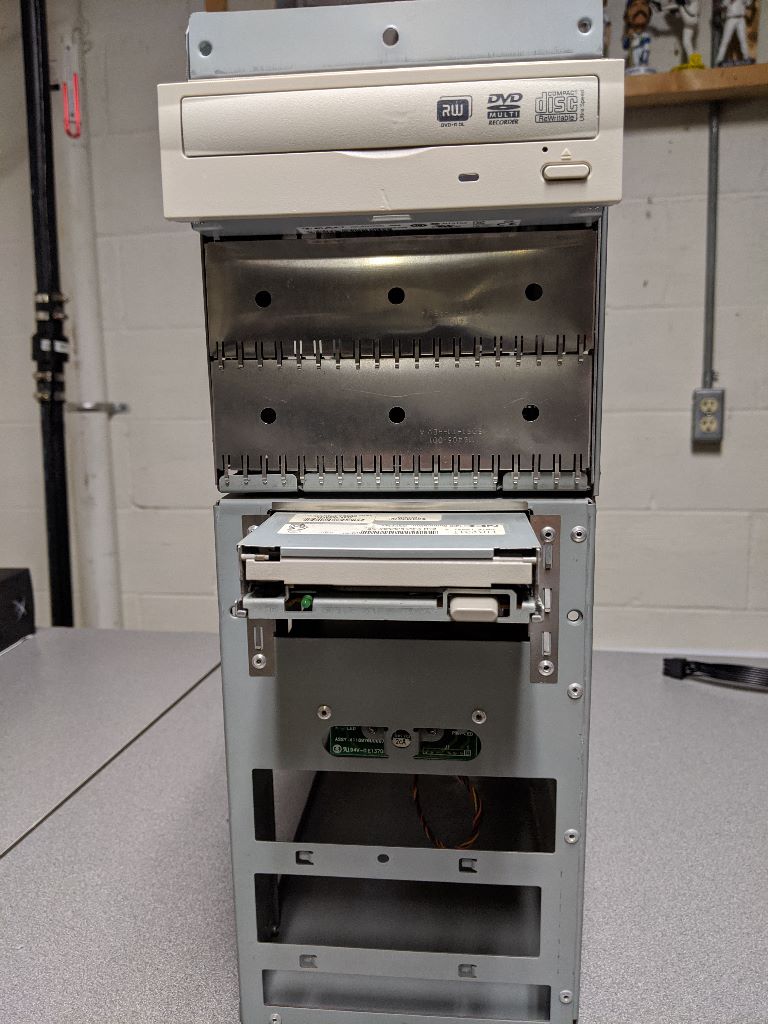
| Keeping it beige baby! | 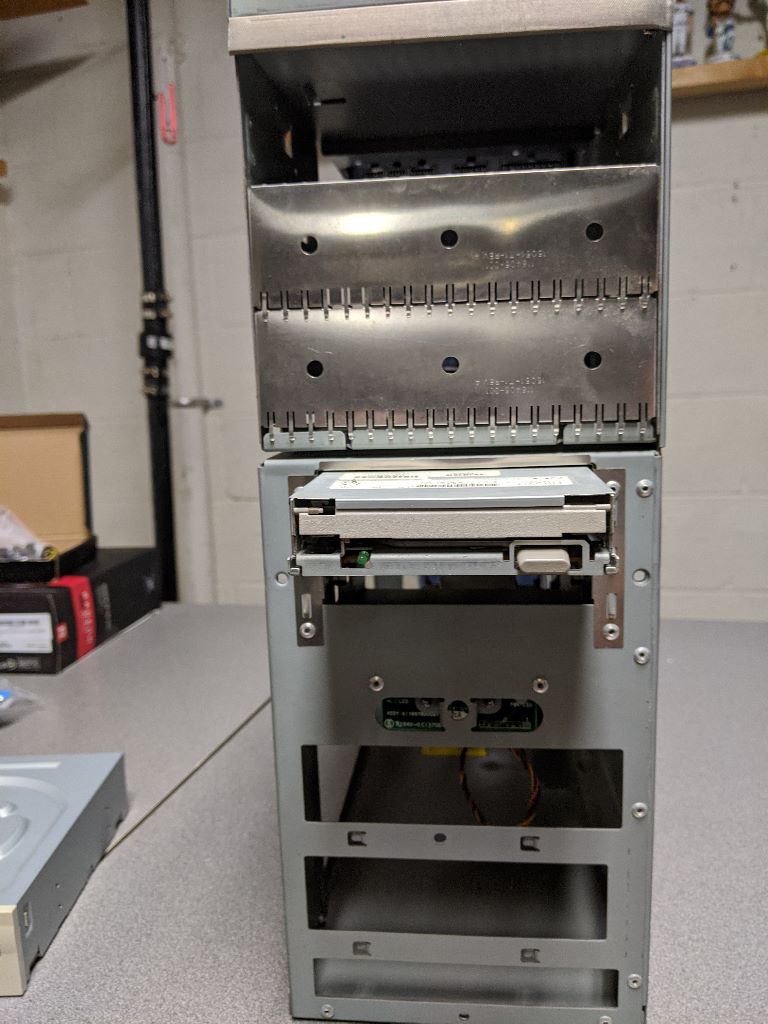 |
 |
|
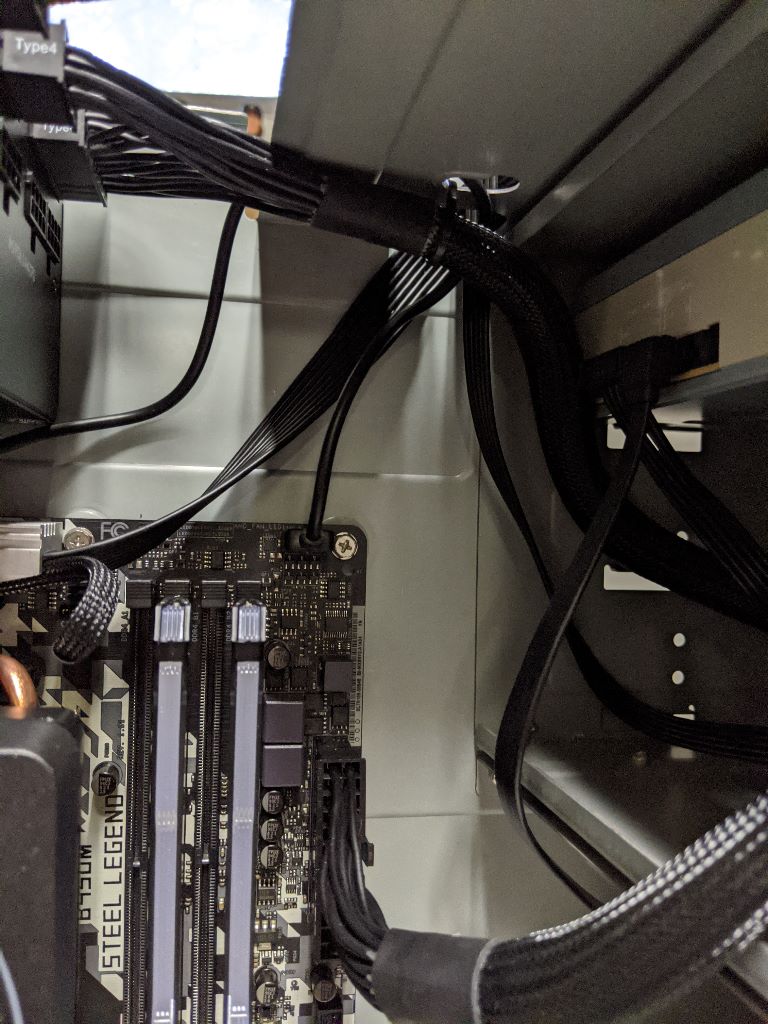
| Cabling is going to get real cluttered real fast in this case. | 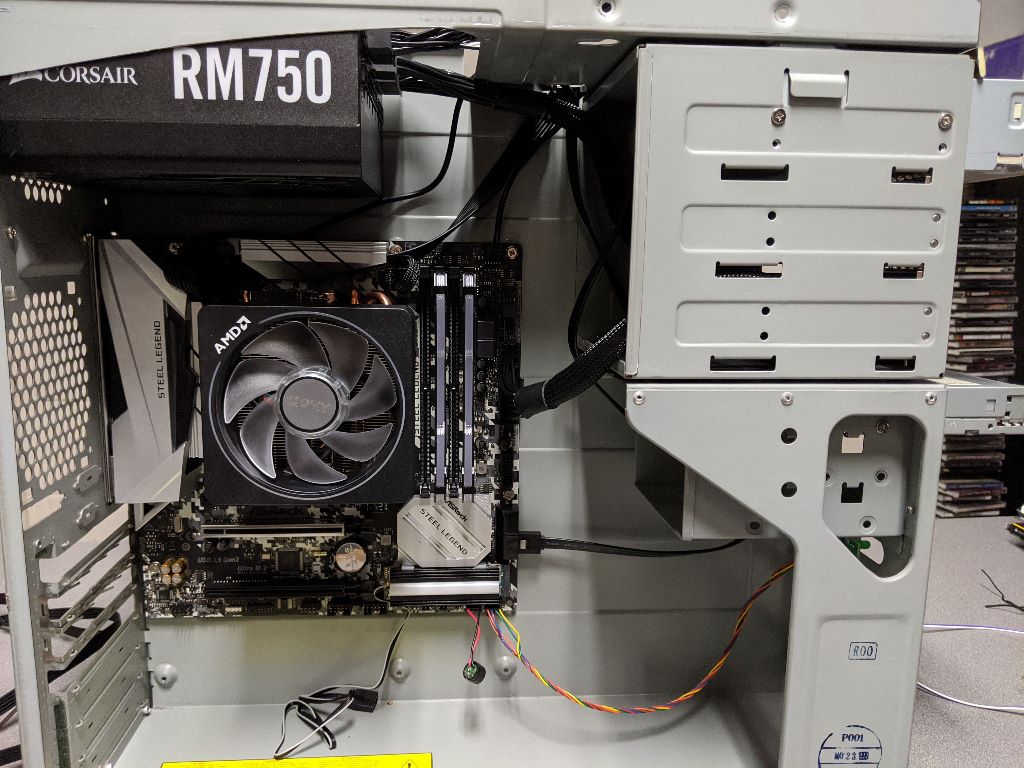 |
 |
 |
| Floppy 34-pin to USB. Could not get this to work but it did power up. | 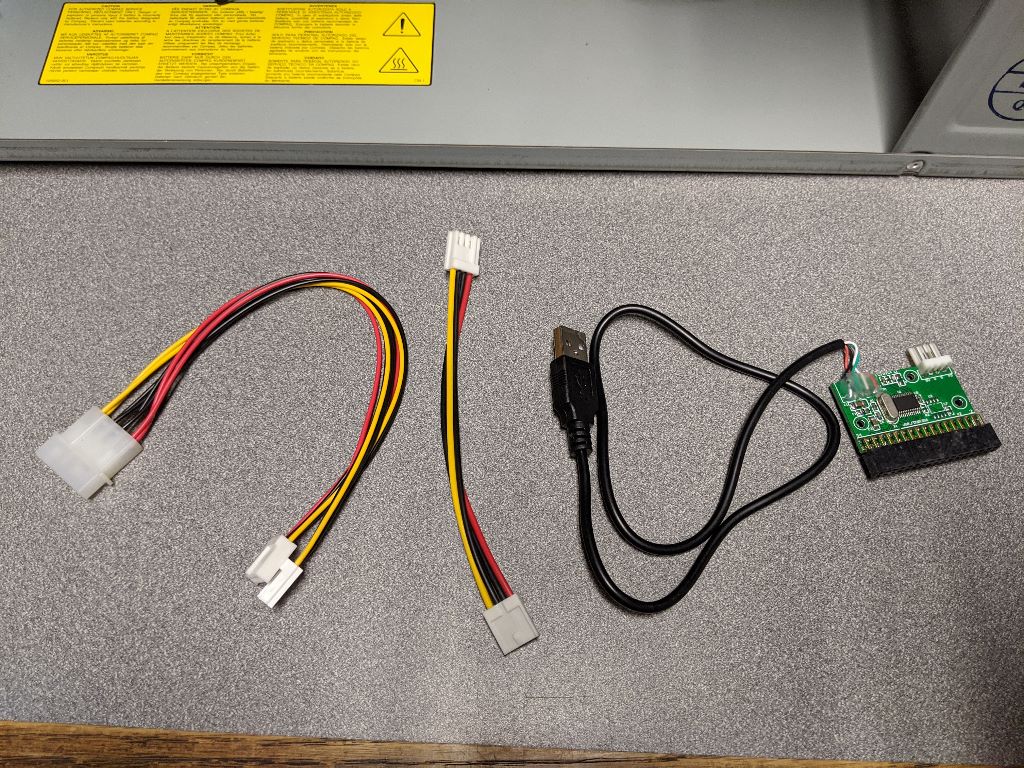 |
 |
|
| Zip drive I also couldn't get to work using IDE to SATA. Windows wouldn't boot then the PC would restart | 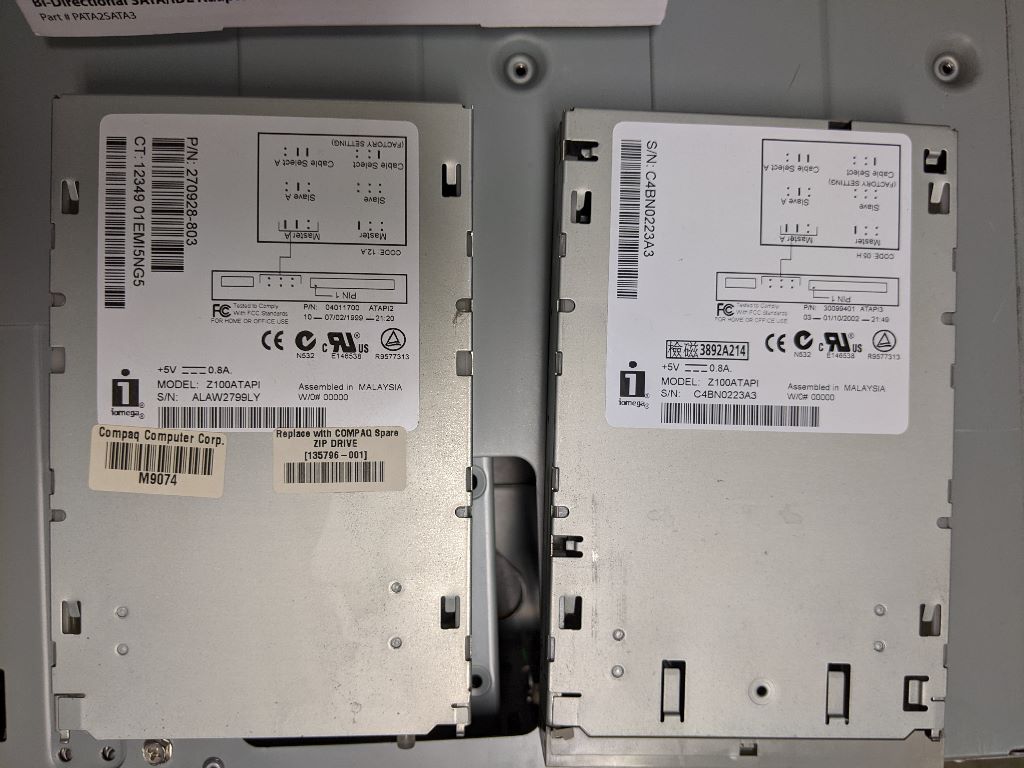 |
 |
 |
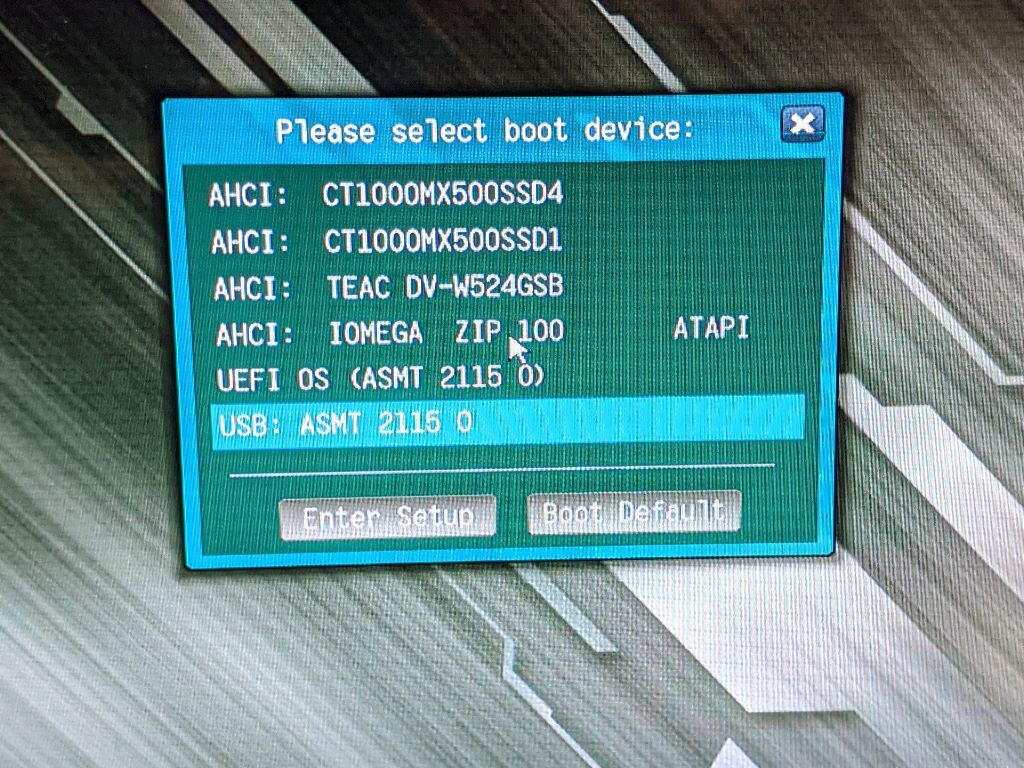
| Super cool looking and the UEFI saw the drive. I tried a PATA to USB adapter and got Windows to see the drive but acted like the disk was read-only, wouldn't format. | 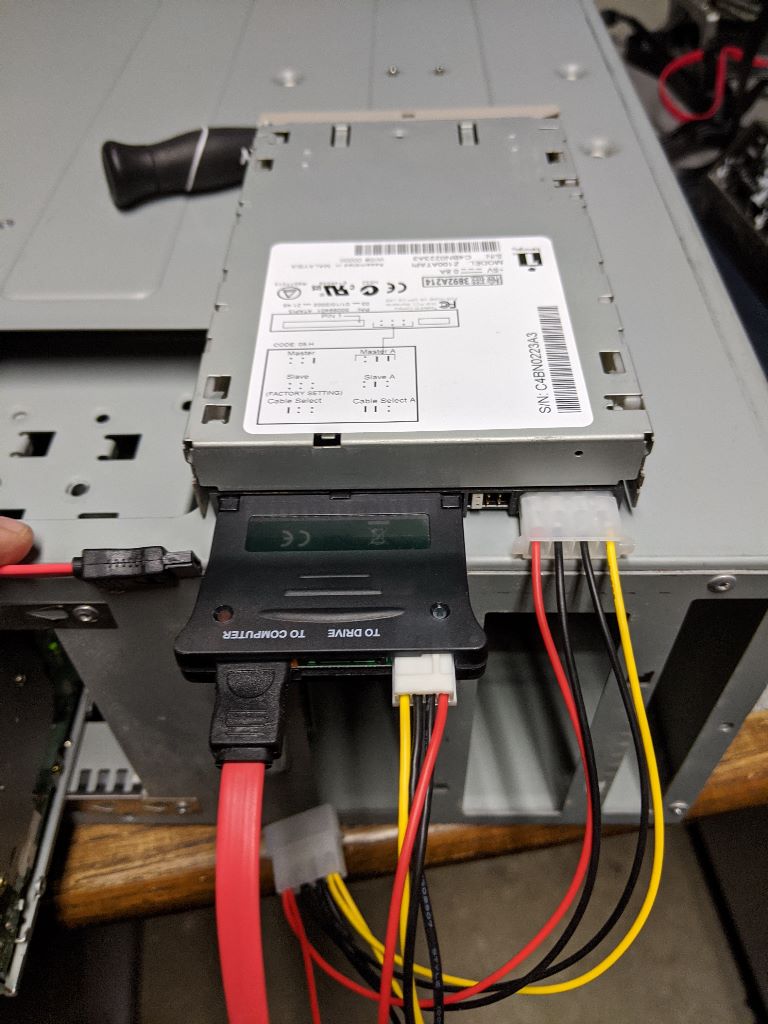 |
 |
 |
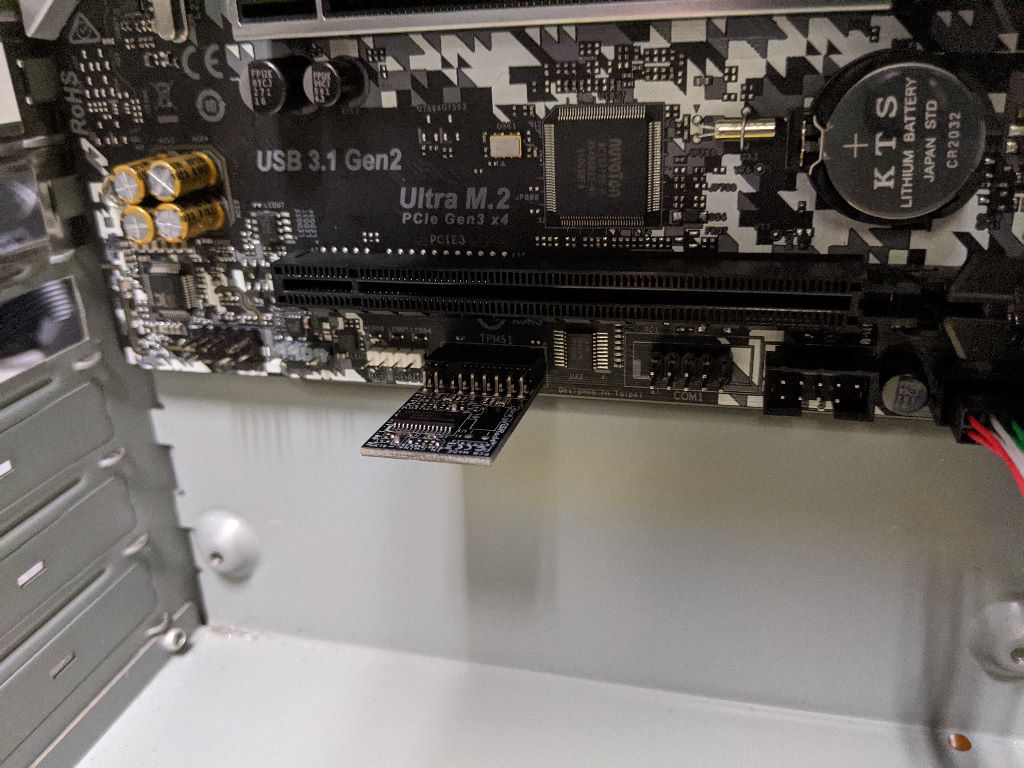
| TPM - cause if you can't trust your platform module, what can you trust? | 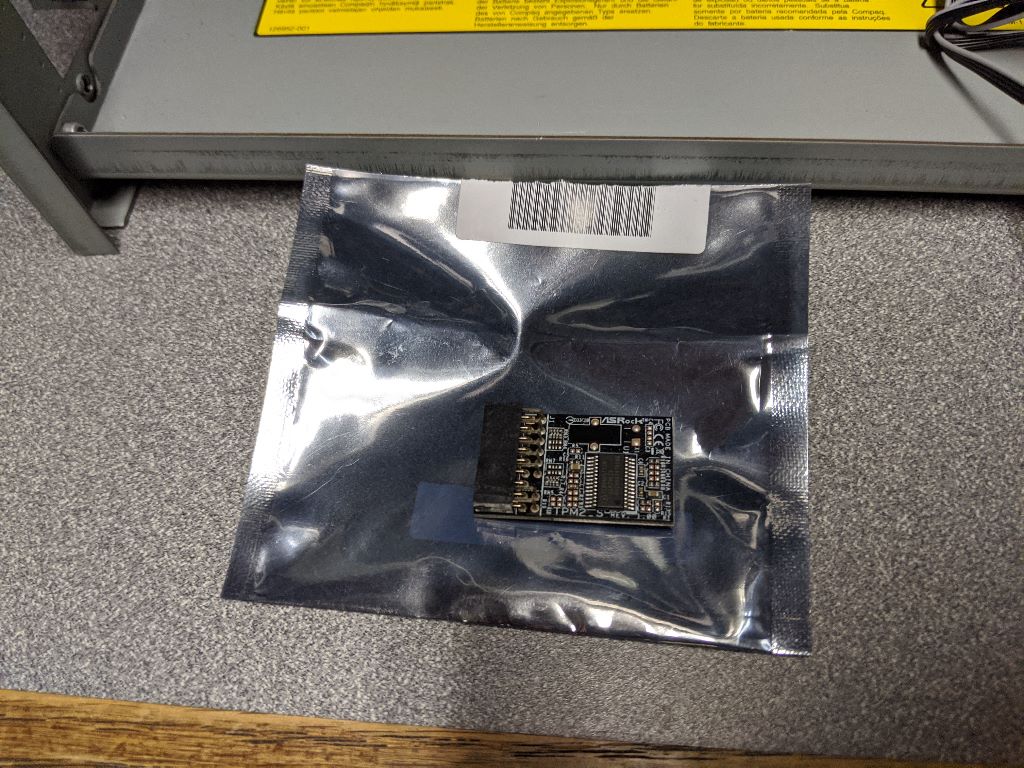 |
 |
|
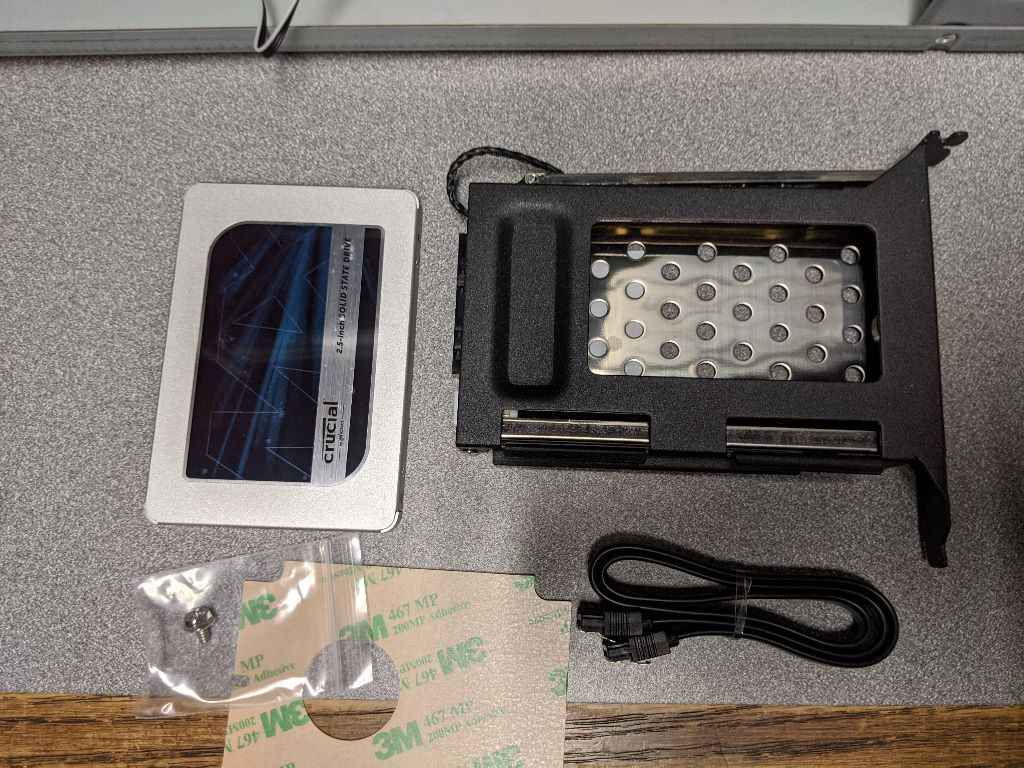
| Secondary hard drive used as an onboard backup device. |  |
 |
 |
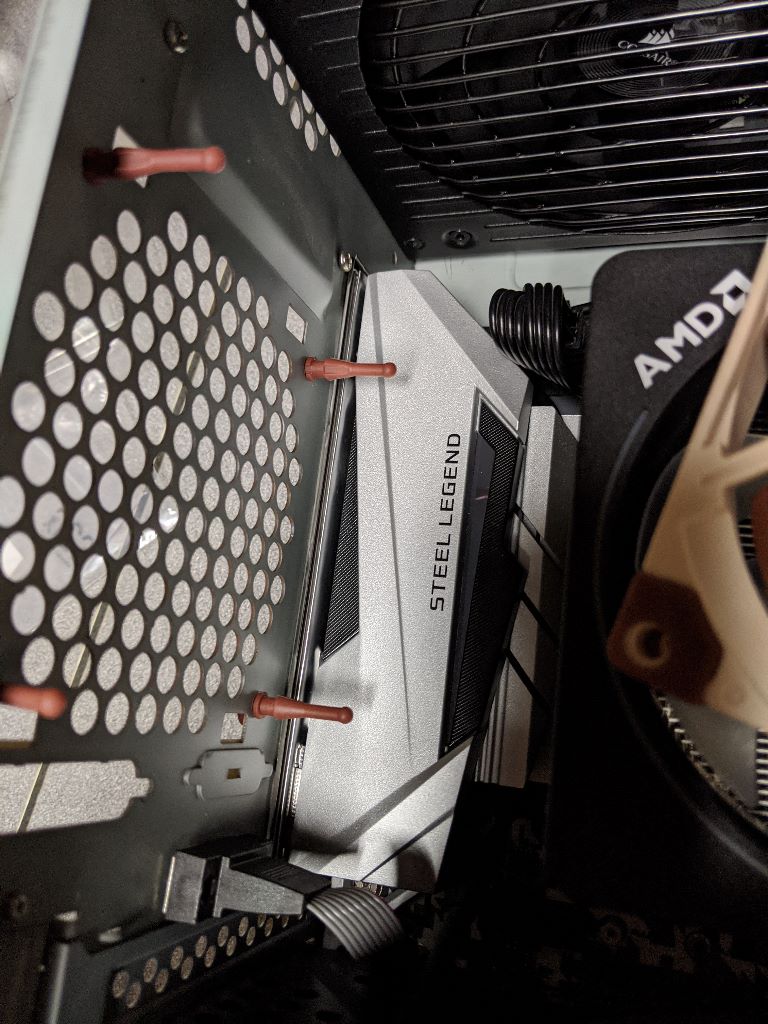
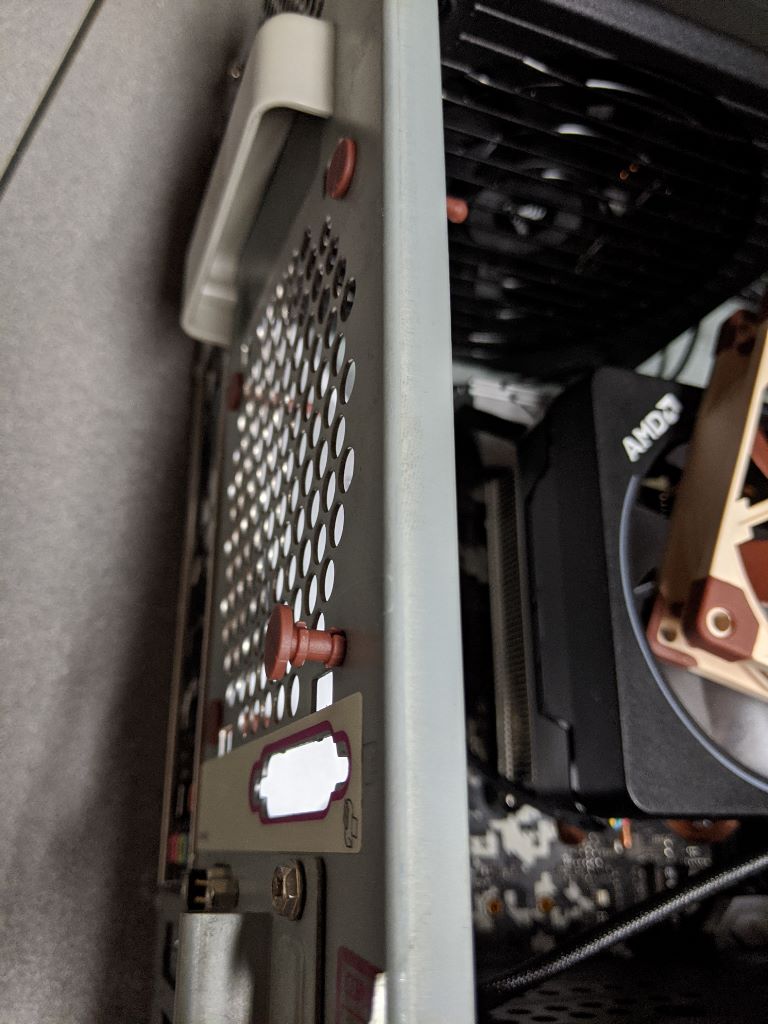
| ejectable without opening the case. | 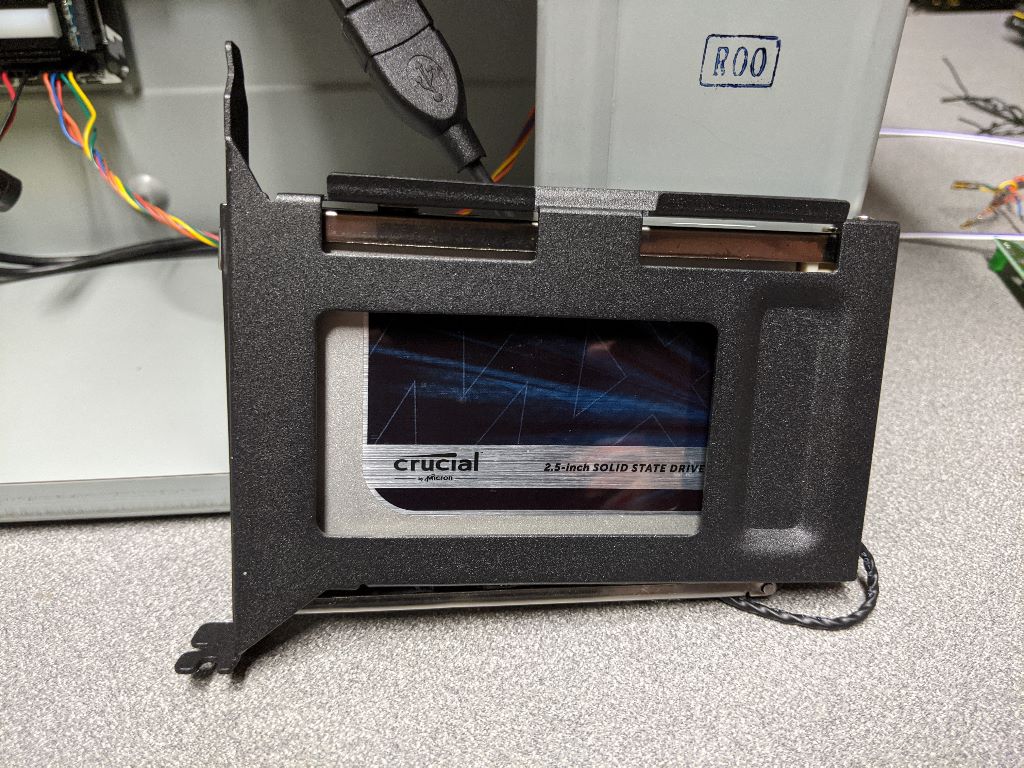 |
 |
 |
| Never know when I might need to console into something. |  |
 |
 |
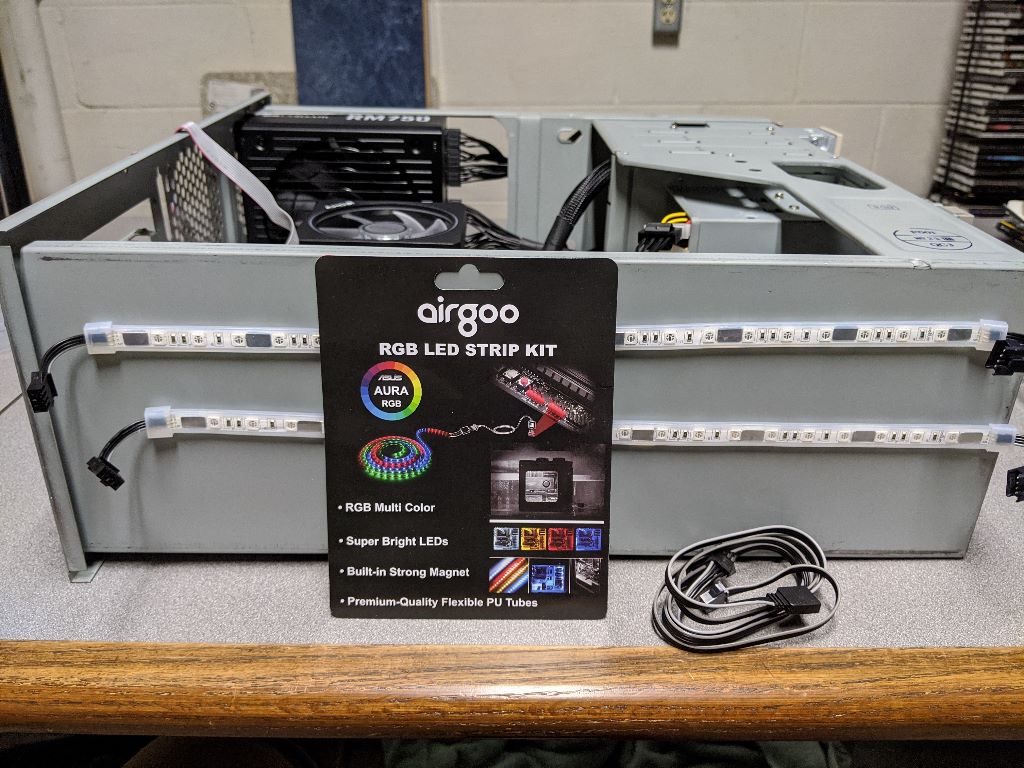
| Turning one RGB header into four. | 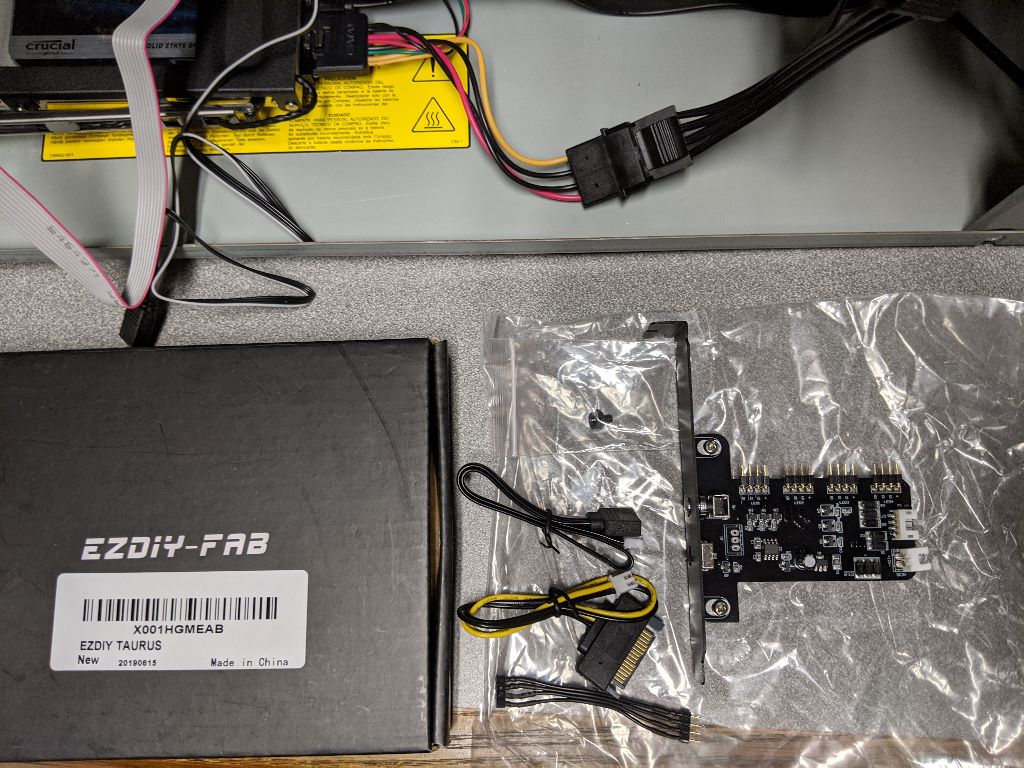 |
 |
 |
| New graphics card and case fan. Fan is 92mm, annoying form factor but excellent quality fan by Noctua. |  |
 |
 |
 |
 |
 |
|
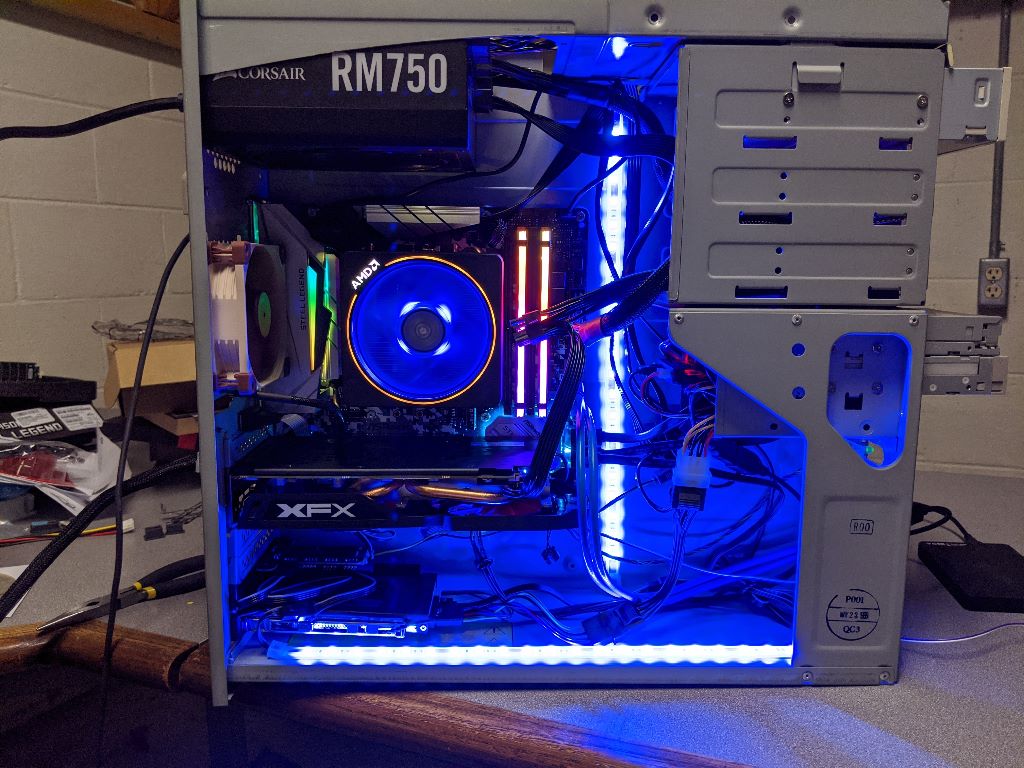
| The payoff! |  |
 |
 |
Up next are all the pictures from modifying the case and installing the window.
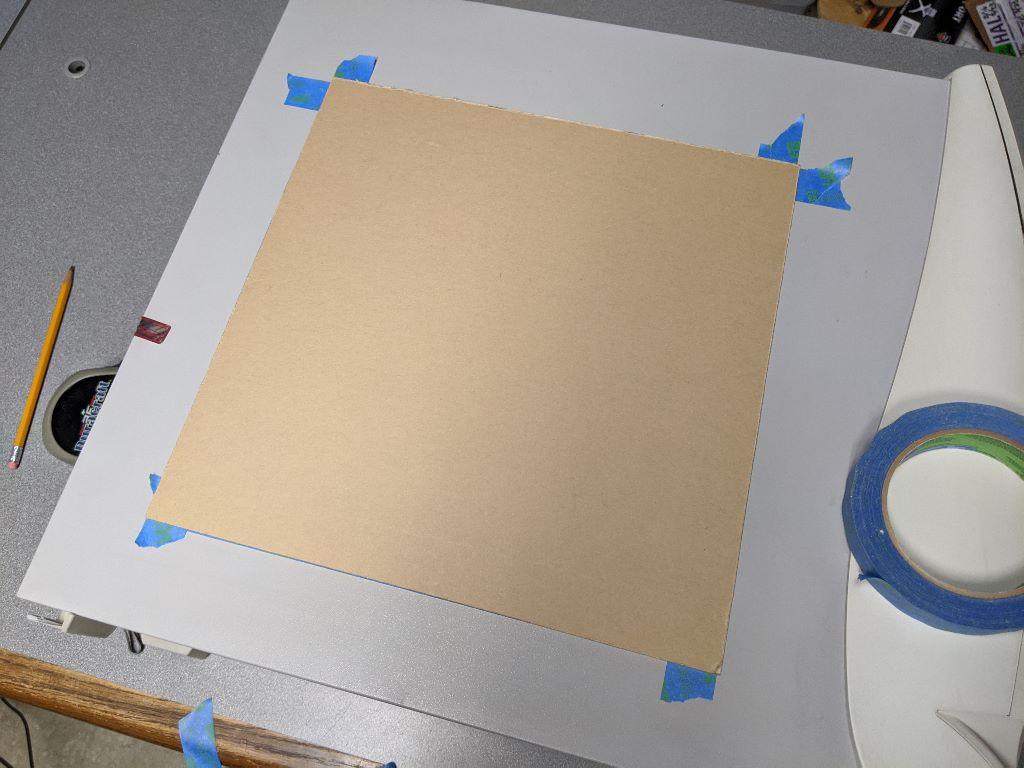
The window is 12"x12". The cutout will need to be less than that so that the plexiglass can adhere to the case. |
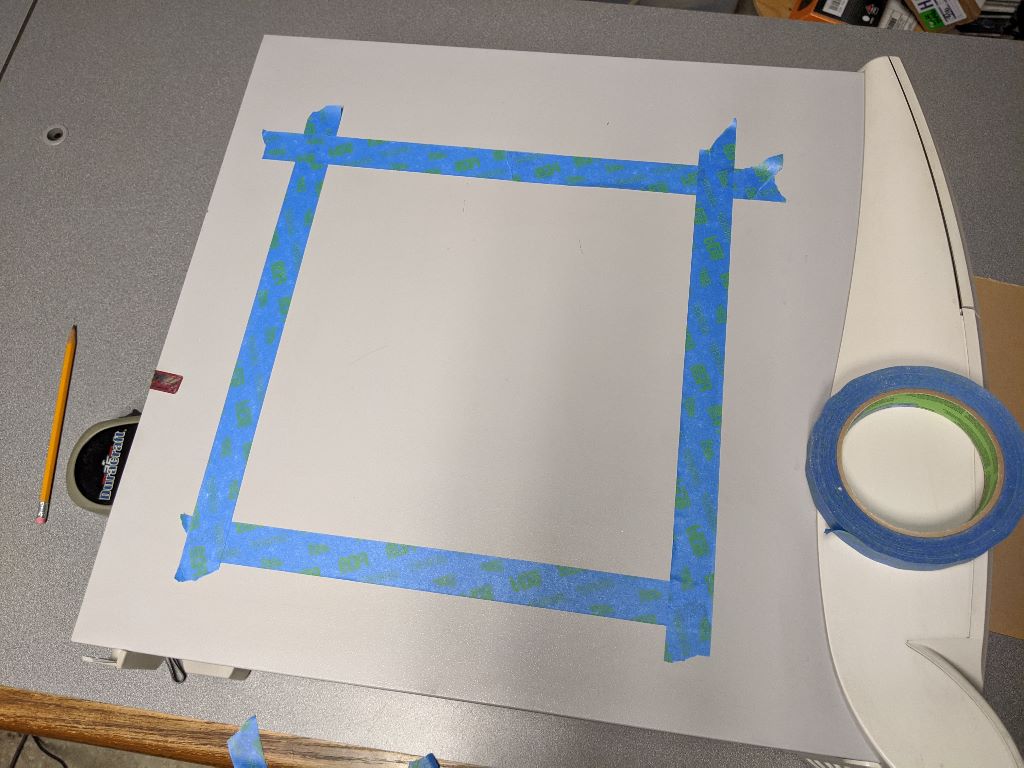
I taped another square inside of my inital tape job. Tape is 1" wide which means my actual opening will be 10"x10", leaving 1" all around the plexiglass. |
I'll be cutting the inside track of the tape. |
10", looking good! |
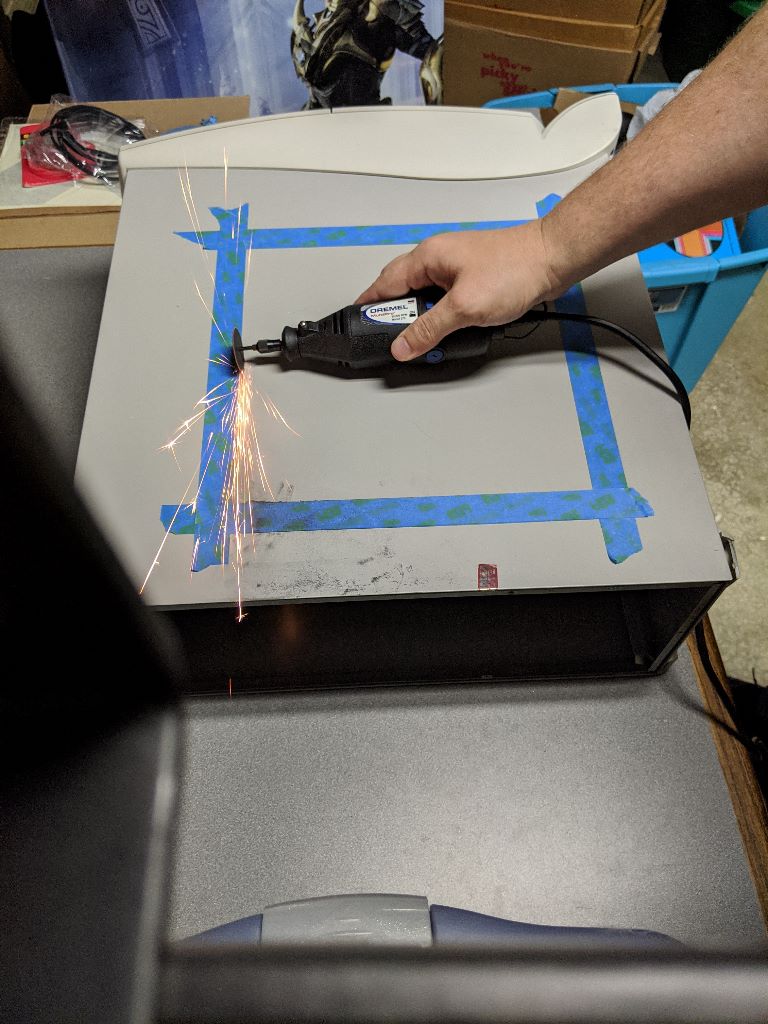 |
I didn't have any better tape nearby so I used extra painters tape to help hold up the piece I was cutting out. I didn't want to cut while it was bending. |
First time I ever used a Dremel to cut steel and it was a lot of fun. I made sure to wear safety glasses and ear plugs for safety. I probably should have worn cut resistant gloves too. Always be safe when working with tools capable of causing injury!
Came out nice and easy. Not pictured is the metal filing done similar to what I did for the PSU. |
A rubber gasket called "U-channel" to help mask any imperfections (of which there was many) and provide a cleaner install. |
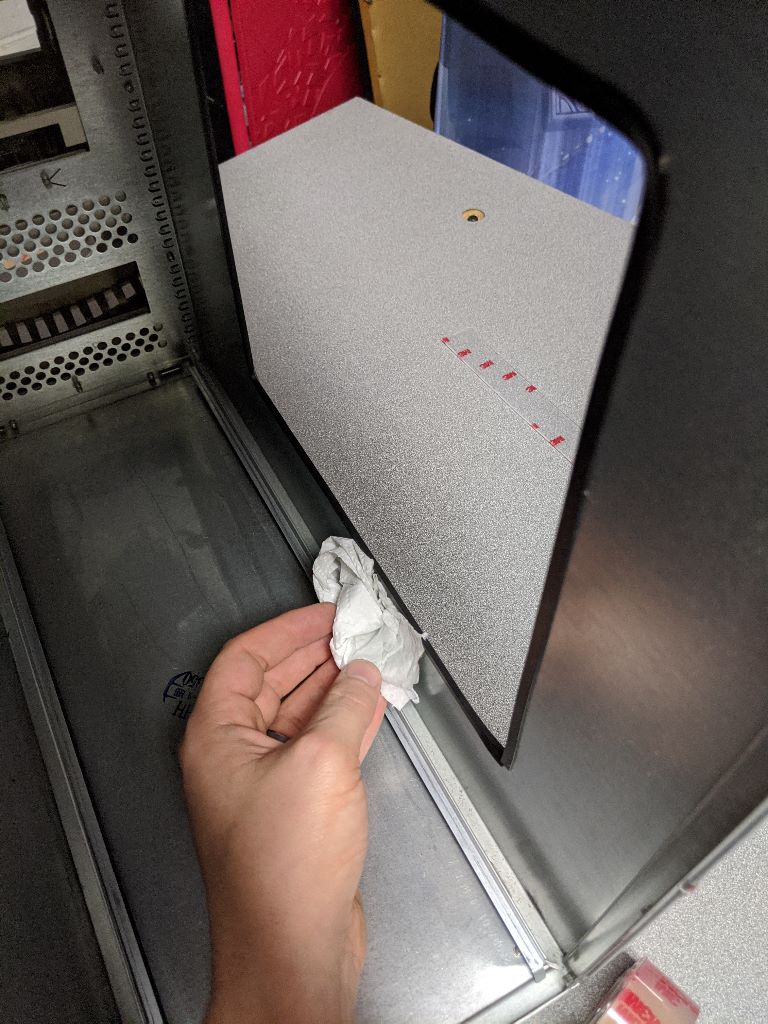
Wiping up excess dirt, paint flecks, and metallic debris with a damp cloth. |
Checking the fit for where the plexiglass will go. I want to minimize any excess tape. |
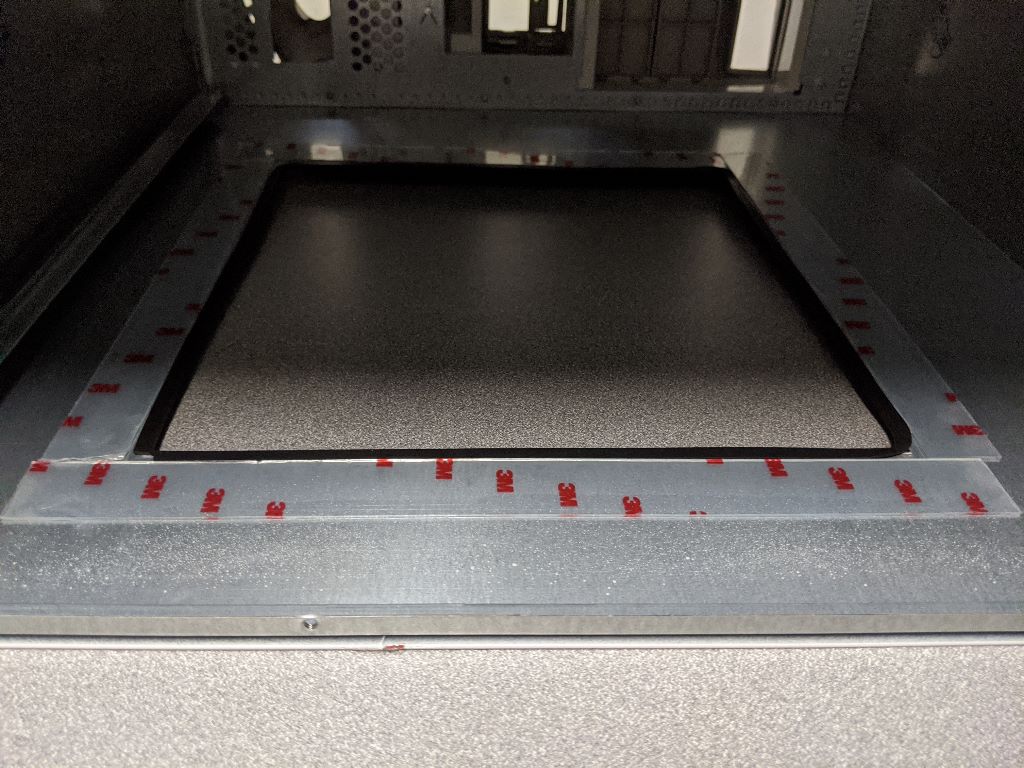
The 1" double sided mounting tape is a perfect height with the u-channel and will make for a good seal when the window is in. |
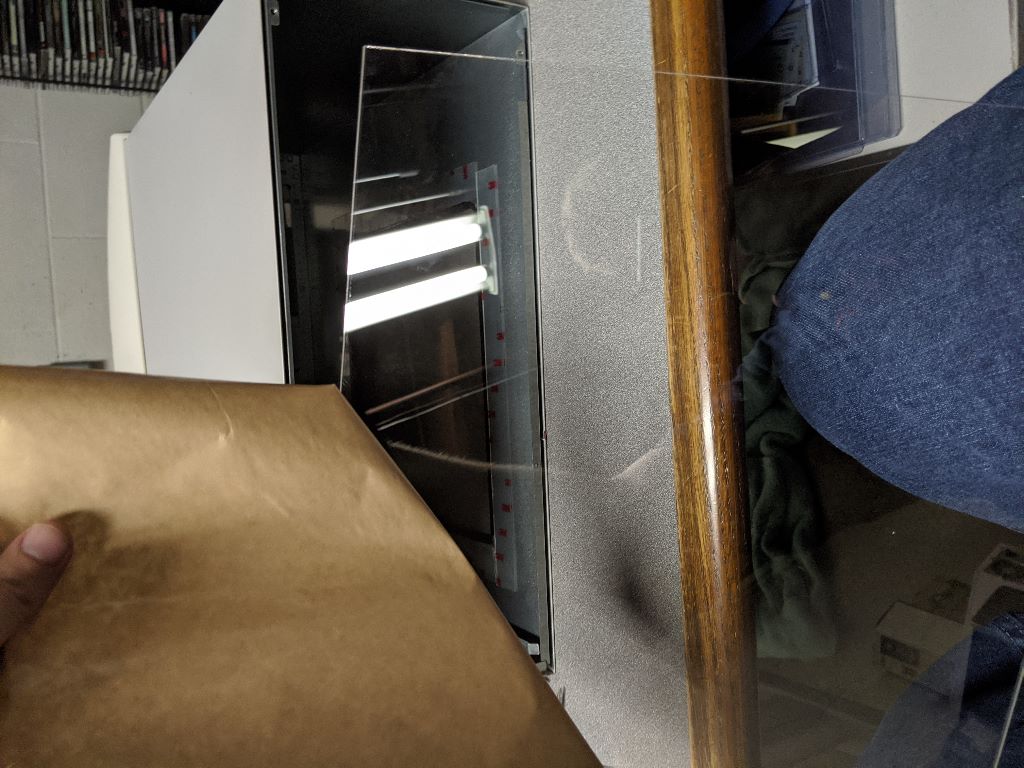
It's like peeling a new cell phone screen but much more satisfying! |
During all this I had to make sure I was going a bit slow because I saw it all coming together and was getting excited to see the end product. Don't want to get sloppy this late in the game.
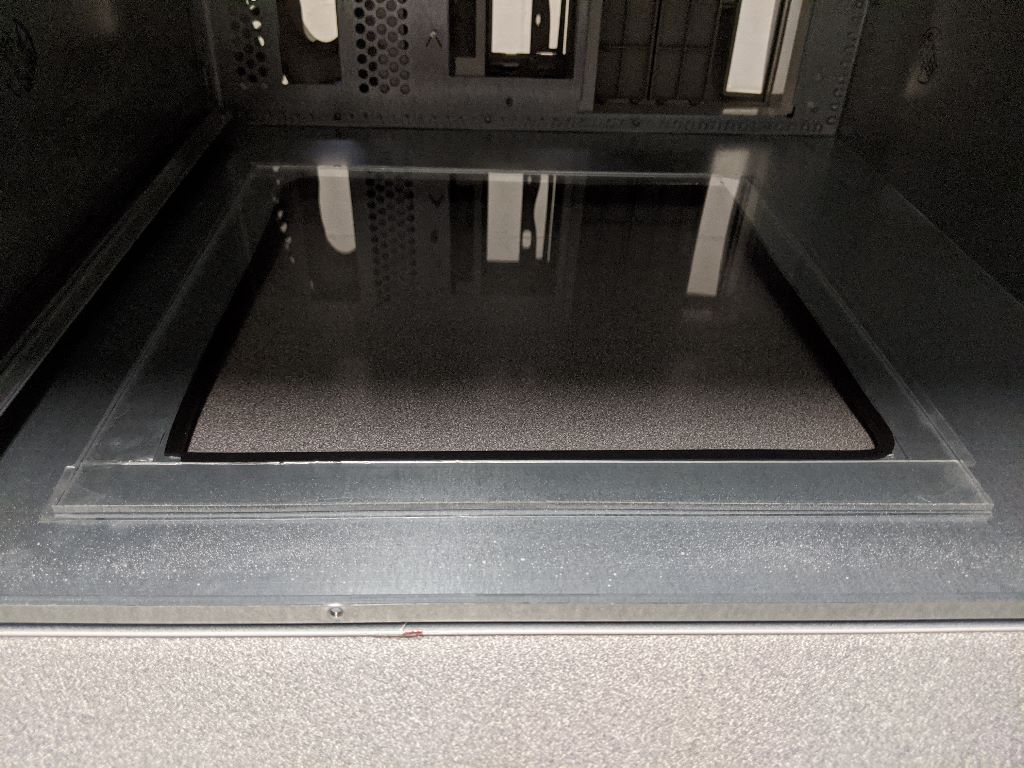
A little excess tape thanks to the u-channel spacing but not bad. Over time dust will make it less sticky. |
|
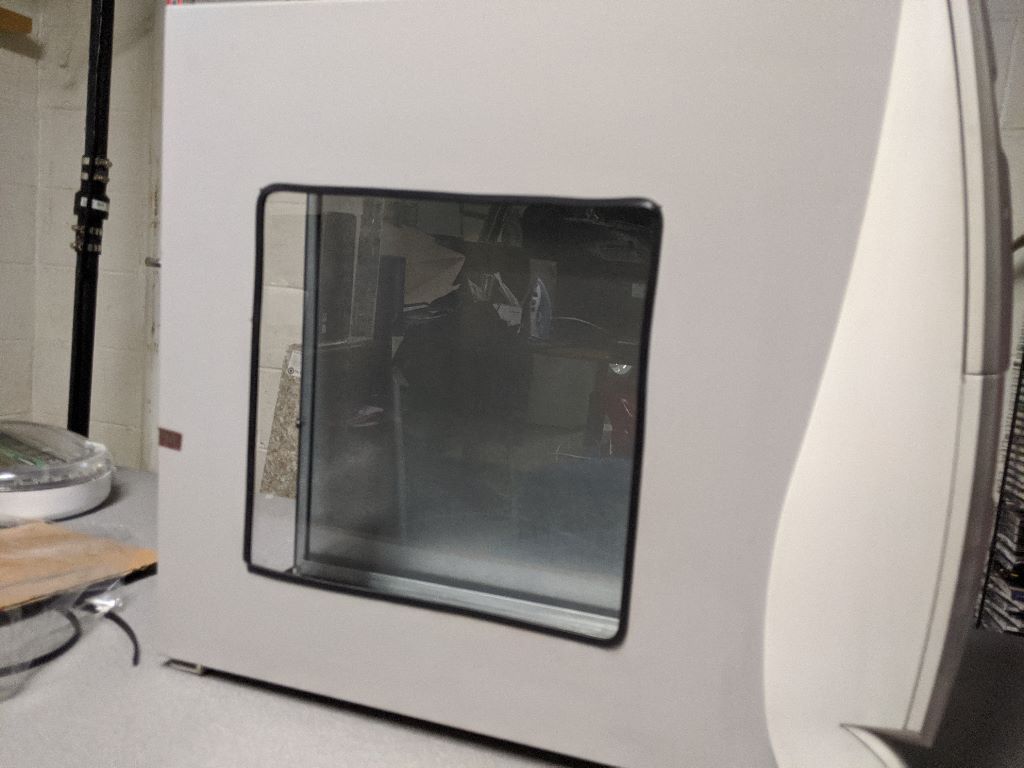
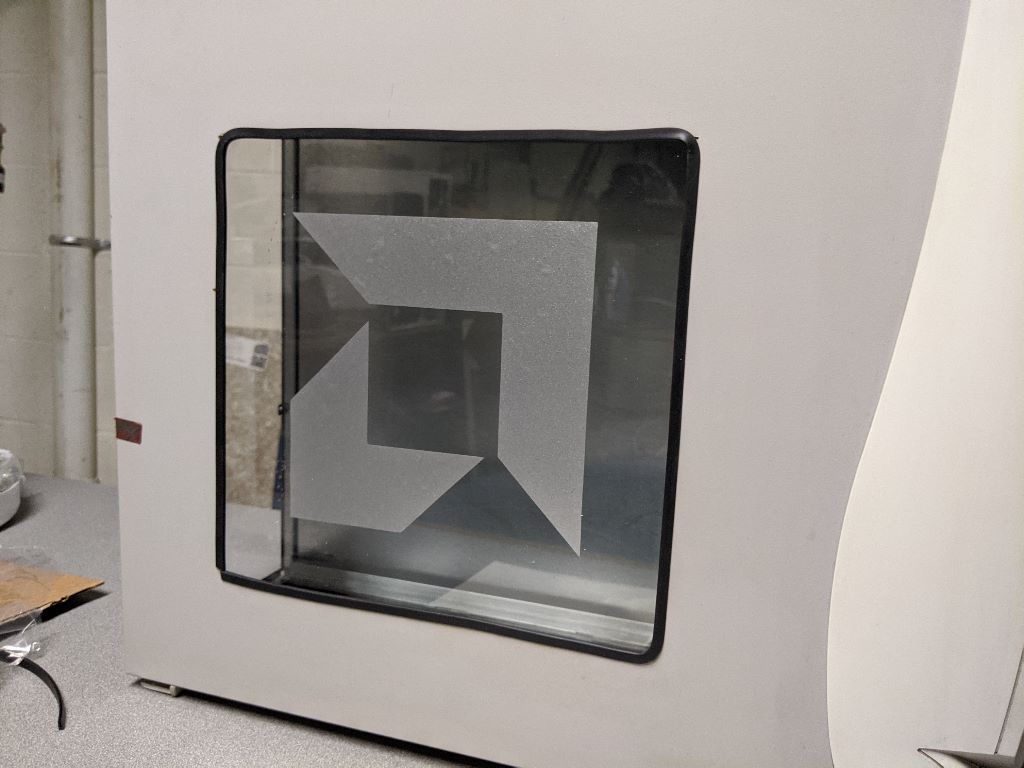
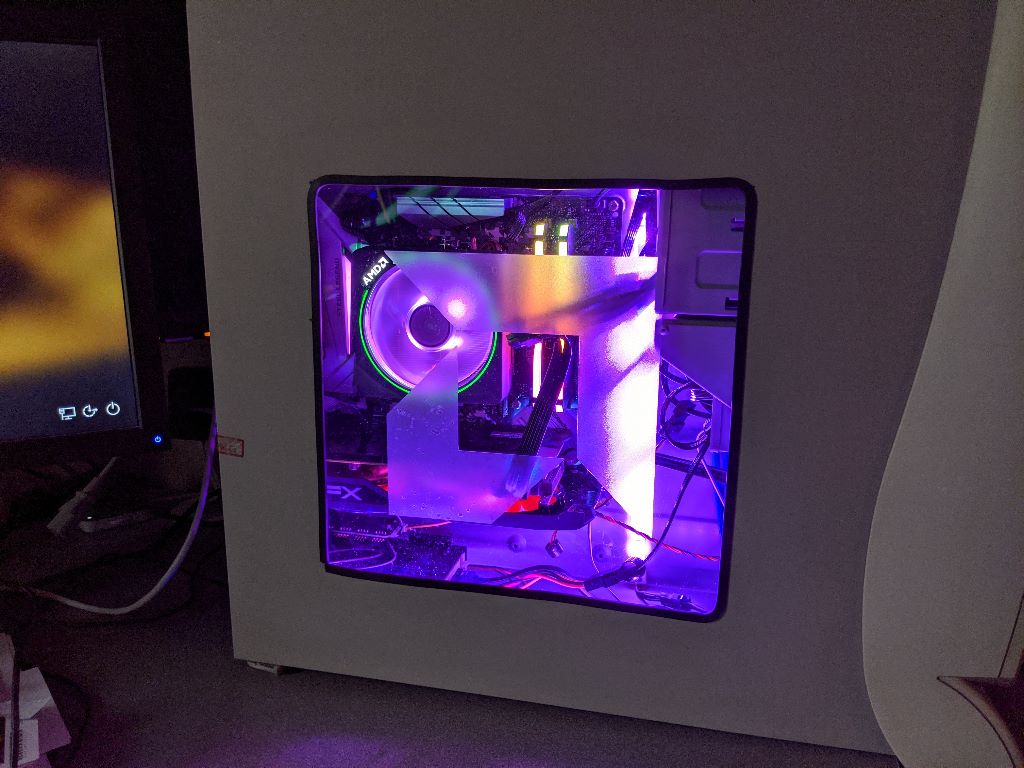
Not content with a simple window, I'm applying an etched style sticker. |
AMD! |
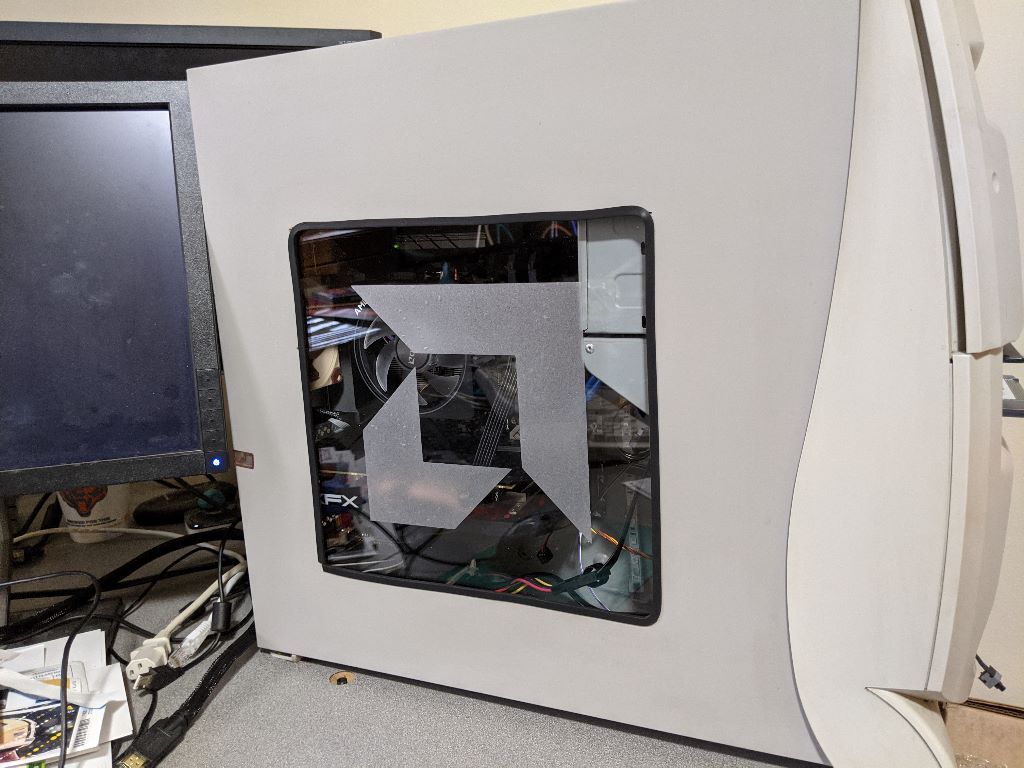
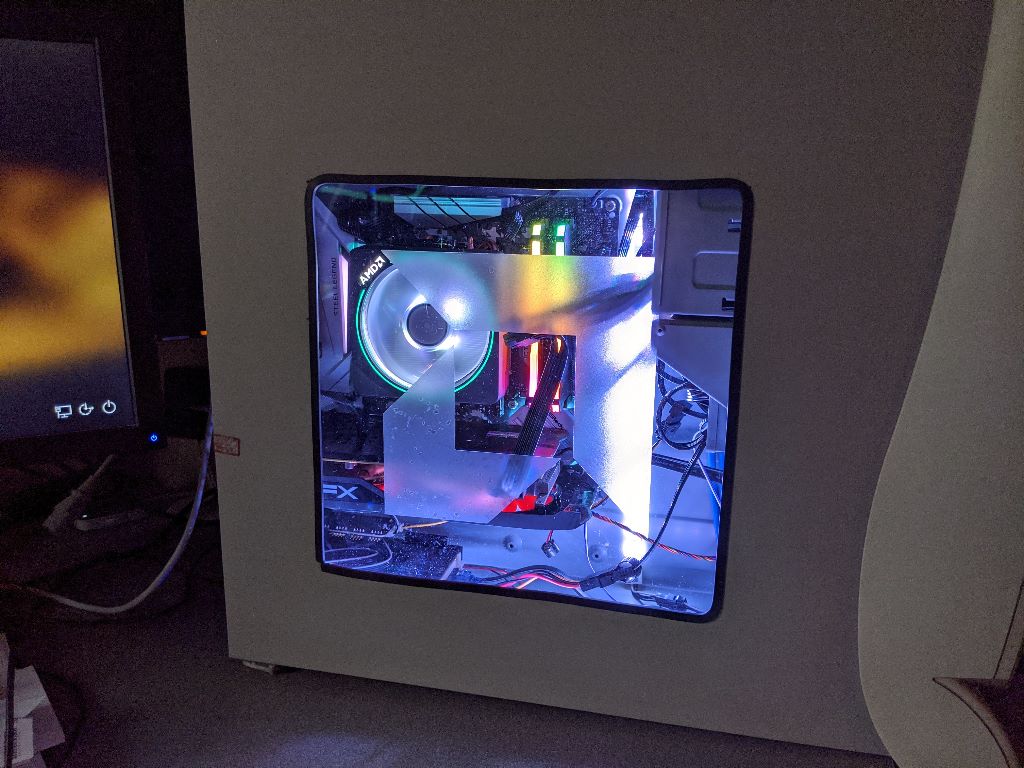
Window shows off the right amount of components. |
I see the air bubbles.... |
Now for the finishing touch, firing up the computer!
 |
 |
 |
 |
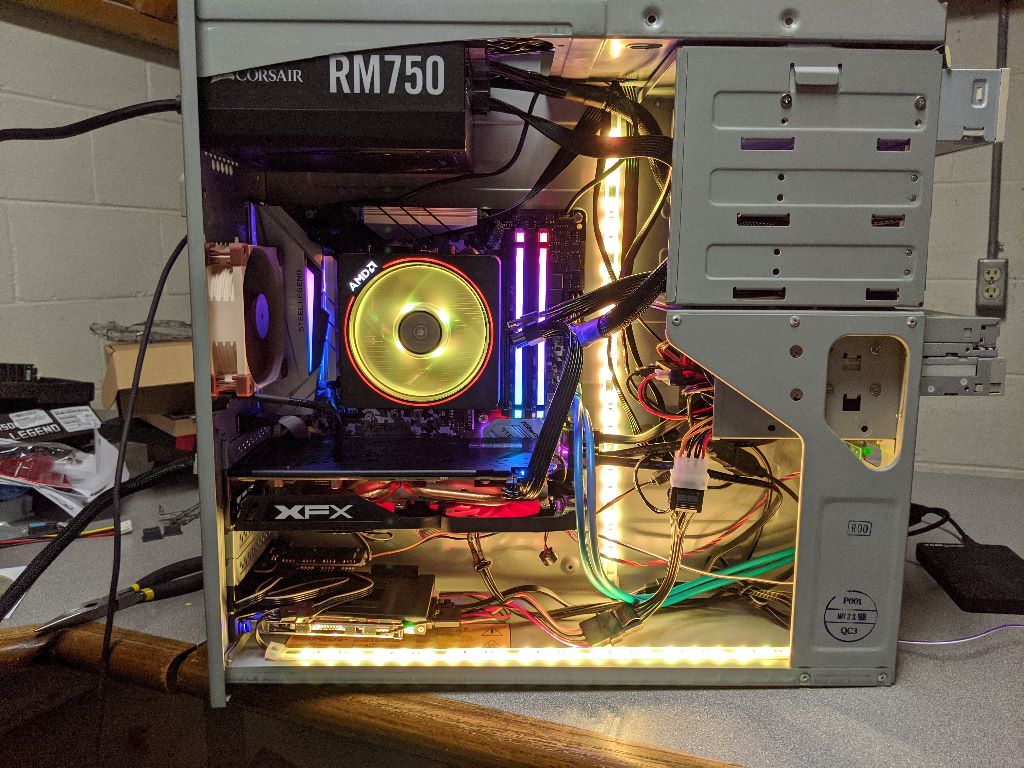
System specs:
CPU: AMD Ryzen 7 2700X, 8-core, 16-threads, 3.7 GHz boostable to 4.3 GHz
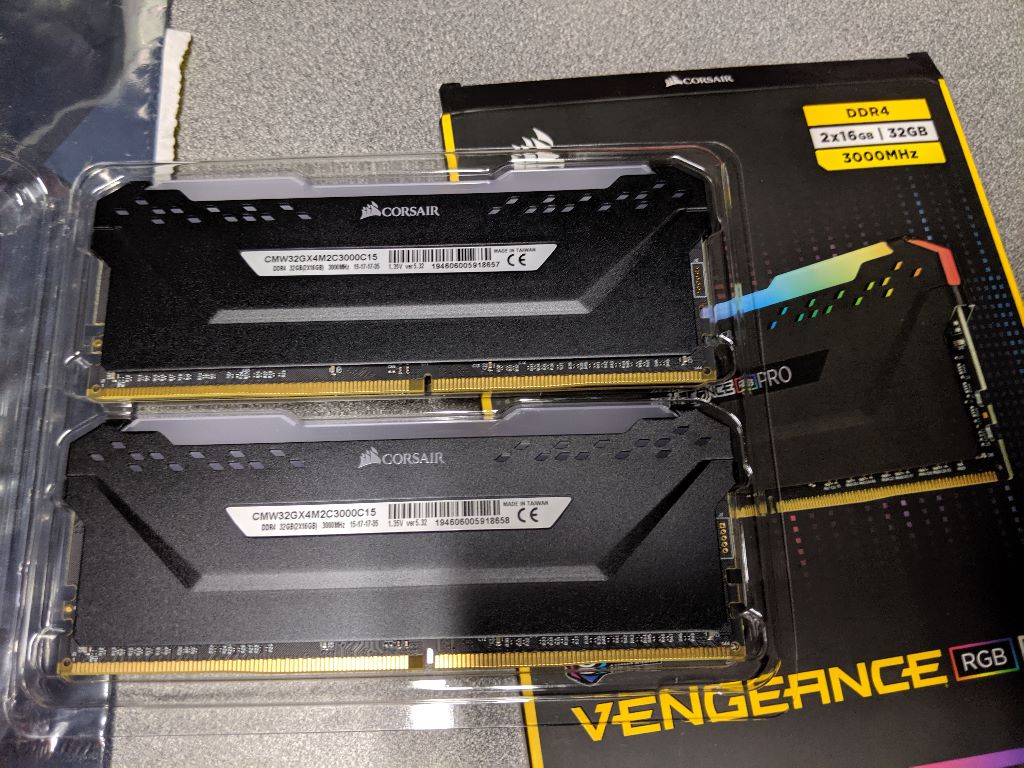
RAM: 32 GB (2x16GB) DDR4 PC4-24000
Graphics: XFX AMD Radeon 570 8 GB
PSU: Corsair 750 watt 80+ Gold
Storage: 1x 1 TB M.2 SSD, 1x 1 TB SSD
This was an immensly satisfying build. Most fun I've had since I built my first gaming tower back in 2002 (AMD Athlon XP 2000+ 1.67 GHz, 768 MB DDR RAM, GeForce 4 Ti 4200 128 MB, 100 GB Western Digital HDD). I'd like to give a nod to those who came before me in building their own retro/sleeper Compaq rigs.